DIY Necklace Holder

Wednesday, February 29, 2012

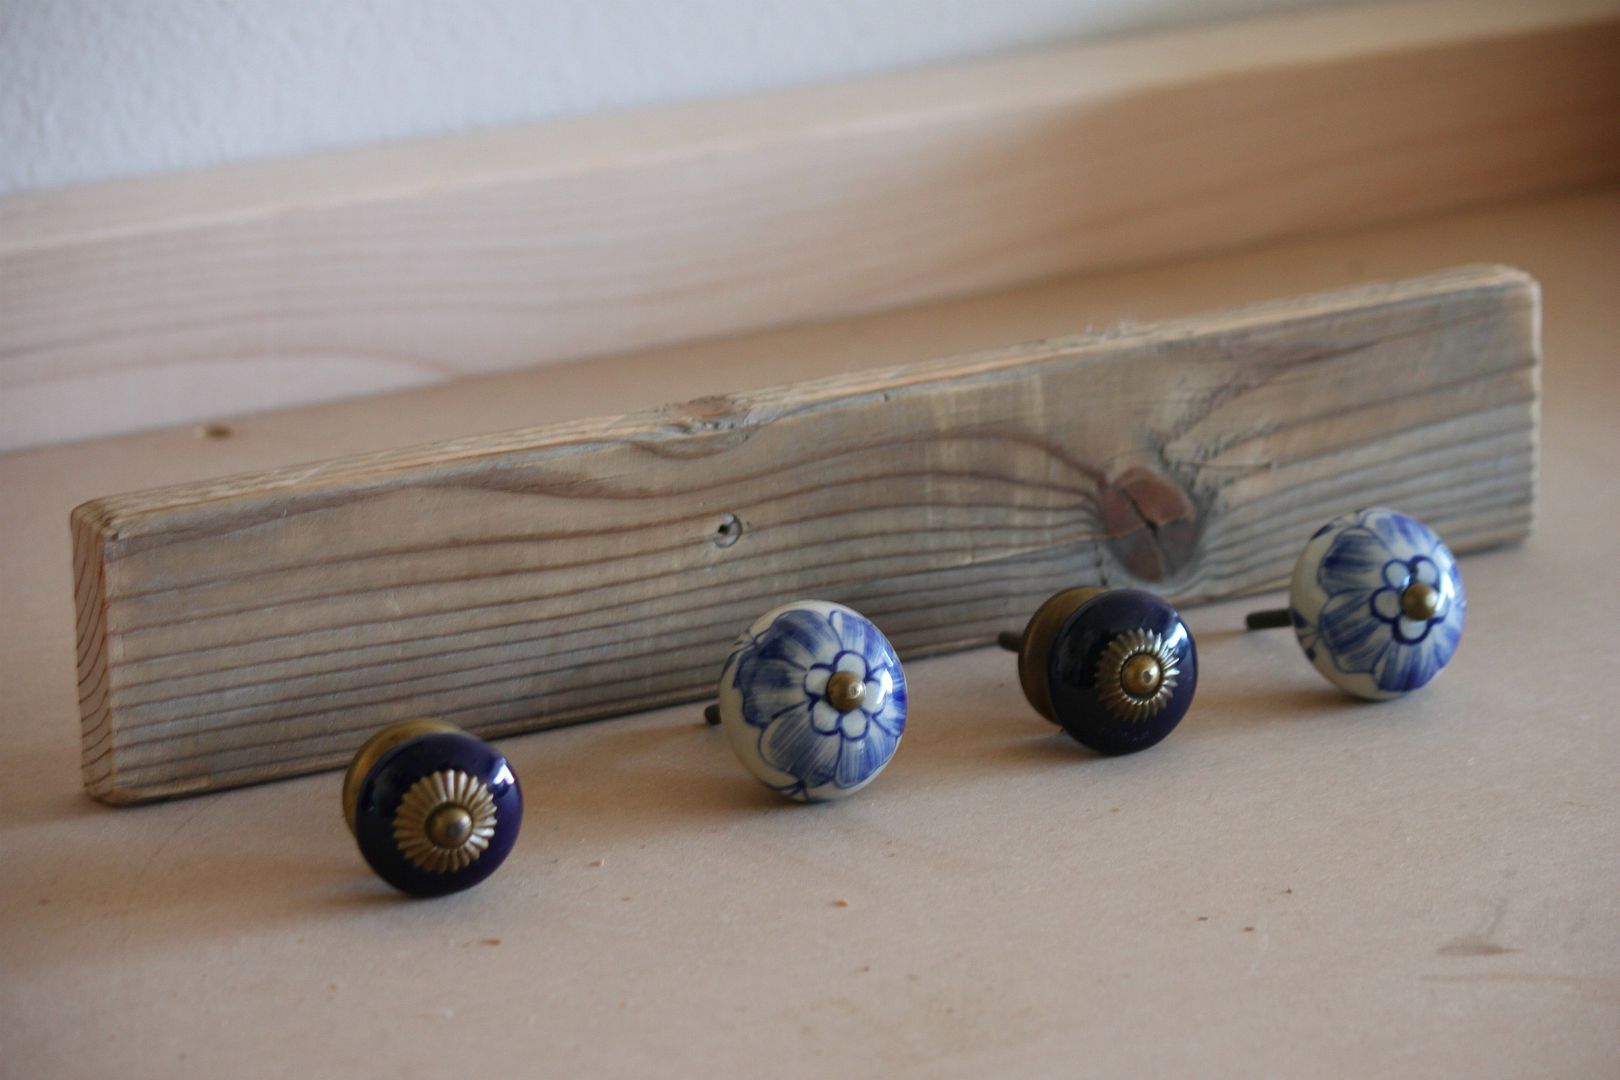
I recently spotted this great necklace hanging idea from a cute Etsy shop. I realized I had all the materials including extra knobs that I had purchased from World Market and never used...so I knew it was something I wanted to diy--instead of buy.

I am not gonna pretend like I did this ALL by myself. My husband told me he did not "trust me with his power tools (lame)," so he helped cut the wood and drill the holes. I think I need my own girl set of tools.

What you will need:
  • A piece of wood cut about 14 inches long
  • 4 knobs. I got mine at World Market
  • A drill
  • A sawtooth (to hang it up on a wall)
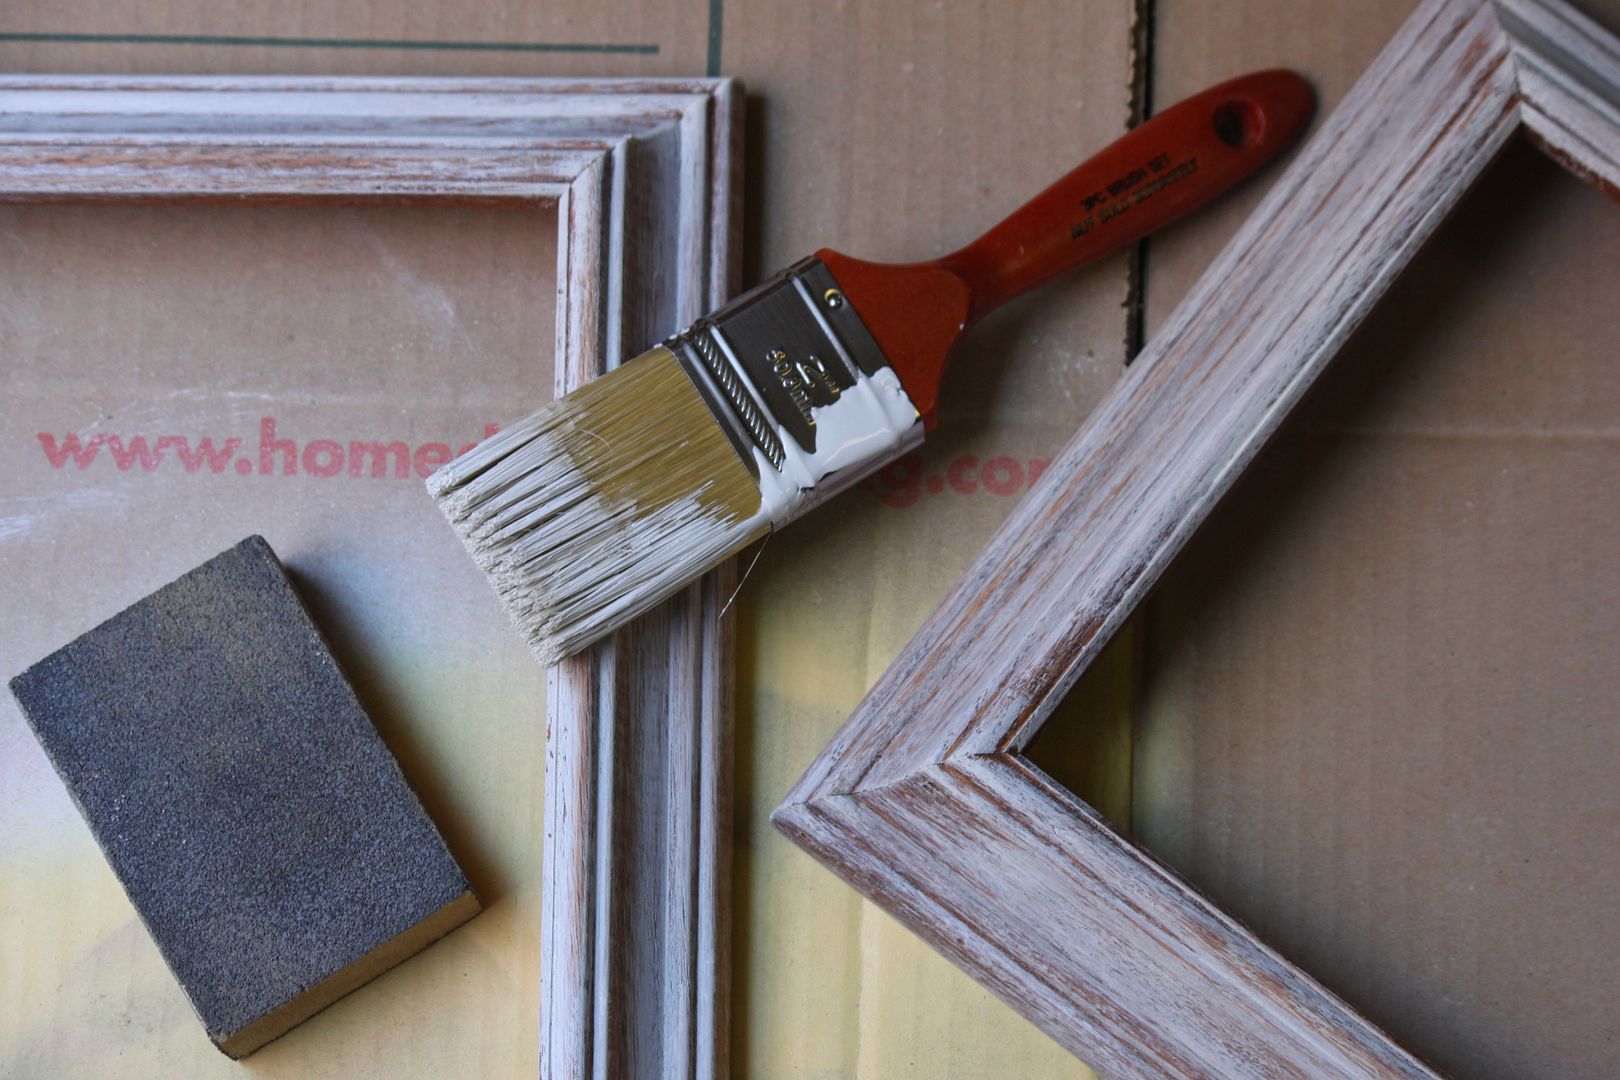
  • Paint brush and paint (optional- only if you want to paint it)
Cut your piece of wood so it is about 14 inches long. I used an old piece of wood that was on our side yard. It was a little rough so I sanded it down to smooth it out.

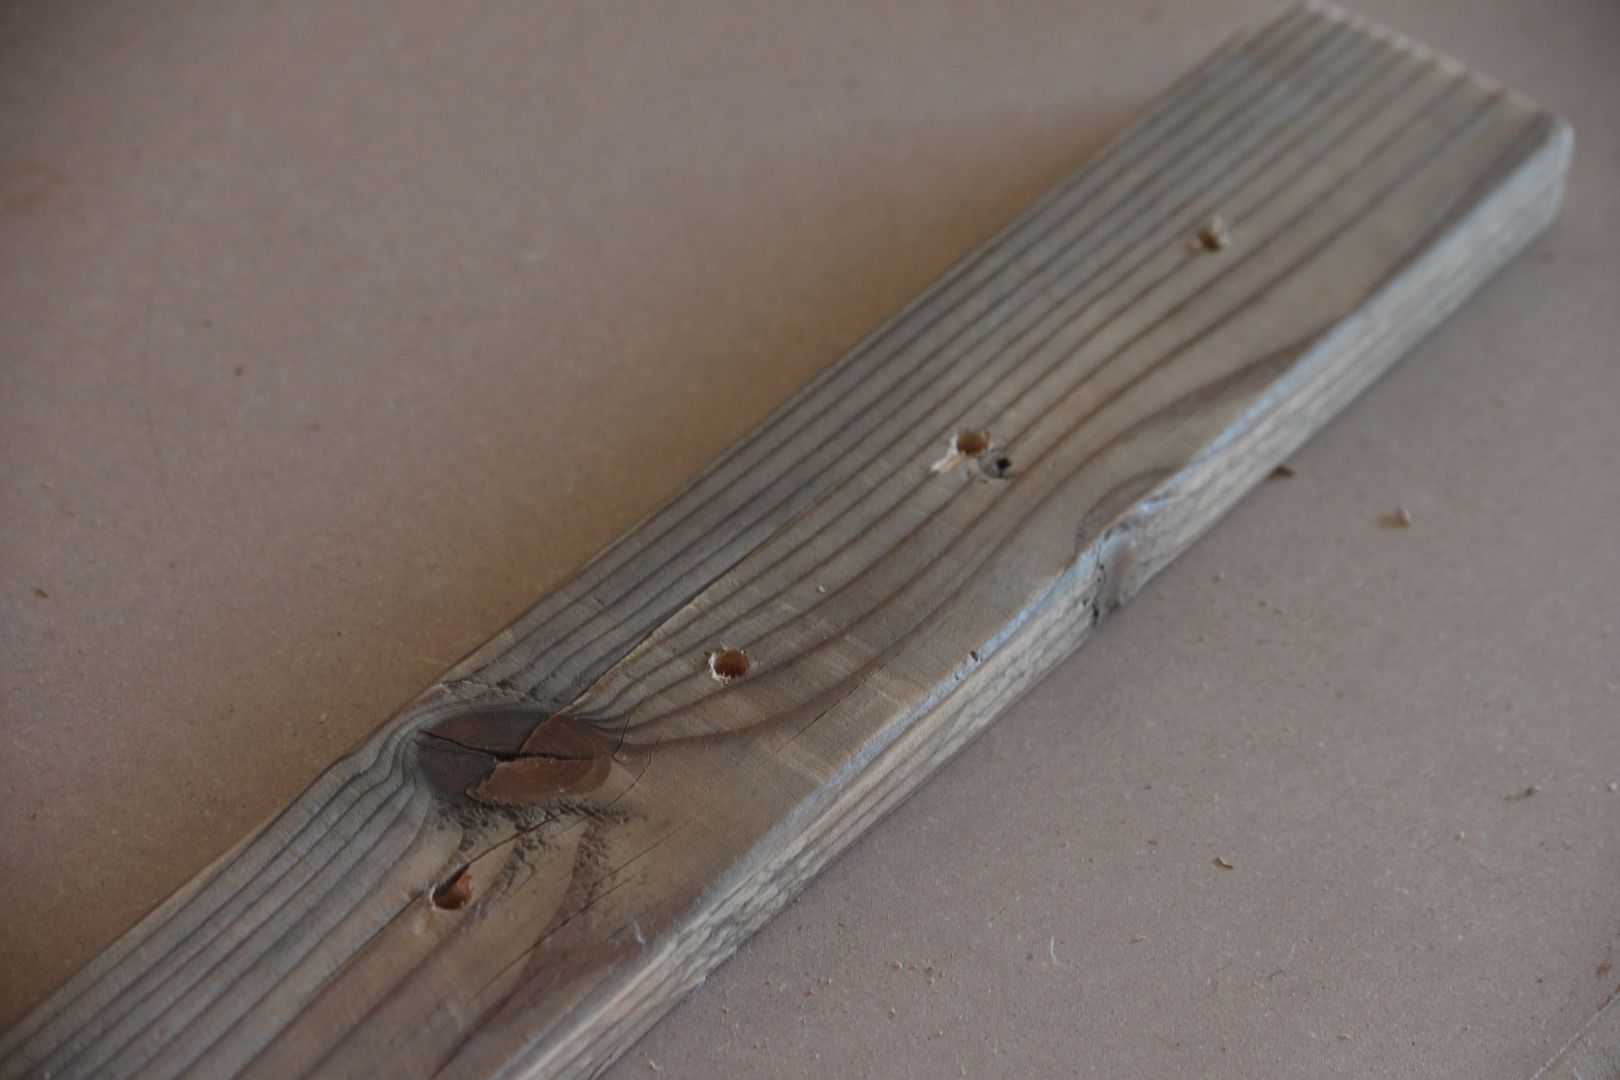
Drill 4 holes into the wood. If your man is protective of his tools (like mine) let him do it so he can feel like he was apart of your diy ;)

Paint your necklace hanger (optional) and let dry.

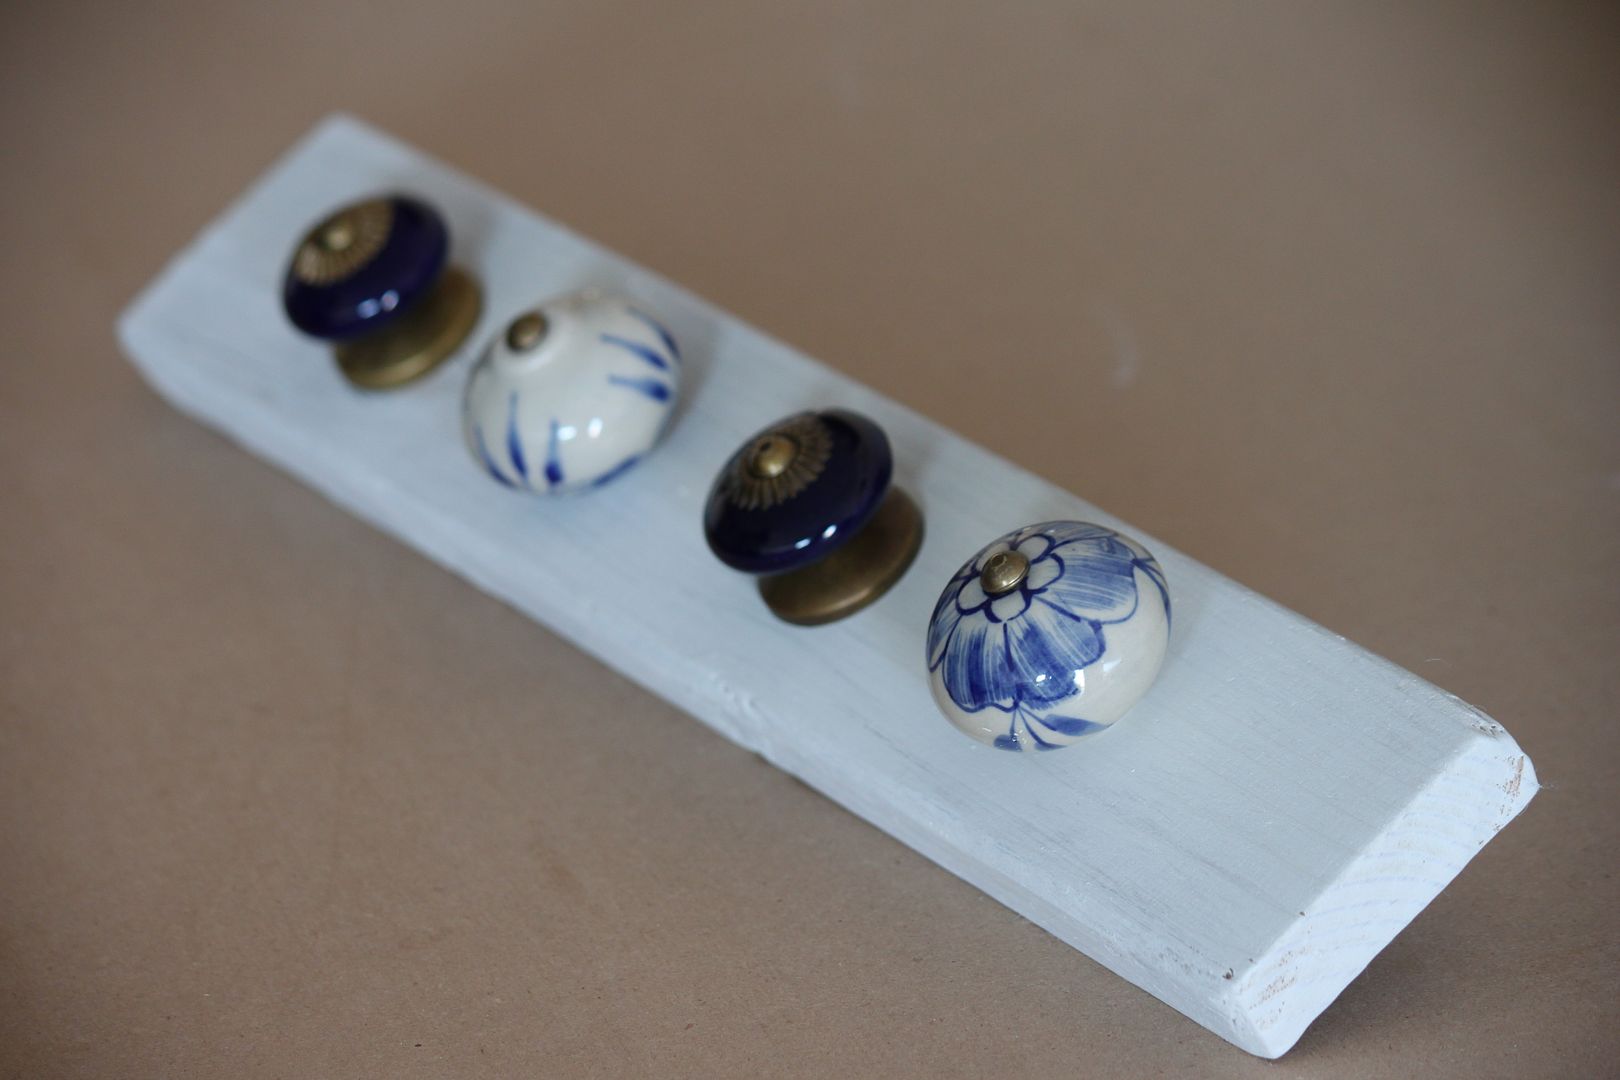
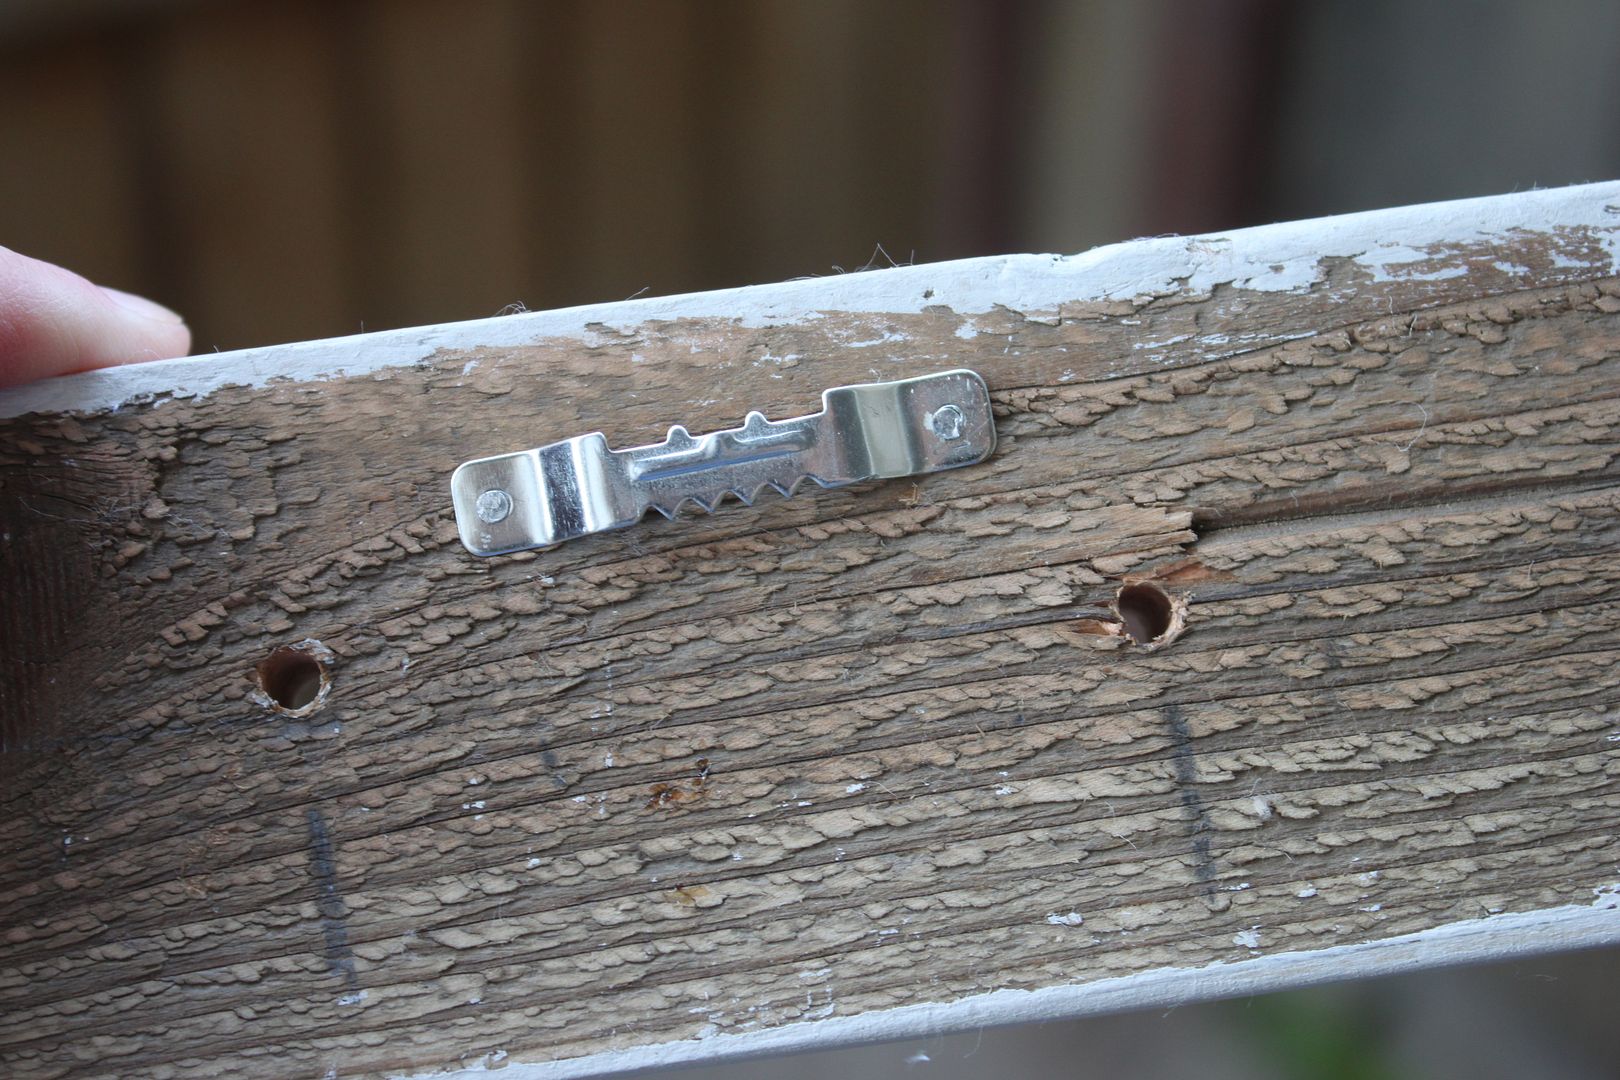
Attach the sawtooth on the back. Screw in the knobs. I realized they stuck out the back a little too far so I had my husband (okay I actually DID need him for this part...I like my fingers) use a power saw to remove the extra backing of the knob.

Attach your necklaces and hang up in your closet or wherever you like! Such an easy and inexpensive way to display your necklaces.

Pin It

Low Carb Strawberry Crunch Smoothie

Tuesday, February 28, 2012

Several of you asked for the low carb smoothie recipe that I mentioned in this post...so I am happy to share it! I drink this for breakfast every morning. It's easy to make, keeps my blood sugars stable, gives me energy and fills me up--the perfect way to start the day in my opinion.

What you will need:
  • 1 cup and about about a tbs of unsweetened vanilla almond milk (if we are being exact here). Make sure you check the back label. The one I buy only has 2 grams of carbs for every cup.
  • 1/2 cup of frozen organic strawberries
  • 1/2 tsp of cinnamon. Cinnamon is great for controlling blood sugars, diabetic or not
  • About 2 tablespoons of almonds
  • 1 tbs of chia seeds (optional)
Directions:
Put everything in a Magic Bullet (if you are an avid smoothie maker I highly recommend this nifty little gadget) or blender. Blend until smooth.

The whole smoothie only has about 7-8 grams of carbs. Enjoy!

Pin It

Delighted Momma Turns One!

Monday, February 27, 2012

Today Delighted Momma turns one! I celebrated (yesterday) by splitting a vanilla butter cream cupcake with Max...it was worth it even though I had to do a boat load of extra insulin to cover it!

One year ago I decided I wanted to start a blog...a blog where I put time and effort into. I had a personal blog before but never updated it and was not passionate about it. I had so many ideas in my head and having a creative outlet where I could share them sounded like a great plan.

I had no idea what I was doing or what direction my blog would take. I didn't even know how to upload a picture and I barely knew how to operate my camera (as you can tell by this post). I told myself I would learn how to use my camera (I watched hundreds of You Tube videos) and figure out basic html. I sat down at my computer and wrote my very first post. That was the day this little blog was born.

Blogging has been such a fun journey. I have loved writing and sharing with you all over this past year. I truly appreciate those of you who continue to support and read. Thank you so much!

Things that make me say yeay

Friday, February 24, 2012

My low carb strawberry crunch smoothie that I make for breakfast every single morning while I am pregnant...other than the occasional scrambled eggs and skinny pancakes on the weekend. This is the only thing that keeps my blood sugars from rising and gives me a ton of energy. I love it!

A funny onesie that I recently bought. I love the, "bald, unemployed, still living with my parents." part. Made me laugh.

My favorite little gardener.

An Eames rocker for baby Ronin's Nursery. Yes we have decided on a name!

Distressing picture frames to add some new family photos into. DIY here.

Any fun plans for the weekend? Max and I are headed out bright and early tomorrow to cheer on Ian and his best friend, while they do a 13 mile obstacle course mud run with electrical shock wires (CRAZY) and the whole nine yards! Nothing like the little 3 mile mud run I did a few months ago.

Pin- tester *Homemade granite cleaner*

Thursday, February 23, 2012

I was so excited to try out this pin that originally came from a blog called 320 Sycamore.

I spend way too much money on granite cleaner and nothing seems to really work. I am always left with a greasy film-y covered looking counter top with store bought products. When I read that you can make your own homemade granite and counter top cleaner using only rubbing alcohol, dish soap and essential oil I knew I needed to test it out.

All you do is fill an empty spray bottle with about 1/4 cup of rubbing alcohol, a few drops of dish soap, a few drops of essential oil (I used lavender) and the rest with water. Shake it up and it's all ready!

Final verdict: I LOVED this! It made my kitchen smell clean and had my counter tops shiny in no time flat. I am so excited since this homemade version costs a whole lot less than what I was buying before. I am a happy camper for sure!

Have you tested out any pins lately?

Today is the last day to enter the k.slademade leather clutch giveaway!

Superfood Energy Snacks

Wednesday, February 22, 2012

I love quick and easy snacks that I can just grab and go. These are perfect for that and loaded with good for you ingredients.

Raw chocolate nibs- are a Mayan superfood that are packed with antioxidants and known to be one of the highest dietary sources of magnesium.

Chia seeds- a superfood and one of the best known sources of essential fatty acids. They are also an excellent source of antioxidants, dietary fiber and protein. Another fun fact is chia seeds expand when wet so they make you feel full faster...always a good thing.

What you will need:
  • 1/2 cup of shredded unsweetened coconut
  • 1/2 cup of chia seeds
  • 1/2 cup of raw chocolate nibs (your local health food store will have these)
  • 1/2 cup almond butter
  • 2 tbs of honey
  • 1 tsp of cinnamon
Directions:
Throw all the ingredients into a bowl and mix together. Place in the fridge for 30 minutes and then roll into small tablespoon size balls. Place in an airtight container and keep in your fridge up to a week.

These little snacks are loaded with antioxidants and will keep you satisfied and full when you are on the go!

If you are interested in other recipes with chia seeds you can check out:
Chia seed coconut pudding
Vanilla chia seed fudge

24 week bump update + a few other things

Tuesday, February 21, 2012


I am officially 24 weeks (6 months pregnant) and time seems to be flying. Maybe it's because I am busy chasing around a crazy 1 1/2 year old and I don't have the luxury of feeling sorry for myself while watching "A Baby Story" and eating a whole box of popsicles this time around.

Things that are annoying:


-Cellulite. I have never been dimple free but what is up with cellulite and pregnancy? I literally had to do a double take at my butt the other day.

-Not being able to run. I love running. I tried slow jogging and almost fainted on the treadmill. I will stick with the bike and elliptical until after baby.

-Really missing wine, sushi and coffee.

-My belly button has taken on a whole new shape that no longer resembles my old one. I have learned to dress around my new belly button though...stripes and patterns help conceal it, solid colored shirts do not.

-I ripped my favorite workout pants. I am now aware that my butt is no longer a size small and I should not have tried to squeeze into them but I am still bummed.

Things that I am loving:

- Little baby kicks and punches that are now a regular daily occurrence.

- Only 3 months left until I get to meet my little man!

- Baby is growing perfectly and is so healthy. Such a relief for a diabetic Momma.

- I like normal food again. I was worried about this one for a while there.

-Pregnancy boobs. Too bad they don't stay that way.

-Max kisses my tummy when I ask him where his brother is.

-My sweet husband gives me a foot massage almost every night.

-Getting so excited and inspired for baby's nursery and SO thankful that my Aunt is helping me decorate!

I am off to a routine weekly doctor's appointment this morning. Hearing that little heartbeat never gets old.

Skin Care Tip of the Week *The correct way to extract a blemish*

Monday, February 20, 2012

Image via

One of the most common mistakes I see people make when it comes to their skin is popping a zit (lets call it what it is) incorrectly.

By incorrectly extracting a blemish you can push the sebum and bacteria deeper into your skin causing one giant zit and infection. You also run the risk of spreading the bacteria to the surrounding areas.

How to correctly extract a blemish:
  1. Always make sure your hands and skin are clean before you start.
  2. It is best to extract a blemish after a shower or after you have steamed your face. Steam and warm water helps to open your pores, making the extraction easier.
  3. Wrap your pointer fingers in tissue paper and gently press down and up into the blemish.
  4. Use a slight wiggle back and fourth motion while applying pressure.
  5. DO NOT squeeze the blemish straight on or use your nails to try to extract it, this will only irritate your skin and will not remove the built up sebum.
  6. If your blemish is ready to be extracted, it should come out without a fight. If it is not ready do not force it. Leave it be until it is.
  7. After your extractions, apply a topical agent such as tea tree oil to help speed up the healing and close the pore.

I also do not suggest using a comedone extractor unless you REALLY know what you are doing. This can cause scarring and damage if done incorrectly.

Hope this little tip helps the next time you are faced with an unwelcome friend!

Things that make me say yeay

Friday, February 17, 2012

Max making Valentines.

A Nordstrom Rack is opening up 10 minutes from my house! Ahh so excited about this.

After dinner treat on Valentine's Day.

A brand new French press that I found at a garage sale for $3. Not sure what all the other little gadgets are that came with it. Anyone know?

Painting Max's room and giving it a "big boy makeover." I have been spending SO much time on baby #2's nursery we wanted Max to feel special too.

Hope you have a wonderful weekend! We are painting and I am trying to convince my husband Ikea is cool and we should go (I need a giant rug for the baby's room). I heard Ikea has food. Maybe that will persuade him.

Low Carb Pizza

Wednesday, February 15, 2012

Just because I can not eat carbs does not mean that I will say bye bye to the foods that I love...pizza being one of them. I recently discovered a low carb pizza crust recipe and I could not be more excited about this, since eating a low carb diet is a must for me in order to keep my diabetes and blood sugars in the tightest possible control.

The key ingredient to making this crust low carb is flax seed meal.

What you will need:
  • 1 1/2 cup of flax seed meal
  • 2 tsp of baking powder
  • 1 tsp of oregano
  • 1 tsp of salt
  • 1/2 tsp of Stevia or natural sweetener
  • 3 eggs
  • 3 tbs of olive oil
  • 1/2 cup of water

Directions:

  1. Preheat oven to 425 degrees.
  2. Mix dry ingredients together.
  3. Add wet ingredients and mix well.
  4. Let the dough sit for about 5 minutes to thicken up.
  5. Spread dough on a large round pan. If you don't have this you can line a cookie sheet with greased parchment paper (this is what I did).
  6. Bake for 15-20 minutes or until cooked through. Check it at the 15 minute mark and take out if it looks done.
  7. Add toppings and place back into the oven to melt the cheese.

For the toppings I used organic pizza sauce, Parmesan and mozzarella cheese, tomatoes, garlic and basil. After you add toppings place pizza back into oven to melt the cheese.

I am officially in heaven. The whole pizza was devoured by my family before any one could blink.

For you carb counters out there, this entire pizza has only 7 grams of carbohydrate! One slice of regular pizza has 25-30 grams. That is insane to me. I see no point in ever making pizza the old way again.

Pin It

Happy Valentine's Day!

Tuesday, February 14, 2012

Happy Valentine's Day!

Today Max and I are delivering Valentine's cards to the Grandparents and enjoying the day. I am also having a major frozen yogurt craving so we will be making a stop at Golden Spoon.

Even though Max is too little to remember all the details, I want to always make each holiday special and filled with fun memories. So today I will be unplugging from the internet and turning off my phone to soak it all up and do some momma and son bonding.

Tonight I am making a giant feast of lobster, skinny mashed potatoes and some kind of dessert that I have not yet come up with. Any quick last minute (easy) suggestions?

Our plan is to put Max to bed early and have a nice romantic dinner in our backyard just Ian and I...the only thing that will be missing is a glass of red wine for me...BOO ;)

Are you celebrating today, or is Valentine's Day not your thing?

On a side note: Have you entered the k.slademade giveaway yet? Don't miss out on a chance to win a beautiful hand made leather clutch!

Image via

Skin Care Tip of the Week *DIY sea salt citrus scrub*

Monday, February 13, 2012

Valentine's Day is tomorrow! Time to shave my legs...ah kidding...kind of. On a serious note, no one likes dry dusty elbows and knees right? I know my man definitely appreciates it when my legs are shaved and my skin is soft.

Exfoliating your body on weekly basis will keep your skin looking healthy and rejuvenated.

Making your own body scrub is easy and quite cost effective. I personally like to use sea salt in my scrubs but you can also use sugar.

Benefits of a Sea Salt Scrub:
  • Helps to replace lost minerals into the skin.
  • Helps to draw out toxins and increases skin blood circulation
  • Helps hydrate your skin and give it a wonderful glow
  • Improves skin tone by removing dry dead skin cells

DIY Sea Salt Citrus Scrub:
  • 1/4 cup of sea salt
  • 1 tbs of sweet almond oil (you can also use grape seed oil)
  • 1 tbs finely ground lemon peel
  • 3 drops of lavender essential oil
Directions:
  1. Add all of the ingredients together and mix well
  2. When you are showering take about a quarter size amount and gently massage into skin, paying special attention to the back of arms, knees and elbows
  3. Rise off
I only recommend using this on your body. For a more gentle scrub that can be used on your face you can read this post.

Get your salt scrub on and have glowing skin by tomorrow!

Pin It

k.slademade clutch giveaway! -Closed-

Friday, February 10, 2012


This giveaway is now closed- The winner is Hanna! Thank you to all who entered!

Hanna please e-mail me at lindsay.kujawa@yahoo.com so I can get your mailing address.

I am SO excited about today's giveaway hosted by k.slademade! k.slademade is a beautiful shop full of unique one of a kind clutches, handbags, totes, jewelry pieces and accessories that will make your heart do a little skip!

Kelsea the owner and designer of k.slademade is giving away a Royal Blue Fold Over Clutch to one lucky reader. This beautiful handmade clutch is made with soft royal pebbled leather and has a fun pink and gold zipper.

How you can win:
  • You must be a follower of Delighted Momma
  • Visit k.slademade and take a look around. Come back and leave a comment telling me what caught your eye.

Extra Entries: (please leave an additional comment for each)

  • Like k.slademade on Facebook here
  • Like Delighted Momma on Facebook here
  • Follow k.slademade on Twitter here
  • Blog, Tweet or Facebook about the giveaway

Good luck! The winner will be picked at random and announced February 24 here on this post and on my Facebook page.

Pin-tester

Thursday, February 9, 2012


I SUCK at hard boiling eggs. I never seem to get it right. They either come out undercooked or so hard that you could bounce them like a ball. I am also always left with annoying little egg shells that stick to the egg when I try to peel off the shell.

SO this week for the Pin-tester series I tested a method that is supposed to make peeling eggs super easy. The pin came from an awesome site called theKitchn, which I would have most likely never discovered if it wasn't for Pinterest.

The method which can be found here says that if you add 1/2 tsp of baking soda to the water it will make the egg shell easier to peel. I followed a simple method for hard boiling the eggs, which I found in the comment section of the post.

Final verdict:
It worked! The egg shell slipped right off. What a neat little trick.

Max loved the shell free perfectly cooked egg too. From now on this is the only way I will hard boil my eggs.

Have you tested out any pins lately that were a success...or a big flop?

On a side note: I have an awesome giveaway going on tomorrow! You will not want to miss out on this one.

DIY Polymer Clay Cut Out Heart Bracelet

Wednesday, February 8, 2012

With Valentine's day less than a week away I decided it was time for another heart inspired jewelry diy. The inspiration for this project came from the candy heart bracelet that I recently made. I am a huge fan of hearts so this is a fun piece to wear all year round.

What you will need:
  • Polymer clay
  • Razor
  • Heart cutout (purchased at Michaels)
  • Roller or large marker (not pictured)
  • A bracelet (to use as a guideline)
Before beginning condition the clay by mashing it up between your hands so it becomes soft and pliable.

Start with a large round ball of clay and roll into a long snake like piece. Use the roller to flatten it out. Flip the piece over to reveal the smooth side. Use the razor to cleanup the edges and make straight. Measure your wrist and adjust bracelet size accordingly.

Use the heart cutout to stamp out the hearts along the piece of clay. Avoid putting the hearts too close to the edge since you will be connecting the two pieces together.

Connect the two ends by overlapping one piece slightly over the over (first picture). Gently press and mold the two pieces together with your fingers.

Use a bracelet as a guideline to make sure it will fit you and to help shape it into a circle.
Place clay bracelet on a baking sheet and bake according to clay directions. I baked mine for 30 minutes at 275 degrees.

Let bracelet cool and harden once taken out of the oven and you are good to go! If you are not a fan of hearts you can also do triangles (which looks awesome), circles or any other shape you want.

If you end up creating this please send me a picture. I would love to see your version!

Pin It

DIY Anthropologie Painted Mug

Tuesday, February 7, 2012

Anthropologie Verdant Acres Mug

If I had an unlimited budget I would run to Anthropologie immediately. It is by far one of my favorite stores. I love how beautifully decorated and eclectic it is. I always feel like I am in a whimsical dreamy world for a moment whenever I step inside...and then my son starts having a melt down and I am instantly brought back to reality and usually have to leave ha!

I recently spotted the mug pictured above and loved how pretty and spring-y it was. I am NOT an artist by any means but the original mug looked like it was made using water colors ( I can hang with water colors) so I thought it would be fun and simple enough to try and recreate.

What you will need:
  • A plain white mug
  • A few porcelain paint colors. You actually only need a few since you can mix colors to make other colors...duh I didn't think of this until after I got home and started opening all of them up (Sharpie markers and regular paint will wash off in the dishwasher)
  • Two different sized paint brushes
Start painting on your creation. Make sure you wash your paint brushes in between each color. Once you are all finished let your mug dry for 24 hours and then bake in an oven for 35 minutes at 300 degrees. This sets the paint and will make it dishwasher safe.

My (new) mug. Even though it looks like a 3rd grader painted it, it has definitely made my morning cup of tea just a little bit more exciting. For those of you out there who are talented in the painting department you could really get creative and paint something completely unique on yours.

Pin It
Related Posts Plugin for WordPress, Blogger...