Grain Free Chocolate Granola (Paleo)

Wednesday, November 28, 2012

Ever since I started blogging my excitement for food has gone to a whole new dorky level.  I get just as excited about sharing an awesome Paleo granola recipe as I do about watching the Real Housewives of Beverly Hills once everyone has gone to bed. Sometimes I totally dork out and search You Tube videos on how to make healthier versions of my favorite foods.  Take rice for example.  I love rice.  Anywhoooo I did a search for grain free granola and TA DA..hundreds of videos popped up.  I had no idea this even existed!  I got the basic gist of how to do it and came up with my own twist and recipe.  This is good...so good. 

What you will need:
  • 1 cup of pecans
  • 1 cup of hazelnuts
  • 1 cup of raw almonds 
  • 1/4 cup of roasted flax seeds
  • 1 cup of coconut oil (measure it out while it is in solid form not melted)
  • 2 tbs of honey
  • 1/2 tsp of salt
  • 1 tbs of cacao powder
  • 1 tsp of vanilla
  • 1 tsp of cinnamon
  • 1/2 cup + 1 tbs of unsweetened shredded coconut 
* You can use other nuts if you would like.  Each nut will give your granola a little different consistency and taste.

Directions:
  1. Preheat oven to 300 degrees *
  2. Place all your nuts in a food processor and pulse a few times until you have a granola like consistency.  If you over process you will end up with nut flour or nut butter.  So keep an eye on it. 
  3. In a small pot melt and mix together the coconut oil, honey, vanilla, cacao powder, salt and cinnamon.  Stir in the shredded coconut.  
  4. Add the mixed nuts to the melted mixture and coat your "granola" really well. 
  5. Place granola on a parchment lined baking sheet and bake for 10 minutes.
  6. Let cool and eat just like you would eat any other granola!
Keep granola in an airtight container in your fridge.
    *  After my husband requested I make more of this asap I made the second batch completely raw and did not put the nuts in the oven.  This was just as good!  The baked version just has a little more of a deeper roasted taste.


    If you like regular granola you will love this.  Even my husband who is a grain filled cereal lover thought this was awesome. 

    Little Snippets From Our Thanksgiving

    Monday, November 26, 2012


    Thanksgiving #1 at my Mother-In-Law's house.  The food was amazing! I was having too much fun drinking wine and eating appetizers that I forgot to take any pics of the actual feast and festivities.


    Thanksgiving table #2 at my grandparents adorable little house in Redondo Beach.

    Ronin having a little chat (aka blowing spitty bubbles) with his Great Grandparents.  I am so incredibly thankful that we are still able to spend holidays with them.  They are 83 and 89.  My Grandpa still plays in a jazz band (he is a trumpet player) and my Grandma still exercises daily with little baby weights.  They are full of life and so much fun to talk to.


    Homemade pies.  I always have room (and extra insulin) for pie.


    These two...I love them to the moon and back

    Max, still at the "big people" table.  Not sure about you but I always remember sitting at the kid table when I was little and always wondering what the old people were talking about.  Lucky him.


    I feel so blessed and thankful for my family. 

    I hope everyone had a wonderful Thanksgiving.  I can not believe that the countdown  for Christmas has begun!  

    How to Make Salt Dough Ornaments + I may have cried over a Pinterest fail

    Wednesday, November 21, 2012


    I am a total loser.  I cried (well half cried half laughed) at a failed Pinterest project.

    Let me back up a little a tell you the story.  It was the weekend and  I was beyond pumped to make these awesome homemade ornaments with my two year old.  I read all the instructions on the blog that had the tutorial and I got my ingredients, which consisted of cornstarch and baking soda.  That seemed simple enough...or so I thought.  My husband agreed to watch Ronin (he is a screamer when I am in the room and not holding him so this was a sweet gesture actually) so I could have craft time with Max.

    I whipped up the first batch of "dough." I am not sure what I did wrong but my dough resembled a weird science experiment that would harden and then liquify when I touched it.  I know that makes ZERO sense but that is what happened.  It was like magic flubber.  I tried to do it again....and again...and again and each time it produced flubber not dough.  I was frustrated, Max was getting impatient, Ronin was screaming, my husband was getting irritated and 3 freakin hours later I had 4 giant batches of flubber a flour bombed kitchen and ZERO homemade ornaments.  My husband told me, well more like shouted above Ronin screaming to just give up and buy some damn premade clay.  Men do not understand the need to craft apparently.  I started crying, then started laughing and then cried and laughed all at once.  Fail.  Major freaking Pinterest FAIL.

    So I decided to get back to basics and google a salt dough recipe.  This worked like magic, pure homemade ornament dough magic.  You can not mess this up, I promise. 

    What you will need:
    • 2 cups of all purpose bleached flour
    • 1 cup of salt
    • 3/4 cups of water  *add a little more water if your dough is dry and not sticking together.  
    Directions:
    1. Mix all the ingredients together.  
    2. Knead it until it's nice and doughy.  
    3. Use cookie cutters to make whatever shape ornaments you want. 
    4. Use a straw to poke a hole in the top so you can hang them with a string or hook. 
    5. Bake for 20 minutes at 200 degrees.  Turn over once at the 10 minute mark.
    6. Once they are baked you can paint them, bedazzle with glitter or whatever you want! I painted mine with a layer of Mod Podge and sprinkled gold glitter on top.

    Have a wonderful Thanksgiving tomorrow!   xo

      The Merino Baby Sleep Bag--The product that solved one of my biggest Mom fears!

      Tuesday, November 20, 2012


      I think every Mom has things that worry them when it comes to their babies.  One of my biggest fears during the baby stage is loose blankets in the crib.  My worry is that they end up pulling the blankets over their face while they sleep and they suffocate themselves.  With my first son he would do this as really young baby, while he would take naps and it would freak me out.  It freaked me out so much that I decided not put any blankets, stuffed animals or "extra" things in his crib until he was almost a year old.  I just dressed him like an Eskimo when he went to bed if it was cold.

      I was planning on doing the same thing with Ronin who is 5 months old currently.  A wonderful company contacted me recently and asked me if I would like to review something called the Merino Kids Baby Sleep Bag, which is the worlds best and #1 top-selling merino sleep sack worldwide.  I almost never do reviews but I quickly checked out the link and realized this is EXACTLY what I have been looking for, but I had no idea it even existed!

      Okay so let me tell you this is wonderful! It is made of organic cotton, which is incredibly soft and the design is pretty genius.  It has two little snaps at the shoulder and you simply zip your baby up in it kind of like a body sleeping bag.  It does not restrict your baby of movement and they have plenty of room to wiggle and move around.  This is perfect since Ronin hates to be swaddled .  It also makes diaper changing really convenient with the zipper located at the bottom, which I recently realized when I had to do a midnight diaper change.  One more very cool feature that I must mention is that it has a nifty safety belt aperture built into the sleep bag making it super easy to transfer your sleeping baby between the car seat to the crib all while keeping your baby sleeping and cozy.  

      I can not say enough good things about this product.  It has completely solved my mom fear and I feel at ease during the night knowing my baby is warm and safe. 

      I highly recommend this product to all new Moms.

      Things That Make Me Say Yeay + Skinny Pumpkin "Risotto" Recipe

      Friday, November 16, 2012


      This beautiful bracelet c/o  Danique Jewelry with both of my boys initials engraved.  I absolutely love it. I think every Mom/lover needs one.  The one I have can be found here.  The sweet shop owner is giving all Delighted Momma readers a discount towards anything you would like.  You can use the code delightedmomma15 to receive 15% off.

      Instead of baking holidays treats I can not eat, my thoughtful friend made me homemade hummus with carrots and included the carb count on a little sticky note. So sweet.


      My happy carefree two year old jolting off to the park.  This picture makes my heart happy.


      A fridge full of insulin.  I am so thankful that insulin even exists. It's crazy to think that I simply could not survive without it.

      Skinny pumpkin "risotto"  that I made with cauliflower rice.  I used the shredder blade on my food processor and pulsed the cauliflower until it resembled rice.  I cooked the "rice" in a large saucepan with coconut oil for about 7 minutes and slowly added the sauce.  For the sauce I used a can of organic pumpkin puree, 1/2 cup full fat coconut milk, cinnamon, nutmeg salt & pepper.  It was amazing.

      Have a wonderful weekend! We are getting Ronin baptized and getting all of our Christmas decorations out.  Time to get festive!

      What's on Your Holiday To-Do List?

      Wednesday, November 14, 2012


      Last year I was a Grinch.  Yep, I was a mean grumpy frumpy pregnant Grinch and I feel a little bit (a lot) bad that I was so anti holiday season.  If I remember correctly I actually didn't even care if we got a Christmas tree and I would have been fine with one of those little stick ones that I could decorate while lying down.  In my defense when you feel like you are going to vomit 24/7 you would not want to do much either.  Ladies that don't get sick while pregnant just plain irritate me.  This year I am making up for that and I am going to be so festive I might put reindeer antlers and a giant wreath on the front of my car.  Okay I would never do that but if you do drive by me you can bet that Mariah Carey and the Backstreet Boys Christmas albums (don't judge) will be blasting out my car window, and I will be singing along...

      Holiday to-do list:


      1. Make winter sangria.

      2. Take Max to Disneyland for the first time (once all the holiday lights are up).

      3. Go on an ice skating date with my husband. 

      4. Go sledding.

      5. Snowboard.  It has been way too long since I went last.

      6. Attempt to actually start and finish a crochet scarf.

      7. Go to a Christmas light show (you know where an entire neighborhood participates and lights their houses up while you play the coordinating music in your car).

      7. Order holiday Christmas cards way in advance since I am always doing that last minute and stressing.  I am loving all these holidays cards from Tiny Prints!

      8. Anonymously drop off presents and a turkey to a family in need.

      9. Have a cookie exchange party with girlfriends.  My husband thinks this sounds naughty...and trust me it's not ha.

      10. Find the most ridiculous festive matching PJs for all of us...and get a picture of us wearing them of course :)

      What are you excited to do this holiday season? Please share! I could use a few more festive ideas.

      Homemade Non Dairy Peppermint Creamer

      Tuesday, November 13, 2012


      One of my favorite things about the holiday season is all the delicious holiday creamers that fill up the dairy section at the grocery store.  Since I have completely cut out dairy (and have never felt better by the way) I decided my coffee still needs a little holiday flair.  Plus coffee without creamer is borrrrrring.  Unless you are a mountain man with a grizzly beard then you probably like creamer in your coffee too.  Even if you do drink dairy this is still delicious regardless and this is artificial flavor, artificial color and dipotassium phosphate free.  What's dipotassium phosphate?  I actually have no idea but it is an ingredient that is in the holiday coffee creamers and it sounds weird and terrifying. 


       What you will need:
      • One can of full fat organic coconut milk
      • 1 tbs of pure peppermint extract
      • 6 drops of all natural liquid stevia
      Directions:
      Mix all the ingredients together and you're done! 
      Place in the fridge and it will last up to two weeks.

      This was so good I wanted to drink it...instead of my coffee :) 

      Skin Care Tip of the Week *How to turn any lightweight moisturizer into a fall/winter moisturizer instantly*

      Monday, November 12, 2012


      It can get pretty pricey spending money on all new fall/winter skincare products so today I am going to share a really easy, effective and inexpensive way to turn your lightweight summer moisturizer into a hydrating fall/winter moisturizer in just seconds.  Not only will you save quite a bit of money, but you will love how incredibly baby soft your skin feels with the added glycerine.

      Adding a few drops of 100%  pure vegetable glycerine to any moisturizer will instantly make it more hydrating.  You can find this at a health store or follow link below.

      The benefits of  100% vegetable glycerine:
      • Extremely moisturizing
      • Will not irritate your skin
      • Safe for acne prone and sensitive skin
      • All natural
      • Inexpensive to purchase
       What you need:

      What to do:
      1. Take a small amount of moisturizer in the palm of hands and mix 1-2 drops of vegtable glycerine with it. 
      2. Massage into your skin.  That's it! 
      So easy! 

      Things That Make Me Say Yeay

      Friday, November 9, 2012


      Max (and Ronin's) first carousel ride at a super fun cousin play date.  PS I want my cousin's floral leggins from Urban Outfitters.

       Friday night takeout...because by the end of the week all I want to do is NOT cook.  

      A really tasty and really good for you drink c/o "Drink Chia."  My favorite flavor was the Honeysuckle Pear.  YUM!  Even my two year old thought this was "deeeewishious!"  That would be delicious for those of you who do not understand toddler talk.

      Succulent plants.  I love these.

      A perfectly decorated room, which made me feel like I was in the movie Austin Powers. 

      Have a wonderful weekend!

      We are doing a little BBQin with friends and relaxing, which is my favorite kind of weekend.

      How To Make Fire Cider (all natural cold and flu remedy)

      Monday, November 5, 2012


      My step mom first introduced fire cider to me last fall when I was pregnant with Ronin and coming down with a horrible cold.  She brought me in her kitchen, told me to plug my nose and take a big spoonful of this beet colored "cider." I am super weird and I love the taste of pickled anything so I thought it was delicious.  My husband, who also tasted it thought I was nuts.  She gave me a whole jar and within a few days I was feeling normal again.  My cold was completely gone.  She recently brought over a brand new batch and was awesome enough to share her recipe with me.  So today I will be passing it on to you.   
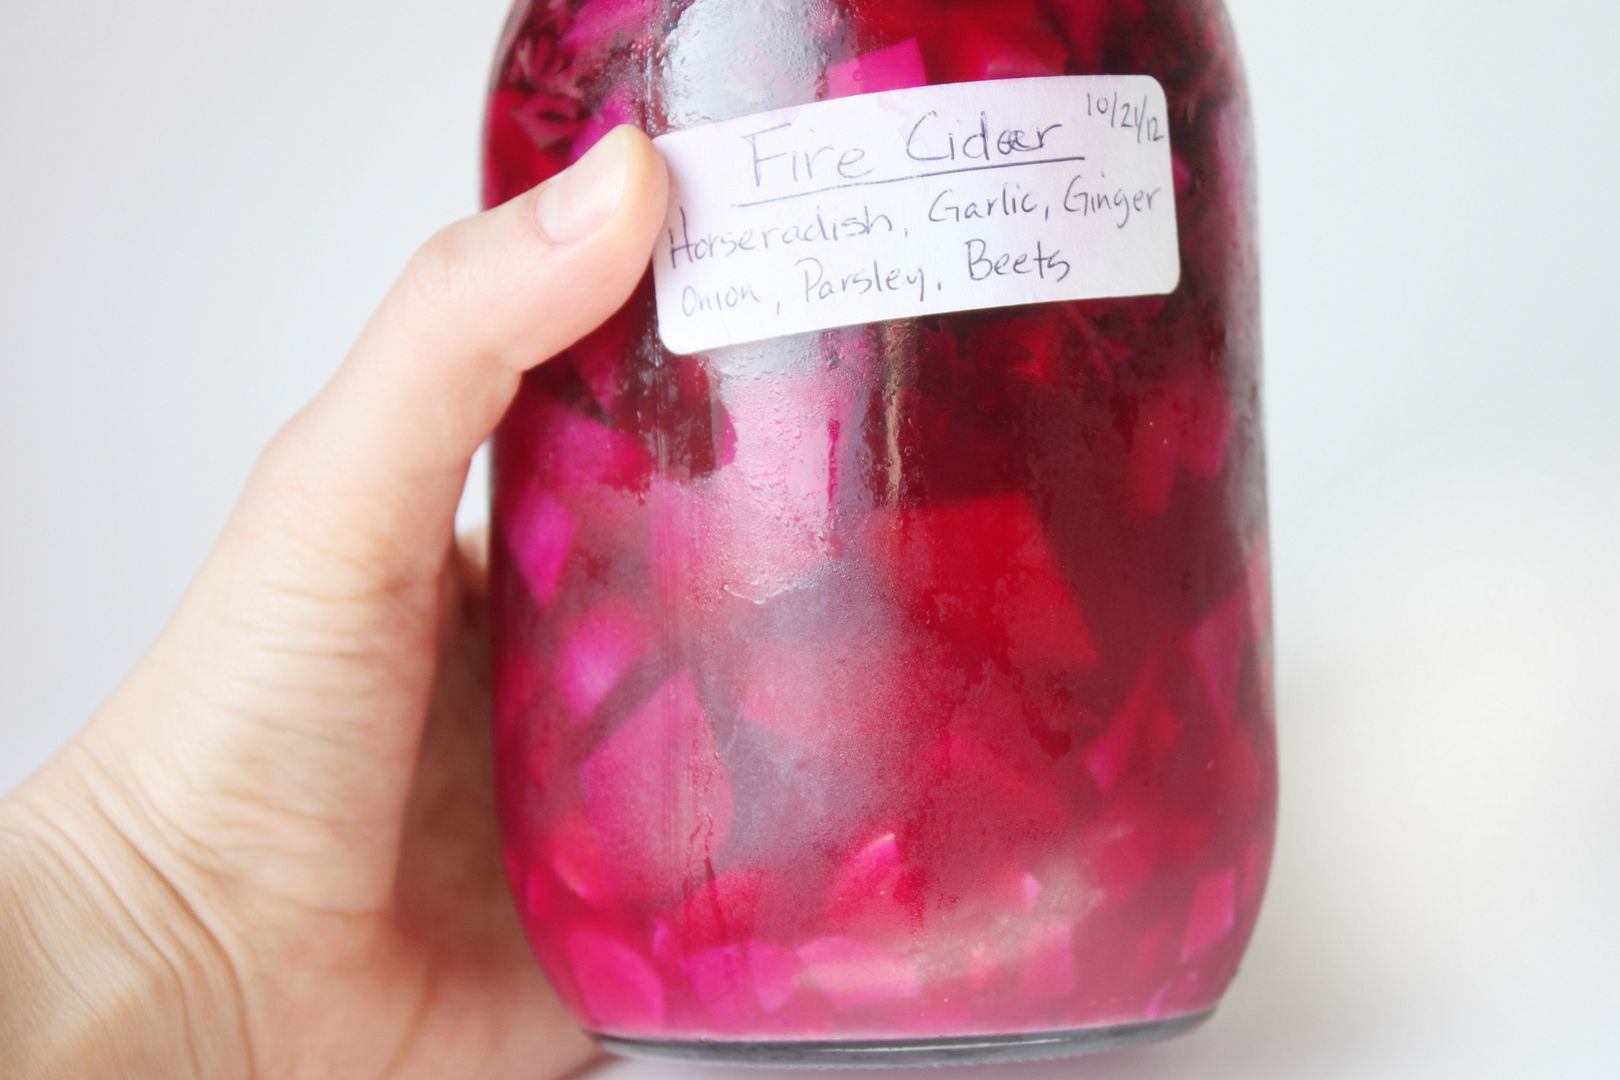
      Fire cider is an all natural herbal remedy that can be taken daily or at the onset of a cold or flu.  It helps to break up congestion and ward off yucky flu and cold like symptoms.  The combination of ingredients help naturally boost your immune system.  Fire cider is nothing new.  It has been used for centuries by people all over the world.  We have just become so accustomed to calling the doctor or running to the store to get cold meds the moment we feel sick, it has become less common to hear about natural remedies.  

      The ingredients used in this recipe are:
      Raw organic unfiltered apple cider vinegar- read all about the benefits of here.
      Horseradish-contains natural antibiotic properties. 
      Garlic-natural antibiotic.  Promotes sweating, which is important if you are experiencing flu like symptoms. Garlic also helps regulate blood sugar levels.
      Ginger- a natural circulatory stimulant and helps ease nausea.
      Onion- helps naturally detoxify your body.
      Beets- super rich in antioxidants and has anti-inflammatory benefits.
      Parsley- it is very high in iron and vitamin C.  It is also a blood purifier and helps kill bacteria in the body.  Read a little more about it here.

      What you need:
      A large mason jar
      Raw organic unfiltered apple cider vinegar
      3 tbs of grated horseradish root or pure horseradish 
      3 tbs of grated ginger root (find this at a health food store)
      A small onion
      One head of garlic
      3 tbs of fresh parsley
      1 cup of organic beets

      Directions:
      1. Chop up all the ingredients into tiny pieces (the horseradish and ginger will need to be grated).
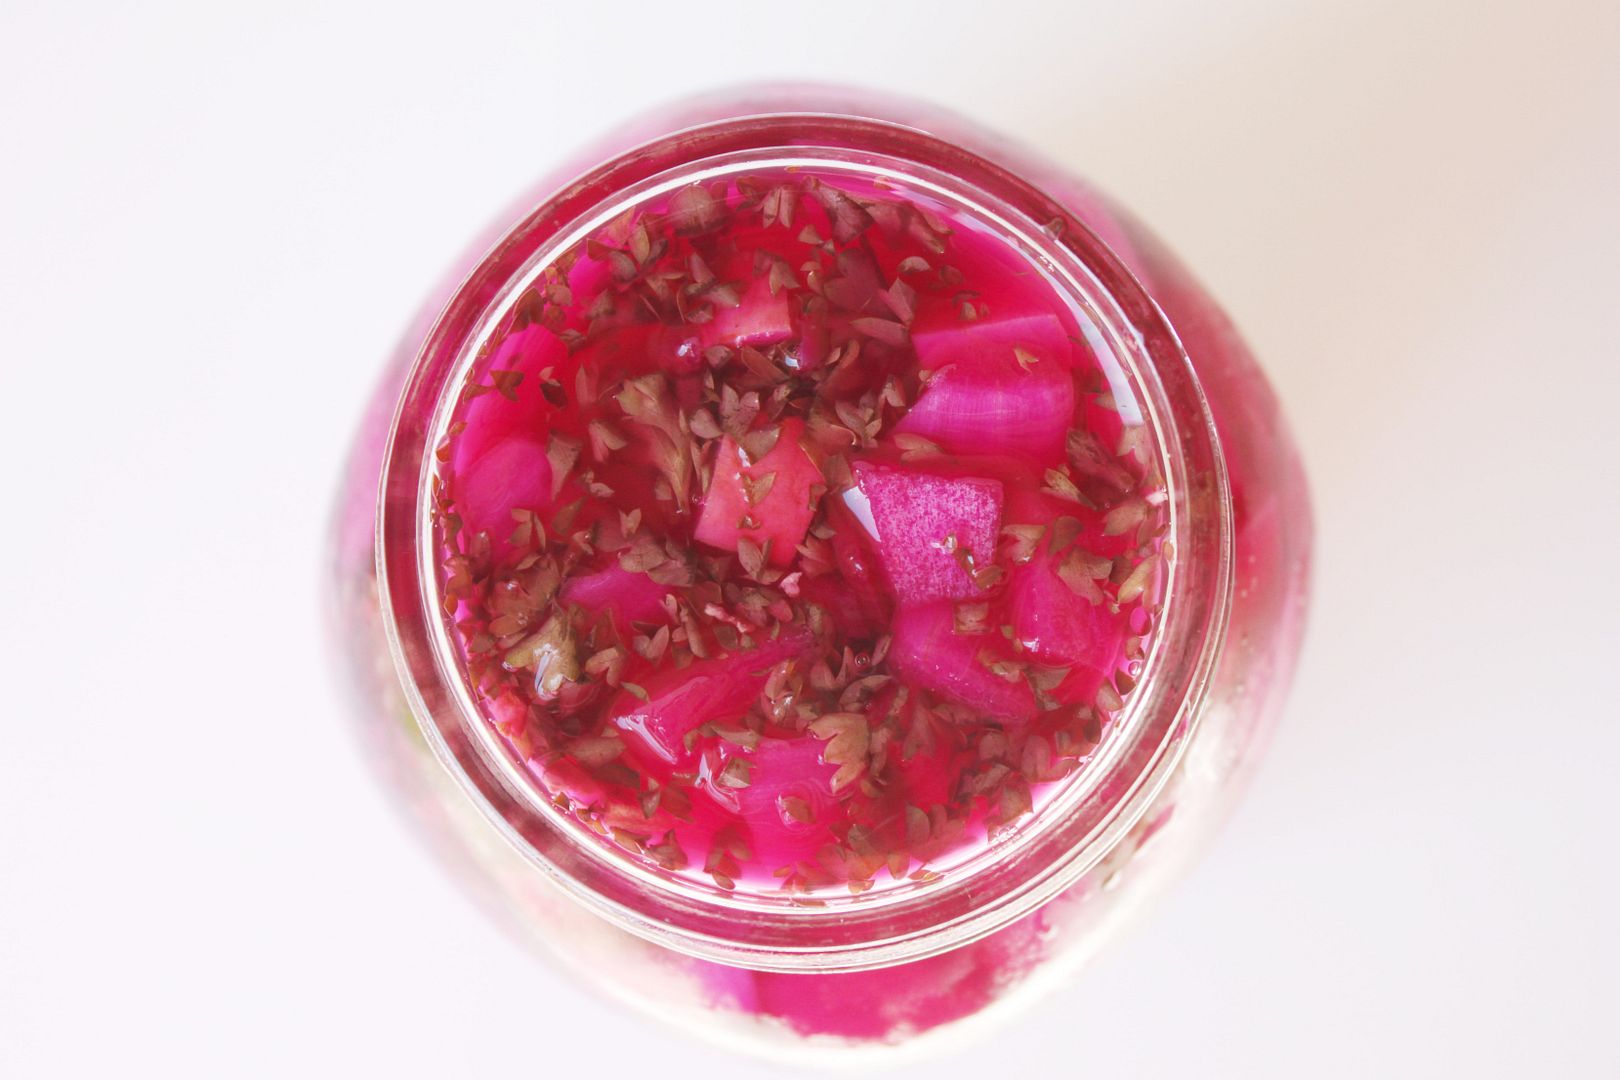
      2. Place everything in the bottom of the mason jar.  
      3. Pour the apple cider vinegar in over the herbs.  Fill the mason jar with it until it reaches the very top.  Make sure you see no air bubbles and secure the lid tightly.
      4. Place this is the fridge. 
      5. Allow the herbs to steep for 2-4 weeks (the longer the better).  Do NOT open the jar at all until you are ready to strain everything out.  
      6. At the end of the 2-4 weeks strain everything out of the jar.
      7. You can use the leftover herbs to saute up fresh veggies if you want so nothing goes to waste.  This is SO yummy.  
      Keep this tonic in the fridge and use daily (1-2 Tbs) or whenever you feel a cold or flu coming on.  

      To answer your questions ahead of time about whether or not you can substitute ingredients or leave something that, that is up to you.  This is the only recipe that I have personally used and I have not yet experimented with other ingredients or leaving ingredients out. 

      Things That Make Me Say Yeay

      Friday, November 2, 2012


      My little superhero "Dash" from the Incredibles.  He thought he was so cool it was pretty cute!


      And my chubby little sleeping pumpkin.  Yes, this onsie might have been a teensy weensy bit small, but since it was the last time he would ever wear it we made it work :)

      Flourless chocolate chip cookies that we devoured within a matter of hours.  I got some really mixed reviews from these cookies, like some of you cookie makers HATED them so I made quite a few changes to this particular recipe (like no coconut) and these were bomb diggity...so there!  Once I get the recipe totally perfected I will post it...because I am not ready for a swarm of flourless cookie haters again.

       My Mother-In-Law's famous Halloween chili. It does not ever disappoint.


      Okay, maybe a little dorky how excited I am but I made my very first wreath...that was actually good enough to hang up.  I got everything at the dollar store so I am pretty excited (you should take a drink of something every time I use the word excited) it only cost me about $4 to make.

      Hope you all have a wonderful weekend! 

      Pumpkin Chia Seed Pudding

      Thursday, November 1, 2012


      Okay I know what you're thinking.  You are thinking that looks gross! Ya...it does but if you judge this little gem of a pudding based purely on how it looks you will miss out on a super tasty pretty much guilt free treat.  And for the record...if you are able to photograph pumpkin seed pudding and make it look amazing, you are my hero.

      Chia seeds are so incredibly good for you.  My top two favorite benefits that I personally notice are...they fill you up (they expand when wet and "trick" you into thinking you are full faster) and they give you energy (plus they are loaded with more antioxidants than blueberries).  The ancient Mayans used them for endurance and it is said that they would run all day with the help of these tiny little seeds.

      This recipe makes two servings and even though you may want to eat it all, I promise that magic of the chia seeds will fill you up with just one serving.  So....unlike this recipe you can be nice and share.

      What you will need:
      • 1/4 cup + 1 tbs of chia seeds
      • 1/2 cup of organic pumpkin puree
      • 2/3 cup of almond milk
      • 1 tbs of honey
      • 1/2 tsp of cinnamon
      • 1/2 tsp of vanilla
      Directions:
      Mix all of the ingredients together.  Refrigerate for a minimum of three hours and eat!

      Enjoy :)

      Related Posts Plugin for WordPress, Blogger...