Showing posts with label Pin-tester. Show all posts

Pin-tester *Ultimate Greek Chopped Salad*

Wednesday, June 11, 2014


It has been forever since I did a Pin-tester post but I decided it was time to bring it back since I have been doing a whole lotta pinning and not a lot of doing or making as of recently.

I decided I would start off the series with food because to be honest I have been sucking in the dinner making department.  Nothing sounds exciting and the creative/imaginative part of my brain seems to be on vacation.  So I searched my main food board and found something that sounded perfect for a hot (almost) summer night.

This pin came from a blog called The Garden Grazer 
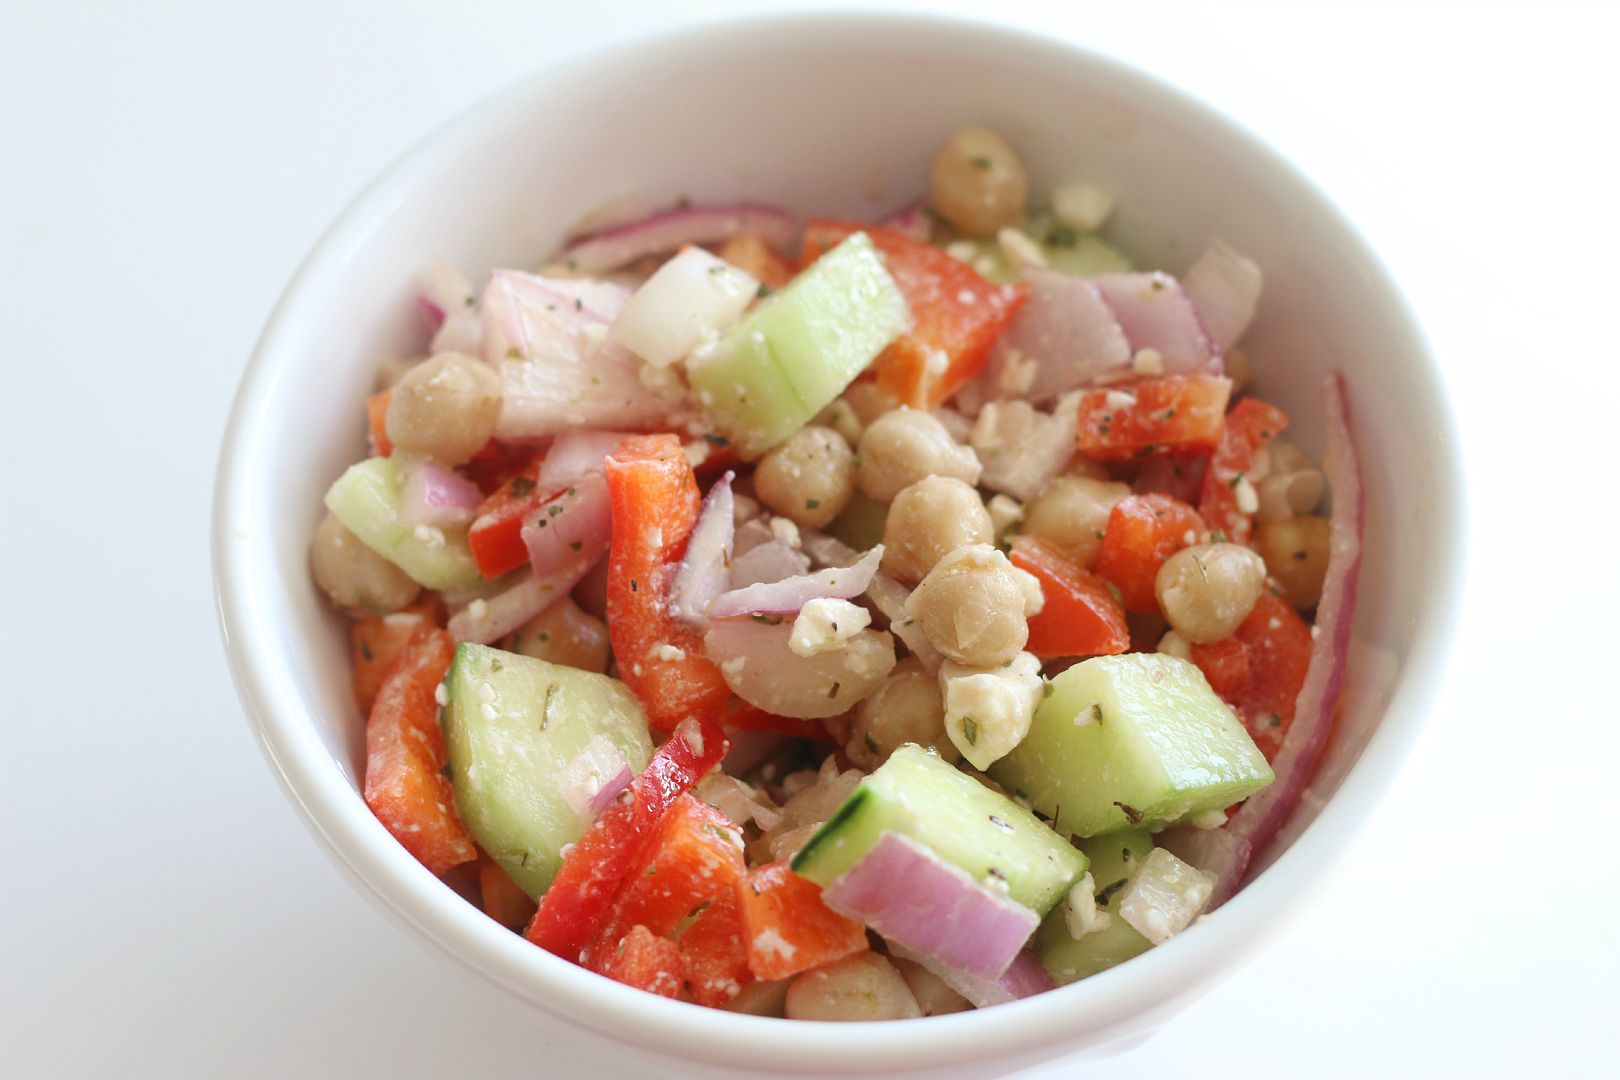
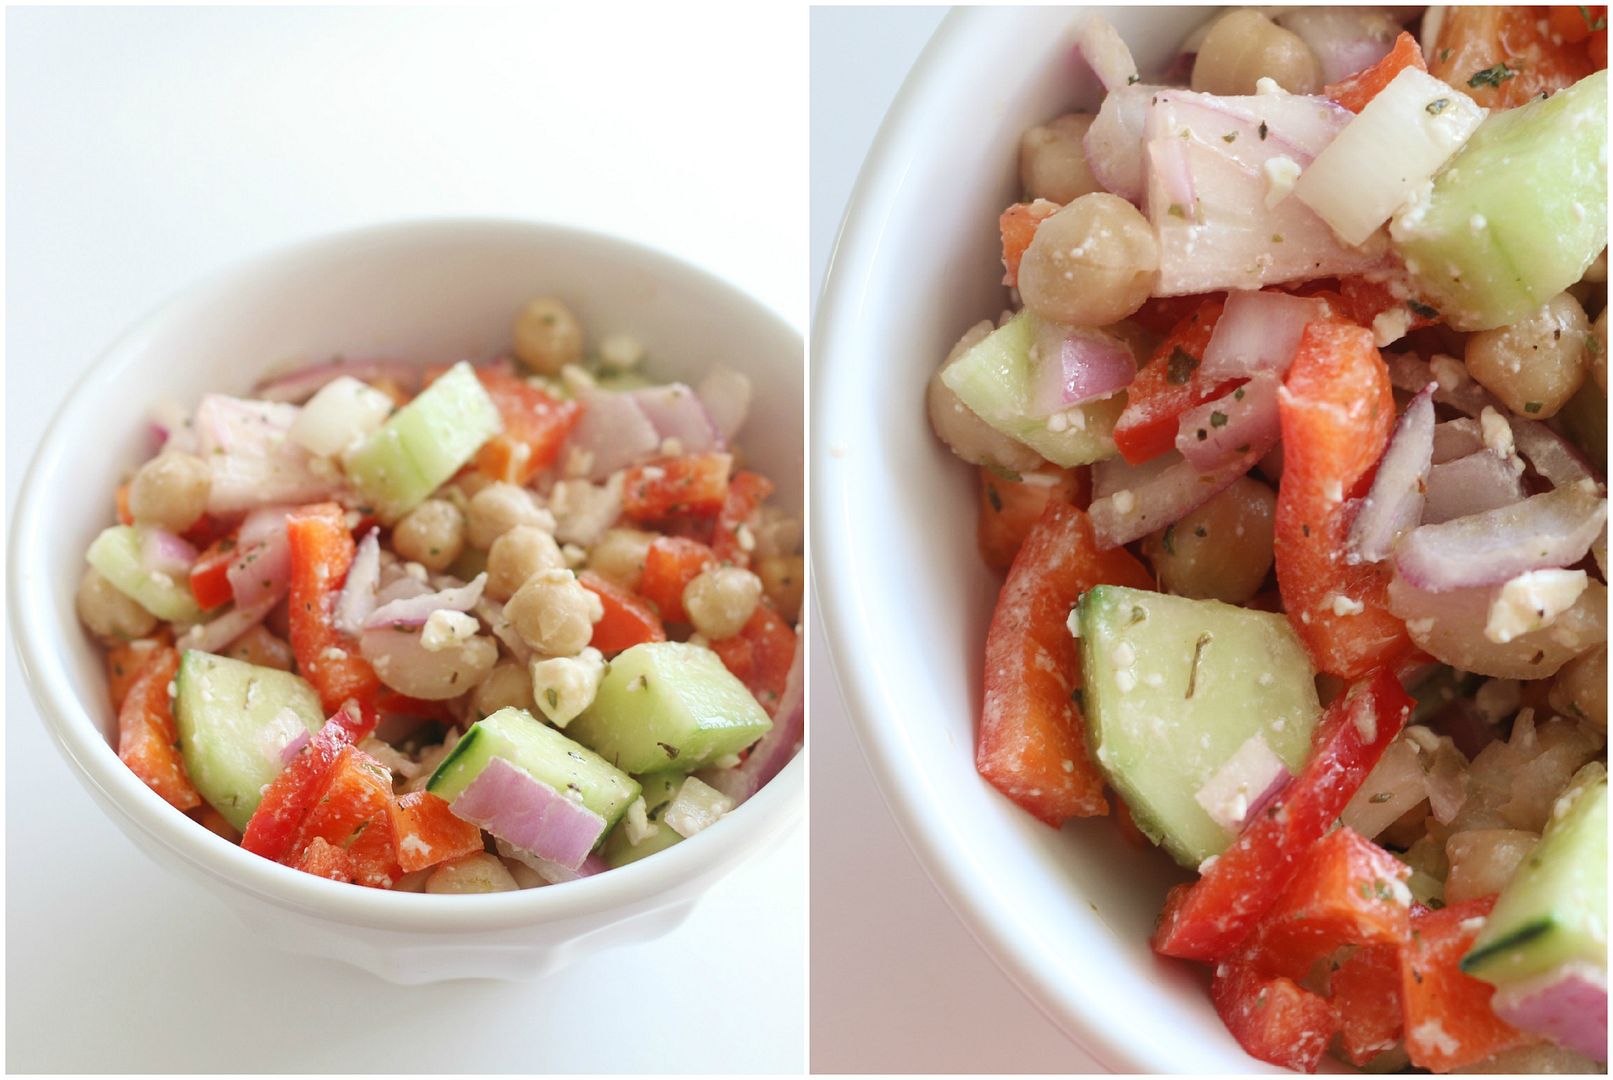
What you will need:
  • 1 hothouse cucumber 
  • 4-5 ripe Roma tomatoes (I omitted these) 
  • 1 large red bell pepper
  • 1 small red onion
  • 1/3 cup of feta cheese 
  • 15 oz can of garbanzo beans (rinsed and drained) 
What you will need for the dressing:
  • 3 tbs of red wine vinegar
  • 1/4 cup of olive oil
  • 2 tsp of oregano 
  • 1/4 tsp of salt
Directions:
  1. In a small bowl mix together the ingredients for the dressing and set aside. 
  2. Dice the cucumbers, bell pepper and onion and add to a large bowl. 
  3. Add in the garbanzo beans and the feta cheese. 
  4. Add dressing and toss.
  5. Serve and eat immediately (the leftovers were soggy so this is best fresh). 
Final verdict:  Win win win.  I did not use tomatoes like the original recipe called for since our garden is not ready yet and all the tomatoes at my local organic market were from Mexico, so I passed on those.  Ian and I loved this.  The garbanzo beans added a fun element that I have never used before in a salad.  The kids were not fans but that wasn't too surprising considering some of the raw ingredients.  I will be making this again for sure and I think it's the perfect dish to bring to a summer BBQ as well.


Pin- tester *DIY Air Freshener*

Thursday, July 19, 2012

I am pretty much the easiest person to market to when it comes to candles and air fresheners. "Hawaiian Sunset" and "Banana Cream Pie" get me every time. Now that I think of it does a sunset even have a scent? Who knows but I like it when I plug it in.

It has been a little while since I did a pin-tester and when I saw a pin that stated you could make your own air fresheners with just about any scent you want I was sold.

This pin came from a blog called The Burlap Bag.

What you will need:
  • Baking soda
  • Essential Oil. I used lavender (my favorite).
  • Mason jar or container with a lid
Directions:
  1. Pour about 1/4 cup of baking soda into your jar.
  2. Add about 8-10 drops of essential oil.
  3. Poke holes in the top of the lid. The original source used foil but I wanted mine to look a little more esthetically pleasing so I used a nail and hammered little holes in the mason jar lid.
  4. Shake it up a little and you are done!
My final verdict: Well my whole house did not smell like a lavender filled satchel like I imagined but I think this works great if you put it in a smaller space like a bathroom, which is where I ended up putting this. I also loved that this whole project is super cost effective and cost me a whole nothing since I had all the supplies needed.

Pin-tester * Make your own pore strips*

Wednesday, May 2, 2012


This week I tested out a pin from my beauty board. The pin came from a blog called Petit Elefant and it was a tutorial on how to make your own pore strips. To be honest, I had no idea if this would turn out and I was a little skeptical...not gonna lie. I actually HATE the store bought ones and would never ever recommend them to anyone, but this seemed to be a little more gentle so I wanted to give it a whirl.

What you will need:
  • 1 packet of unflavored gelatine
  • 2 tbs of milk
Directions:
Mix the gelatin and milk together in a microwave safe dish. Microwave the mixture for 10 seconds and apply to face (you can use a facial brush or popsicle stick). Leave on for 15 minutes. Slowly peel off the pore strips and walla!

A little forewarning....this next picture might gross you out a little...

Here is the pore strip that came from my nose. I LOVED this! This is seriously the coolest thing ever. I worked like magic and actually peeled off like a regular pore strip, but without ripping off actual skin.

My skin was so soft after and I even think it removed a little peach fuzz from my face ha! The only weird/negative thing I have to say is it smelled like dog food was on my face...yep very stinky! Other than that this was pretty awesome. Thank you Petit Elefant for this great (inexpensive) beauty idea!

Have you tested out any pins lately? I would love to hear which ones!

Pin-tester *Recycling Old Candles*

Thursday, April 5, 2012


This week I tested out a pin that came from a blog called Happy-Go-Lucky.    

I was recently cleaning out the closet of my esthetician room, which is now getting transformed into the baby's nursery and realized I had a bunch of aromatherapy candles that were just taking up space.  I was about to toss them, but then I came across a great tutorial on Pinterest.  I knew this was a pin that I needed to put into action asap!  The original poster used candles in jars so I made a few little changes (I know I originally said I would follow instructions fully but I broke the rules) and I am pretty happy with how my new candle turned out.

I have made my own candles before, but this was so much more cost effective (love that phrase). 

What you will need:
  • Old candles
  • Candle wicks (you can find these at a craft store)
  • A large melting container (I used a giant mason jar that was leftover from this party)
  • A glass jar
Directions:
  1. I hammered up (Max was wondering what had gotten into me I think ha) my old candles so they were smaller chunks for easier melting. I don't actually know if this makes it easier to melt, but it made sense to me at the time.
  2. Boil a hot pot of water. Place the container filled with the candle chunks into the water and let melt.
  3. Place your wick in the other glass jar. When the candles have melted pour wax into glass jar.
  4. Trim wick once wax has dried and you have a new candle!

I love my new giant vanilla scented candle!  Plus...this whole project only cost me $2 (price of the wicks). I don't think I have ever seen a candle this big for $2, so I am pretty stoked about that!

Have you tested out any pins recently that were a flop or a success?  I would love to hear!

Pin- tester *Homemade granite cleaner*

Thursday, February 23, 2012

I was so excited to try out this pin that originally came from a blog called 320 Sycamore.

I spend way too much money on granite cleaner and nothing seems to really work. I am always left with a greasy film-y covered looking counter top with store bought products. When I read that you can make your own homemade granite and counter top cleaner using only rubbing alcohol, dish soap and essential oil I knew I needed to test it out.

All you do is fill an empty spray bottle with about 1/4 cup of rubbing alcohol, a few drops of dish soap, a few drops of essential oil (I used lavender) and the rest with water. Shake it up and it's all ready!

Final verdict: I LOVED this! It made my kitchen smell clean and had my counter tops shiny in no time flat. I am so excited since this homemade version costs a whole lot less than what I was buying before. I am a happy camper for sure!

Have you tested out any pins lately?

Today is the last day to enter the k.slademade leather clutch giveaway!

Pin-tester

Thursday, February 9, 2012


I SUCK at hard boiling eggs. I never seem to get it right. They either come out undercooked or so hard that you could bounce them like a ball. I am also always left with annoying little egg shells that stick to the egg when I try to peel off the shell.

SO this week for the Pin-tester series I tested a method that is supposed to make peeling eggs super easy. The pin came from an awesome site called theKitchn, which I would have most likely never discovered if it wasn't for Pinterest.

The method which can be found here says that if you add 1/2 tsp of baking soda to the water it will make the egg shell easier to peel. I followed a simple method for hard boiling the eggs, which I found in the comment section of the post.

Final verdict:
It worked! The egg shell slipped right off. What a neat little trick.

Max loved the shell free perfectly cooked egg too. From now on this is the only way I will hard boil my eggs.

Have you tested out any pins lately that were a success...or a big flop?

On a side note: I have an awesome giveaway going on tomorrow! You will not want to miss out on this one.

New blog series: Pin-tester

Thursday, February 2, 2012


I am such a huge fan of Pinterest. It is a beyond genius concept. I could seriously spend tons of unproductive hours on there pinning away everything that makes my heart do a little skip.

What I have personally noticed is it can easily become a black hole (a fun black hole) of things that you pin and never do, make or buy for the most part. Who's with me on that one?

So here is how this new blog series is going to work
...each week I will be testing out either a recipe, beauty tip, DIY, cleaning/organizing idea etc, that I have pinned on Pinterest. I will then share here on the blog how it turned out and what I thought about it (completely honest opinion).

Each week I will of course always link back to the original source not back to Pinterest because giving credit to the Original G is important.

So lets get started with the first Pin-tester of the series: The Miracle Mask from College Fashion.

Ahh scary I know! My poor son screamed when he saw me.

If you have been reading my blog for a while you are probably aware that I am an esthetician who LOVES diy skin care so I knew this was something I needed to try asap.

The mask recipe, which can be found here is made up of honey, cinnamon and nutmeg, which are all great ingredients for the skin. I left the mask on for 30 like the directions said and this is what I thought...

Pros:
  • Smelled amazing. After I removed it my face smelled like a delicious cinnamon bun for the remainder of the day.
  • Super easy to mix together and I had all of ingredients in my cupboard.
  • My skin felt soft and tighter after I removed it.
Cons:
  • It was as a pain in the butt to remove.
  • My skin was a little itchy and red (from the cinnamon) but I also have super sensitive skin while pregnant so that was most likely amplifying things a little.
  • It got everywhere! It was on my camera, in my eyelashes and dripped down my shirt ha...I was a sticky mess after but at least I smelled good :)

Final verdict: I liked it. Not sure if I would necessarily call it a miracle mask but it is definitely worth trying.

Have you tried this Pin? If so what did you think?

Related Posts Plugin for WordPress, Blogger...