7 Must Make Fall Recipes

Tuesday, September 30, 2014


1) "Cheesy" Baked Cauliflower Poppers: Perfect for snacking on while watching football and even your non healthy food loving friends will love these!

2) Baked Apple Chips: These are one of my family's favorite fall treats! Plus they make your whole house smell heavenly as they bake.

3) Flourless Snickerdoodle Cookies: These are soft, moist and delicious.  If you have little cookie monsters living at your house like I do, these will not last long.

4) The Two Minute Pumpkin Pie: This Paleo treat will blow your freaking mind, promise.  Sometimes you just need a little treat NOW and you do not have to wait an hour for it to be ready...so when that happens make this.

5) Flourless Pumpkin Brownies: These super moist, cake like brownies are another family favorite with the boys.  The pumpkin is not overwhelming and they are juuuuuust right.

6) Pumpkin Pie Sugar Cookies (Paleo): You need to make these.  That is all there is to say about these. You will not be disappointed.

7) Baked Parsnip Fries: These are sweet, salty and the perfect healthy alternative to french fries.

Have you made any of these treats yet? I would love to hear your feedback if so!


Have You Heard of That Crazy Body Wrap Thing Yet?! I Tried it and This is What I Thought...

Monday, September 29, 2014


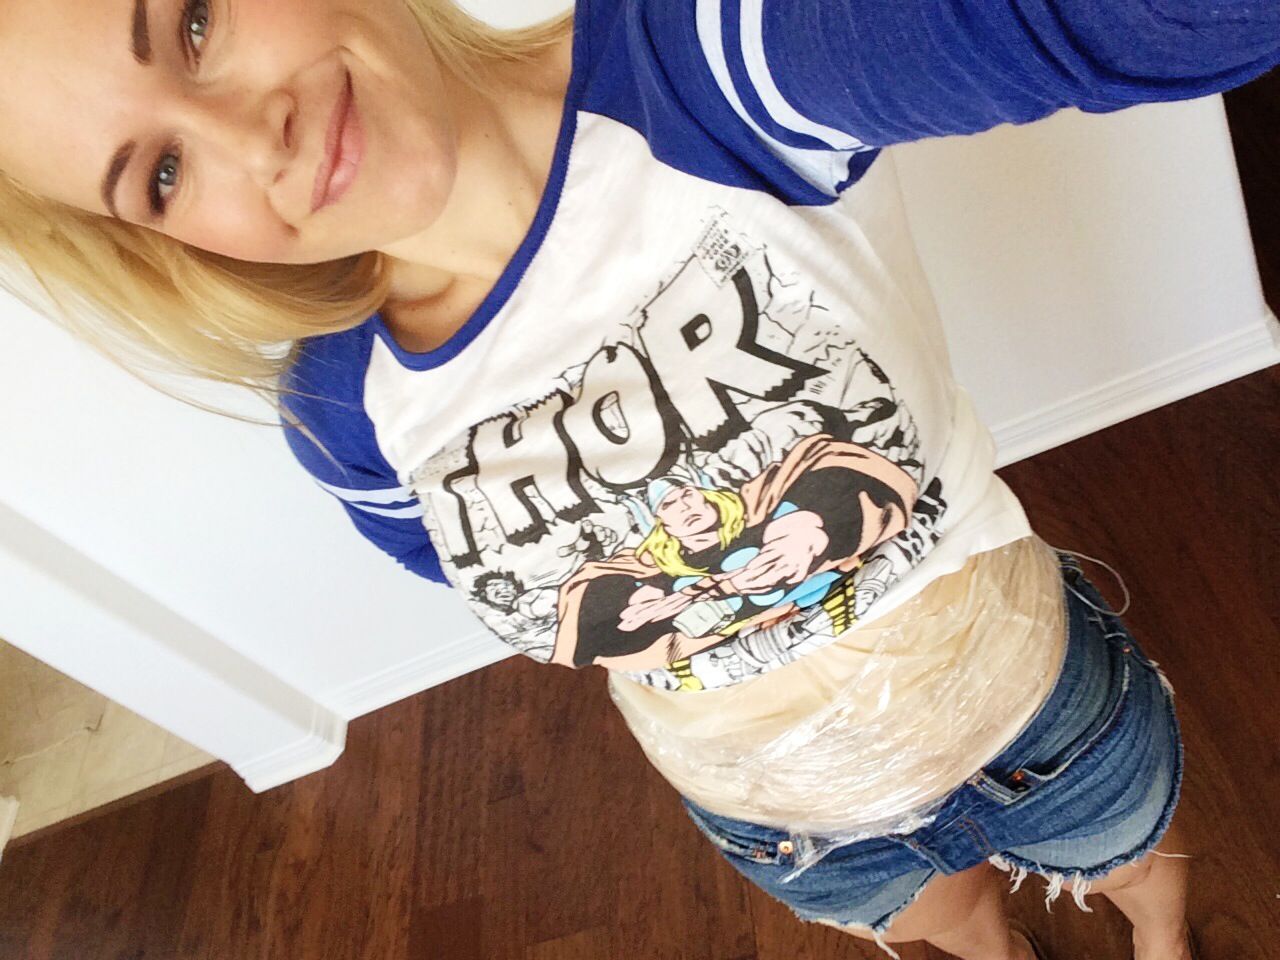
Trying to take a normal looking selfie with one of these things on is nearly impossible ;)

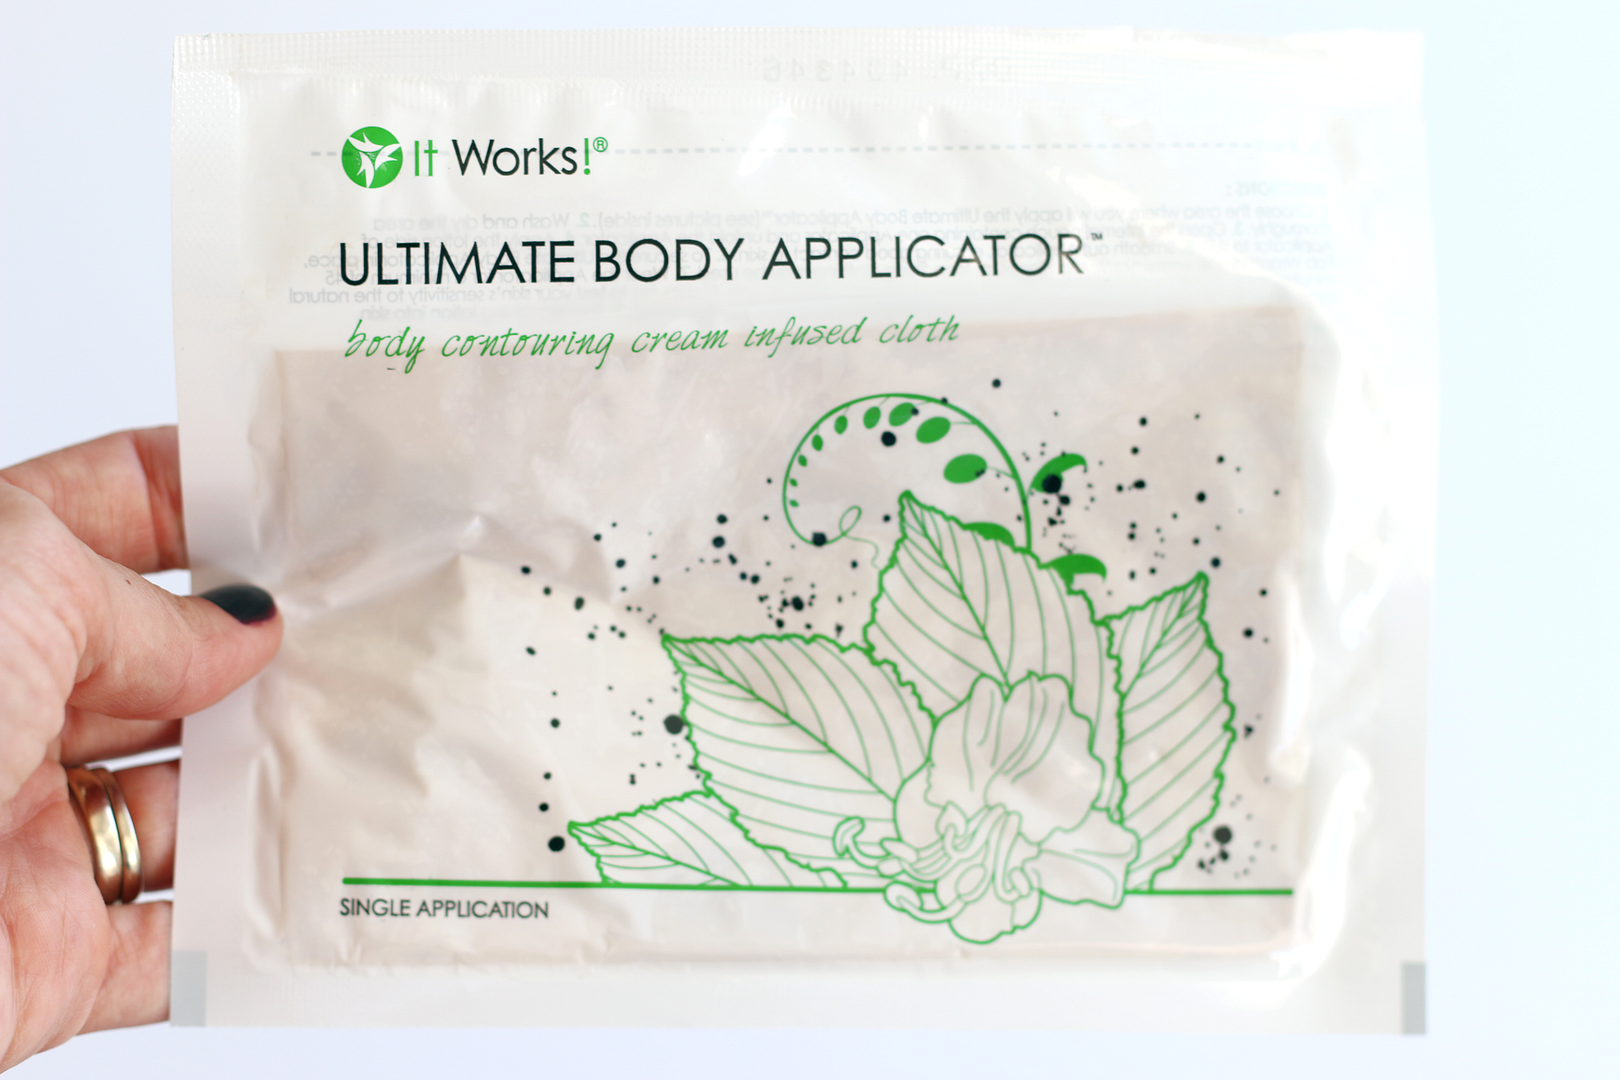
Unless you have been living under a rock (hey it's totally possible) you have probably heard of body wraps and wondered to yourself if they really do work.  Until I recently tried one I was skeptical but I am here to tell you that they do in fact "work" and I am beyond excited about a new product I am on board with, but first a little back story...

If you are a long time reader you are probably already aware that I have been a licensed esthetician for over 8 years.  I have worked for doctors, plastic surgeons, cosmetic dentists and at one point I ran my own esthetics business out of my home.  So I have seen it all as far as skin treatments go.  For the longest time I have been intrigued by the whole body wrap treatment thing but the reality is I just do not have the luxury of actually going to a salon on a regular basis (hey I can barely make it to my hair appointment on time) to try it out.

So long story short, one of my good friends recently started selling body wraps.  The hook line and sinker for me was that you could apply the wraps by yourself to specific targeted areas in your own home...what what!! I am a big ingredient whore (yes I am) so I sat there in her kitchen reading all the ingredients before applying and I was sold.  I bought one and took it home to try.

I have used two wraps so far and you guys I was blown away.  My tummy area feels super tight, does not feel bloated (like it always does ughhh) and my jeans in the belly area are actually loose.  To say I am happy is an understatement.

So the number one question that you might be asking yourself is, "Well isn't this just water loss?"
The answer is no. The special blend of botanical ingredients actually works to lighten, tone, and detoxify your fatty tissue below the surface of the skin, leaving you with amazing slimming results that is not related to water loss.

If you would like to try this out for yourself you can find every thing you need here.  If you have any additional questions about how you can get started or how you can get the wraps at my cost you can leave them below or email me at wrapsbylinds@yahoo.com


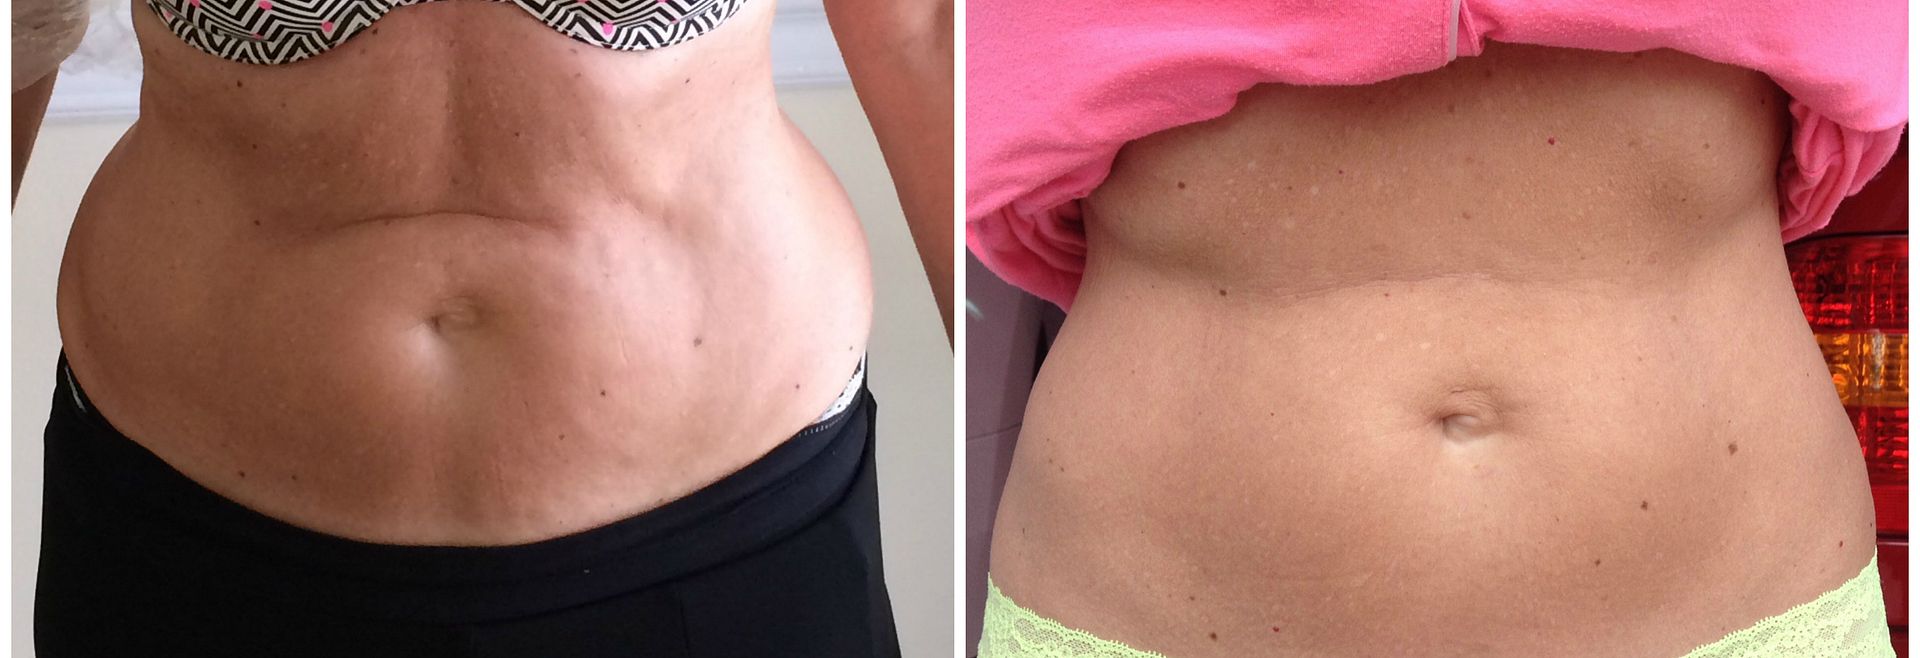
This is a before and after of a close family friend who has done 2 wraps....she is pretty excited about her results so far!

** Update: some of you did not believe this was a real picture but guyssss this is my mom. (secrets out) It's as real as can get because I took these pictures.

Can't wait to hear from you and if you do end up wrapping make sure to take before pics!


Things That Make Me Say Yeay!

Friday, September 26, 2014


Fall-ifying my mantel with a few little things including an owl that Max picked out.


A quote I spotted on a little notepad that I just loved. So true.


Lemonade sweetened only with Stevia that was sent to us to try from Leaf & Love.  It is USDA organic and all natural...woo hoo for that!  The boys loved this and it was so nice to give them a juice box that I knew was actually good for them and not loaded with sugar.  We will be ordering more for sure.  You can use the coupon code MTJVVKFL to receive $2 off your purchase.


Free paint swatch samples = our favorite way to learn colors.


Backyard hangin with my two favorite little guys who lit up when they spotted this grasshopper, which they named and watched for a whole half hour.  There is seriously nothing better than hanging and chatting with these two little guys.  They make you realize that joy can be found in the simplest of things.

Have a wonderful weekend!

Frozen Pumpkin Pie Bites (Paleo)

Thursday, September 25, 2014


Fall has arrived! I am pretty pumped for all things pumpkin and everything else that is super cliche that I totally get into.  Southern California has not received the "lets have colder weather report"  but I decided I was not going to let that ruin my fall fun.  So to get everyone in my house in the spirit I made some freaking fantastic, frozen pumpkin pie bites.  They were gone in a flash and so easy to make!

What you will need for the filling:
  • 2 cups of raw cashews (soaked in water for 3-4 hours is ideal)
  • 1 1/2 cup of pumpkin puree
  • 1 tsp pumpkin pie spice
  • 1/2 cup of coconut oil
  • 1/2 cup of honey or maple syrup 
What you will need for the crust:
  • 2 cups of raw almonds
  • 1 cup of pitted dates
  • 1 tbs of coconut oil
Directions:
  1. Place all of the ingredients for the crust in a food processor or high powered blender.  Process until you have a sticky dough consistency.  If you need to add a little more coconut oil to the crust do it at this point.  
  2. Take a small amount of crust and roll it into a ball.  Then place it on the bottom of your muffin tin and press down firmly so it holds together.  
  3. Clean your food processor or blender and place all the ingredients for the filling inside.  Process until you have a smooth pumpkin pie filling consistency
  4. Layer the filling on top of the crust.
  5. Place in the freezer for about an hour or until they are set. 
  6. Enjoy! 


These are a must make...don't even second guess!  Please come back and let me know what you think if you end up trying them out!


Latest Life Snippets + A Funny Little Story About Max

Friday, September 19, 2014


Whew this week was busy!  It seems like the weeks are now flying by since Max has started Pre-K, which he is absolutely loving by the way.  Speaking of Pre-K funny little story... A couple days ago I was driving Max to school and he said, "Mom when you come to pick me up in class can you please not say, 'Hiiiiii MAXXX! How was your dayyy?!' So loud in front of all my friends?"  Ummm what?! Hahahaha!  I told him that's fine I could be a boring mom who doesn't say hi at all or ask him any questions and we can just go straight to the car in silence. He then told me, "Okay I like the fun mom, be her just don't be so loud."  Ok noted buddy, but I can't promise that I will never embarrass you again ;)

Here a few snippets of our week according to my Instagram. 

1. Farm fresh eggs brought over by Grandpa.  They are so rich and so yummy!

2. What a typical morning looks like on the weekend.  The boys crawl in our bed and totally take it over. I actually don't mind one bit, unless it happens before 5am ;)

3. Max enjoying the life.  Being 4 is awesome.  Not a care in the world.

4. Waiting in the parking lot for Max's Pre-K class to start.  He has been working on his bear hugging skills and here he is basically squeezing my brains out.

5.  Adding a little fall-iday (ooooo I like that word) cheer to my front door step.

6. Slicing open a perfectly ripe and locally grown avocado.  Not sure why this makes me so happy but it does.

Hope you all have a wonderful weekend! Today I am off to a place of fun-ness with the boys to soak up this last bit of summer.

Full Body Detoxifying and Skin Softening Treatment

Tuesday, September 16, 2014


Lately I have been trying to make a conscious effort to take a little bit better care of myself both physically and mentally.  It is so easy to just get stuck in the rut of being a mom and constantly putting yourself last.

So sometimes when the husband is home at night and I get a little alone time in my own house, instead of just drinking wine and browsing the internet (pretty much what usually happens) I have been getting creative with different beauty treatments and I turn my bathroom into a mini spa for like 25 minutes, since that is usually all the time I get before little people come running in ha.  It leaves me feeling relaxed, refreshed and just better in general.

I recently experimented with Pink Himalayan sea salt since it is a natural detoxifying agent and I loved the after results!

Benefits of Himalayan Salt:
  • Helps draw out toxins from your body
  • Improves air quality (so even putting an open jar next to your bath would be wonderful too)
  • Improves energy 
  • Deep cleanses the skin
What you need:
  • 1 cup of Himalayan Salt (can be found in bulk at your local health food store) 
  • 1 can of coconut milk (only ingredients should be coconut milk & water) 
  • 6-7 drops of lavender essential oil
Directions:
Add all of ingredients listed above to a warm bath.  Hop in, sit back and relax :) 


Fall Skin and Beauty Must-Haves

Monday, September 15, 2014


As a licensed Esthetician I am a firm believer that as the weather changes so should a few of your beauty products and skin treatments.  When the weather is drier and colder your skin will have different needs and in return will respond differently to products you were using in the hotter months.  Below are a few of my favorite beauty and skin products for fall, which is quickly approaching and I can't wait!

1. MyChelle Incredible Pumpkin Peel: This is a current favorite of mine right now.  It smells heavenly and gives your skin the ultimate glow while gently exfoliating the dead skin cells away.  Best when used 2-3 times per week.

2. Benefit Brow Kit: Until a few months ago I never filled in my eyebrows but ever since I have been using this, I can't imagine not ever filling them in again!  I love the super natural look it gives your brows without them looking drawn in or too harsh.

3. MyChelle Pumpkin Renew Cream: Many of you have asked me what I use for my moisturizer and this is it.  It is packed full of incredible ingredients such as acai, pumpkin seed oil, micro-algae, Camu  Camu (which contains the highest documented quantity of natural vitamin C on Earth) and more.  It leaves my skin looking and feeling hydrated without ever making me feel oily or breaking me out.

4. Sephora Formula X Nail Polish:  Have you tried this brand yet?  I am obsessed! It is by far the best nail polish that I have ever used.  It makes your nails look like you are wearing gel and it stays on for days!  I'm currently all about plums and grays.

5. Josie Maran Coconut Watercolor Eyeshadow: I am loving metallics for fall and this creamy based eyeshadow is so so good.  It hydrates your eyelids and the color stays on effortlessly for hours.

6. Clarisonic Mia: I am a big fan of this!  I always recommend holding off on too much exfoliation or peels during the summer but once the weather starts to cool and you are able to avoid the sun a little more it's the perfect time to incorporate this gentle and amazing exfoliating system into your beauty routine.  It creates noticeably healthy skin and helps reduce the appearance of pore size.

7. Egyptian Magic: This wonderful all natural and all purpose cream is my go-to product once fall hits and my skin becomes dry.  You can use this on the bottom of your feet to relieve cracked heels, as a hair masque, wound healer, a shaving balm and so much more.

Things That Make Me Say Yeay

Friday, September 12, 2014


Amazing rock art done by a rad hippie dude at the beach last weekend.  How is this even possible?  I can only imagine all of the patience this must have taken.  So impressive. 


Our first zuchinni from our garden.  I was so pumped on this and it was huge!  I plan on making these zucchini brownies with it!


My very determined little bike rider.  He would do this all day every day if he could. 


Target dollar aisle finds.  You're welcome.  How awesome is all of this unnecessary stuff?!  I can never leave Target without buying a bunch of crap that I probably don't need but I made a promise to myself that I will indeed use all of this :)


Backyard vibes.  We have been spending so much time in our backyard this summer and I have loved it.

Have a wonderful weekend! 

DIY $1 Modern Kids Art

Wednesday, September 10, 2014


You know what I loveeeee?! Well, besides adding extra letters to words to emphasize their importance, I love art that is cheap that does not look cheap.  I was cleaning out my art cabinet yesterday when I discovered all of these unopened packages of die-cut letters that I had purchased from the dollar store a while back for no reason at all (typical).  For those of you who are thinking, "What in the heck are die-cut letters?" they are the letters that come in sheets that are ready for you to just poke them out and use them however you want.

I love how simple and modern the letters are and realized they would be perfect when incorporated into an art print.  This seriously is the easiest project and since I already had the frame, card stock paper and glue I am going to call this the $1 project because that is all that is cost me!  This would look perfect in a children's room or anywhere for that matter.

What you will need:
  • A frame
  • Heavy drawing paper
  • Die- cut number/letters, which can be found at any dollar store
  • Glue stick 
Directions:
  1. Punch out the letters or numbers that you want to use for your art print. 
  2. Arrange them onto the heavy drawing paper in the design that you wish.
  3. Glue your die-cuts to your paper.
  4. Place the finished product into a frame and hang wherever you wish!


Pretty easy right?!  The options of phrases, numbers and letters are endless so have fun!

Pumpkin Streusel Muffins (Dairy and Flour Free)

Monday, September 8, 2014

You know what's awesome? Well, besides these muffins, which will literally blow your socks off and make you do a happy dance for fall...best friends.  Best friends are awesome.  If you are lucky enough to have one then you know what I am talking about. They are the friend who is happy for you when you are doing good and there for you when you are not.  You could tell them anything and they would not judge or tell a single soul.  The friend who makes you laugh and you could talk to for hours about whatever. Mine is the best!  Her name is Alison.

We met in 9th grade.  We had an away volleyball game that day and I had gotten dropped off to school late.  By the time I arrived the bus was already full and everyone on my team had taken their seats.  The only seat left was next to Alison, the crazy goth girl who loved Pantera, wore super tall Dr. Martens, hated the sun, had patches of bands I had never heard of sewn all over her backpack and only dated guys who were in bands.  I was a little preppy, shopped at Abercrombie & Fitch, loved Britney Spears and only hung out with boys who played sports. Oh I sound so annoying ha!  I took my seat next to her.  She asked me if I wanted to get pumped up for our game and placed her giant black headphones on my ears.  Some crazy heavy metal was blasting and for a million dollars I could not have told you who it was.  She asked what I was listening to and I told her Britney Spears and we both started cracking up.  We could not have been any different but from that bus ride forward we were pretty much inseparable.  Fast forward 15 years and Alison is still the first person I call when I have anything of importance to say.  She is now basically a hippie, loves the sun, spends her days at the beach and lives in Hawaii with her adorable little family...oh and she is one hell of a baker.  So thanks to Alison this recipe was made possible since she likes to do wonderful things like invent treats and then sends me the recipe so I can share.

What you will need:
  • 1/2 cup of coconut flour 
  • 1/2 cup of tapioca flour
  • 1 tsp of baking soda
  • 2 tbs of pumpkin pie spice
  • 1/2 cup of coconut oil
  • 1/2 cup of pumpkin puree 
  • 1/2 cup of coconut sugar
  • 1/4 cup of honey 
  • 4 eggs 
  • 1 tsp of vanilla
What you need for the streusel topping:
  • 1 tbs of cinnamon
  • 3 tbs of coconut sugar
  • 1 tbs of coconut oil
Directions:
  1. Preheat the oven to 350 degrees. 
  2. Mix together the dry ingredients and then add in the wet ingredients.  Mix until everything is completely blended together. 
  3. Place baking cups into muffin tray. Scoop enough muffin batter to fill each muffin tin about 2/3 of the way full.
  4. In a separate small bowl mix together the topping ingredients until you have a nice moist crumbly consistency. 
  5. Sprinkle an even amount of crumble topping on each muffin.
  6. Bake for 20 minutes.
  7. Enjoy! And try not to eat all of the muffins yourself because you will want to :)


Ian (that's the hubs if you are new here) said these were his favorite muffins to date and my boys pretty much inhaled them.  Make them!


Things That Make Me Say Yeay

Friday, September 5, 2014


A Sunday baseball game with my family.  We ate the best hotdogs, had old fashioned ice cream sandwiches (picture evidence here) and a whole bunch of other stuff that required extra insulin ;)  It was perfect.


Fresh Lavender from our backyard.  I plan on drying it out and doing something awesome with it.  Not sure what just yet...


A recent double date night at our favorite spot where we had the most delicious black mussels.  They were seasoned to perfection.


A summer afternoon of football playing and cousin bonding.  All of Max's cousins live close and it is so wonderful that they get to all grow up with each other.  They have so much fun!


Book shelf styling has been a major challenge for me.  First world problems I know...ha! But I did recently find these book ends that I love and I don't feel the urge to return them at all :)

Have a great weekend!

DIY Vanilla Cream Dry Oil Body Spray (Non-Greasy)

Wednesday, September 3, 2014


With summer coming to a close you be realizing it is time for some serious moisture repair for your skin.  The problems with most store bought lotions is that they tend to leave your skin feeling like it is sweating (or maybe that's just me ha) and super greasy.  I hate when I go running and then I feel like my lotion is literally sliding off my skin.  Yuck.

I have always loved dry oil sprays but finding one that actually smells good can be challenging.  I recently made my own and not only does it smell amazing but it has been my every day go-to moisturizer for the past couple of weeks and I could not be any happier with the softness and moisture it provides.  If you have never used a dry oil spray before I highly recommend giving this a try!

What you will need:
  • 5 tbs of distilled water (you can find this at any grocery store for super cheap) 
  • 2 tbs of 100% pure vegetable glycerine 
  • 2 tbs of sweet almond oil
  • 1/2 tsp of coconut oil
  • 10-12 drops of vanilla essential oil 
Directions:
  1. Carefully add all of the ingredients to a small (preferably glass) spray bottle.  Empty bottles like the one used above can be found at most specialty health food stores in the vitamin section or you can find them online here
  2. Once the cap is on, shake up the bottle to combine all of the ingredients. 
  3. Spray onto your skin and rub in just like you would a lotion.  
  4. Keep at room temperature and use within 2-3 weeks. 
  5. Enjoy! 


Your skin will look and feel silky smooth without any greasy residue...and not to mention you will smell like you just walked out of a cupcake bakery.  Who doesn't like that?!  No one that's who.

If you make this please make sure to come back and let me know what you think! 


Related Posts Plugin for WordPress, Blogger...