A Few Pictures...

Thursday, December 26, 2013

I hope you all had a wonderful Christmas! It all goes by so fast doesn't it?  We took our tree down today and it makes me a tiny bit sad to see all the Christmas things go back in the garage.  On the flip side I am SO excited for the new year, which means new goals and a fresh start.  I know I said I was taking a break until the new year but my sweet husband got me a new camera for Christmas and I just couldn't help but snap a few pictures.  So here are some life snippets from the past couple days...


Christmas morning juice bar at Grandpa and Aubi's house.  I loved this and so did my boys.


It was a great Christmas!  The best yet.

Things That Make Me Say Yeay + See You in the New Year!

Thursday, December 19, 2013

Hanging Christmas lights on our new house for the first time.  We all sat outside like the Griswolds and waited until it was dark to turn them on to make sure they worked.  They did :) 

I went to the Pasadena Flea Market for the first time recently and it was amazing.  There were thousands of treasures and if you have a little vision you can find just about anything there.  I absolutely loved these handmade marquee lights.  I think I need to find a place for one in my house asap.   

The perfect sparkly ribbon for present wrapping.  I actually have not wrapped one single present yet but I can't wait to use this when I finally get my act together and get my wrap on.

My husband's awesome aunt gave the boy's this gently used kid's table, which her children recently outgrew.  I gave it a little makeover with some white and black chalkboard paint.  It's the perfect size for Max and Ronin to sit and have craft time while I browse Pinterest ;)

Teaching Max the basics of how to make a criss cross on cookies with a fork.  He felt so proud of his smashed (very smashed) cookies and made sure to tell everyone who ate one that HE made them.

This Christmas season has truly been the best one yet.  I have made it a point to not get too caught up in the hustle and bustle (and stress that can sometimes accompany the holidays) and really try to slow things down and spend quality time with my family.  I will be taking the remainder of the year off from blogging and will be back in the new year with some fresh material and ideas.  I hope you all enjoy the rest of this holiday season with your family. 

Have a very MERRY CHRISTMAS!

xo Lindsay 

Max's Big Boy Room

Tuesday, December 17, 2013


When we moved into our new house, I decided that it was really important to me to make it into a home.  In our previous house I never really felt like the boy's rooms were completely done or the house was decorated how I really wanted.  I did have to have a little self talk and I am fully aware that making your house truly "homey" does take time (and a money tree) but I am loving the process so far.

I recently put up a little sneak peek of Max's big boy room on my Instagram.  Many of you were wondering where certain items in his room were from and basically I get distracted and forget to respond so I decided to post it all here for those who would like to know.

I wanted Max's new big boy room to be somewhat of a blank canvas.  I decided not to do a "theme" and instead let him decide what things he would want on his walls as his likes and interests evolve.  Max is really into Star Wars so the print above his bed was actually the very first piece that I purchased for his room.  He picked it out and I think it is perfect for his little space. 


Room Sources:
  • Star Wars Print: Society6
  • r2d2 Poster: aswegoArts
  • Bedspread: Pottery Barn Teen
  • Cross Pillow: Regans Brain
  • Black & White Blanket: Ikea
  • Bed: Garage sale find that we re-stained 
  • Nightstand: it was my husband's when he was a little boy and we sanded it down and re-stained it to match the bed
  • Metal M- a DIY made from a cardboard letter and metallic paint
  • Globes- thrift finds
  • Pendant Light- Home Depot
  • Dresser- Ikea Hack (DIY here)
  • White Book Shelves- Ikea 
  • Vintage School Desk- my cousin found it on Craigslist and my super talented Aunt painted it and gave it a new life for Max. 
His room is a work in progress and I am still on the hunt for the perfect pieces of fun art to hang on his walls but in the mean time he loves it and that is exactly what I was hoping for.

Christmas Countdown To-Do List

Thursday, December 12, 2013

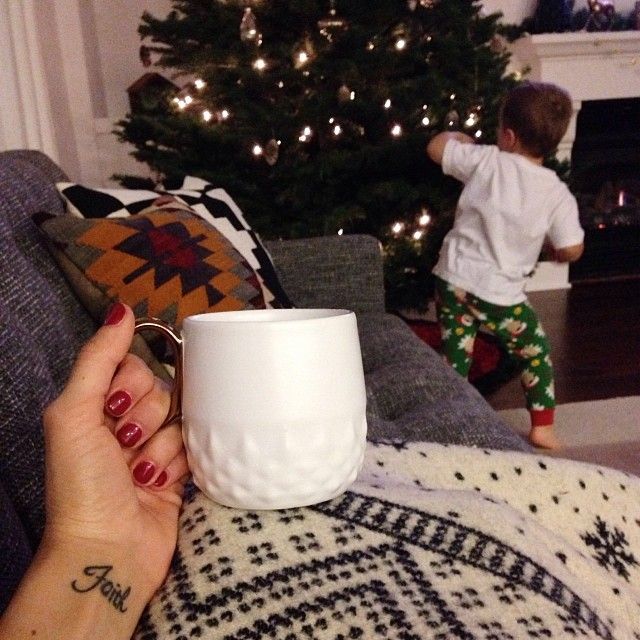
 Instagram photo of Max getting caught stealing more ornaments off our tree.  I found a whole stash in his closet haha!

TWWWWOO weeks till Christmas...said in a man's train conductor voice.  I just shouted that out in my living room and my family looked at me like I'm a big weirdo, which may be accurate.  But yes the Christmas season is in full swing and I want to ENJOY and soak it up because before we know it we will be seeing New Year's Eve pins on Pinterest and people will start talking about spring 2014 clothing trends.

So I have compiled a little list of a few festive things that I plan on doing before Christmas is here.

1. Go see a Christmas light show in our local neighborhood.  There is one not too far from us and when you get in the car you put on the coordinating station that goes with all the lights.  I can't wait to do this and see the boy's faces.

2. Take a trip up to the snow and take the boys sledding.

3. Anonymously give to a family in need.

4. Figure out a delicious meal to make on Christmas Eve.  I need suggestions!

5. Decorate sugar cookies with the boys.

6. Go on an ice skating date with my husband.

7. Watch It's a Wonderful Life and The Christmas Story.  My two favorite Christmas movies.

8. Make a new holiday inspired adult cocktail and make gingerbread houses with the kids.  Okay maybe those two things shouldn't go together but in our house that's usually how we roll.

9. Dress up like Mrs. Claus after the kids go to bed.  Ha ha kidding just seeing if you are paying attention...but I am sure my husband wouldn't mind that ;) 

10. I have ALWAYS wanted to set up a treaure hunt, so this year I want to organize a fun around the house treasure hunt for my husband's main gift.  He will be so annoyed and I will love every minute of it.

Do you have any Christmas time things you love to do?  I would love to hear!


Gingerbread Eggnog Cookies (grain free)

Monday, December 9, 2013


There are a few select flavors that I always look forward to once the Christmas season is officially here.  The top contenders are eggnog and gingerbread.  I seriously can not get enough.  AND I just discovered that my local organic grocery store started carrying dairy free egg nog.  What?! I had no idea this even existed.  I may have done a happy little jig up to the counter because I was so excited about it. 

So let's just cut to the chase and let me introduce you to a cookie recipe that will make you feel like a Christmas party is happening in your mouth.  These cookies are moist, chewy and have the perfect balance between gingerbread and eggnog. 

What you will need:
  • 2 3/4 cups of almond meal
  • 1 tsp of baking powder
  • 1 tsp of cinnamon 
  • 1/2 tsp of ground nutmeg
  • 1/3 cup of melted ghee
  • 1 tsp of vanilla
  • 1 1/4 cup of coconut sugar
  • 1/2 cup of dairy free eggnog (if dairy is not a concern, you can also use regular eggnog)
Directions:
  • Preheat oven to 350 degrees.
  • Combine the almond meal, baking powder, cinnamon and nutmeg in a bowl.
  • Combine the melted ghee, vanilla, coconut sugar and eggnog in a separate bowl.
  • Add the wet ingredients to the dry ingredients and mix well.  
  • Drop tbs size amount of cookie dough onto a parchment lined baking sheet.  The dough will be very sticky and that is normal.
  • Bake for 15 minutes or until the tops are golden brown. *
  • Enjoy! 
*At the seven minute mark I took the cookies out of the oven and used the back of a spoon to slightly flatten them out and then put them right back in the oven.  You do not need to do this but it does make the cookies a little more attractive, which you may or may not care about.  BUT if you want to serve them to friends or take pictures of them like I do, use the spoon :)


You should make these as soon as you can because I think everyone should experience a true Christmas party in their mouth at some point or another.  Also, please come back and let me know what you think if you make these!


Things That Make Me Say Yeay

Friday, December 6, 2013

Ronin and Grandpa sharing a plate on Thanksgiving.  Ronin basically wants nothing to do with me when Grandpa is around but I am perfectly okay with that.  Grandpa is a pretty cool dude. 

Trying out the new Camellia Beauty Oil c/o TATCHA.  I love the added hydration + natural dewy glow it has been giving my skin.

The happiest of sheep at Primal Pastures.  Last week we went on a local farm tour and got to see and learn first hand all about sustainable farming.  It was a great experience.  All of the animals on the Primal Pasture farm are grass fed, free range, hormone/antibiotic free and humanly treated.  Max got to get up close and personal with the sheep and hold a little tiny baby chicken for the first time, which he thought was pretty awesome...despite the fact it pooped on him.  Woopise.

The BEST Paleo Spiced Pumpkin Chocolate Chip Bread from Primal Bake Shop.  They called it crack bread on the farm tour and they could not be more correct.  I may or may not have gotten up in the middle of the night to sneak a little slice while everyone was sleeping...yep.


The cutest little reindeer cookie cutter that I purchased from Amazon for less than a dollar I believe. I am thinkin some cookies need to be made with it asap.

Have a wonderful weekend! We have my husband's work Christmas party tonight and I can't wait to get all fancy, drink wine and have a grand ole kid-less night! 

A Few Family Pictures

Tuesday, December 3, 2013

That time of year has come again where I have to bribe my husband to take family pictures.  No but seriously I have to really pump him up and promise all kinds of things to get him in the picture taking mood haha!  Gotta love him.

Here are a few recent pictures taken by the magical Leslie Houx.  And yes she is magical after I thought we got zero print worthy pictures from our crazy photo session complete with an almost crying husband (kidding sort-of), a temper tantrum throwing 1 year old (I mean COME ON Ronin pictures are fun) and a 3 year old who just wanted to get dirty :)


Thanks again Leslie for capturing our crazy family! If you are in southern California check her out for sure!

DIY Polymer Clay Star Garland

Monday, December 2, 2013

One thing I love about our new house is that we actually have a fireplace mantle! This is exciting since our old house had a mantel-less fireplace, which I always felt was a sad looking sight once Christmas time rolled around each year.  So the fact that I can now do amazing things like hang stockings and garland makes me beyond happy :)

I wanted a somewhat simple garland for the fireplace and something that added a little hint of Christmas cheer without being too loud.  Not sure if that even makes sense but half of the decorating thoughts in my head don't make sense.  This turned out exactly like I visioned (almost never happens) and I love the little sparkle it gives my living room.

 What you will need:
  • 1 large block of white Sculpey polymer clay 
  • Gold glitter
  • Small star cookie cutter (I found mine at Hobby Lobby in the clay section) 
  • String 
  • Clay roller
  • Hot glue gun 
  • Small bowl
Start by conditioning your clay so that is is pliable.  Roll a large chunk of clay into a ball and then use the roller to flatten it out like the picture shown above.


Use the cookie cutter to cut out all of your stars.  I made about 34 stars for my garland.  When you run out of space to cut out additional stars, mash up your clay add a little more to the ball and roll it out again.

Pour a little gold glitter into a bowl and give each star a dunk in the glitter until it is thoroughly coated on each side.


Once all the stars are covered in glitter, place them all on a designated craft baking sheet and bake at 275 degrees for 25 minutes.

Let your stars cool and get your glue gun nice and hot.  Apply a good amount of glue on the back of a star.  Press the string into the hot glue and then quickly (it dries FAST) place another star on top making sure it is laid on top of the other star in the same direction. The string will be sandwiched in between the two stars like shown above.  Press hard to make sure that stars are tightly adhered to the string.


Evenly space your stars along the string.

 Hang your garland and you're done! 

Related Posts Plugin for WordPress, Blogger...