Rosemary Shortbread Cookies

Friday, October 28, 2011

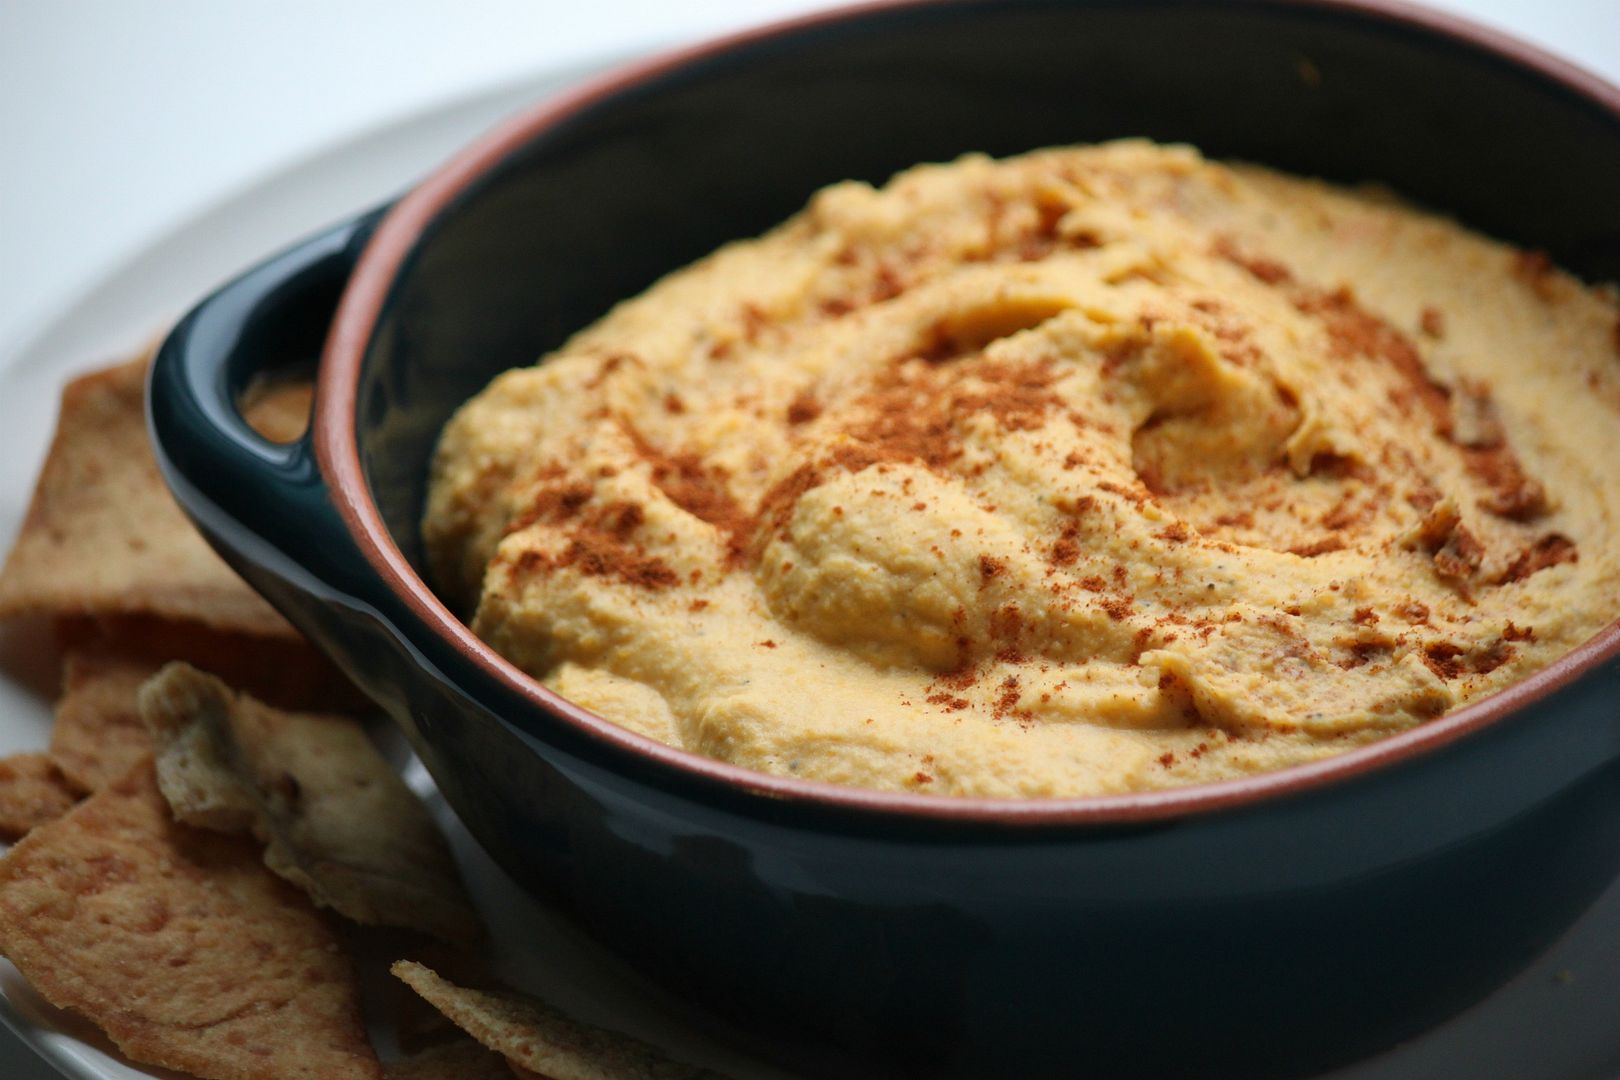
Now that my secret has been shared I can confess that I might be starving my husband. Cooking has come to a fast halt around here because pretty much everything grosses me out. Last night Ian made himself a folded in half bean sandwich with a little side of cucumbers...poor guy.

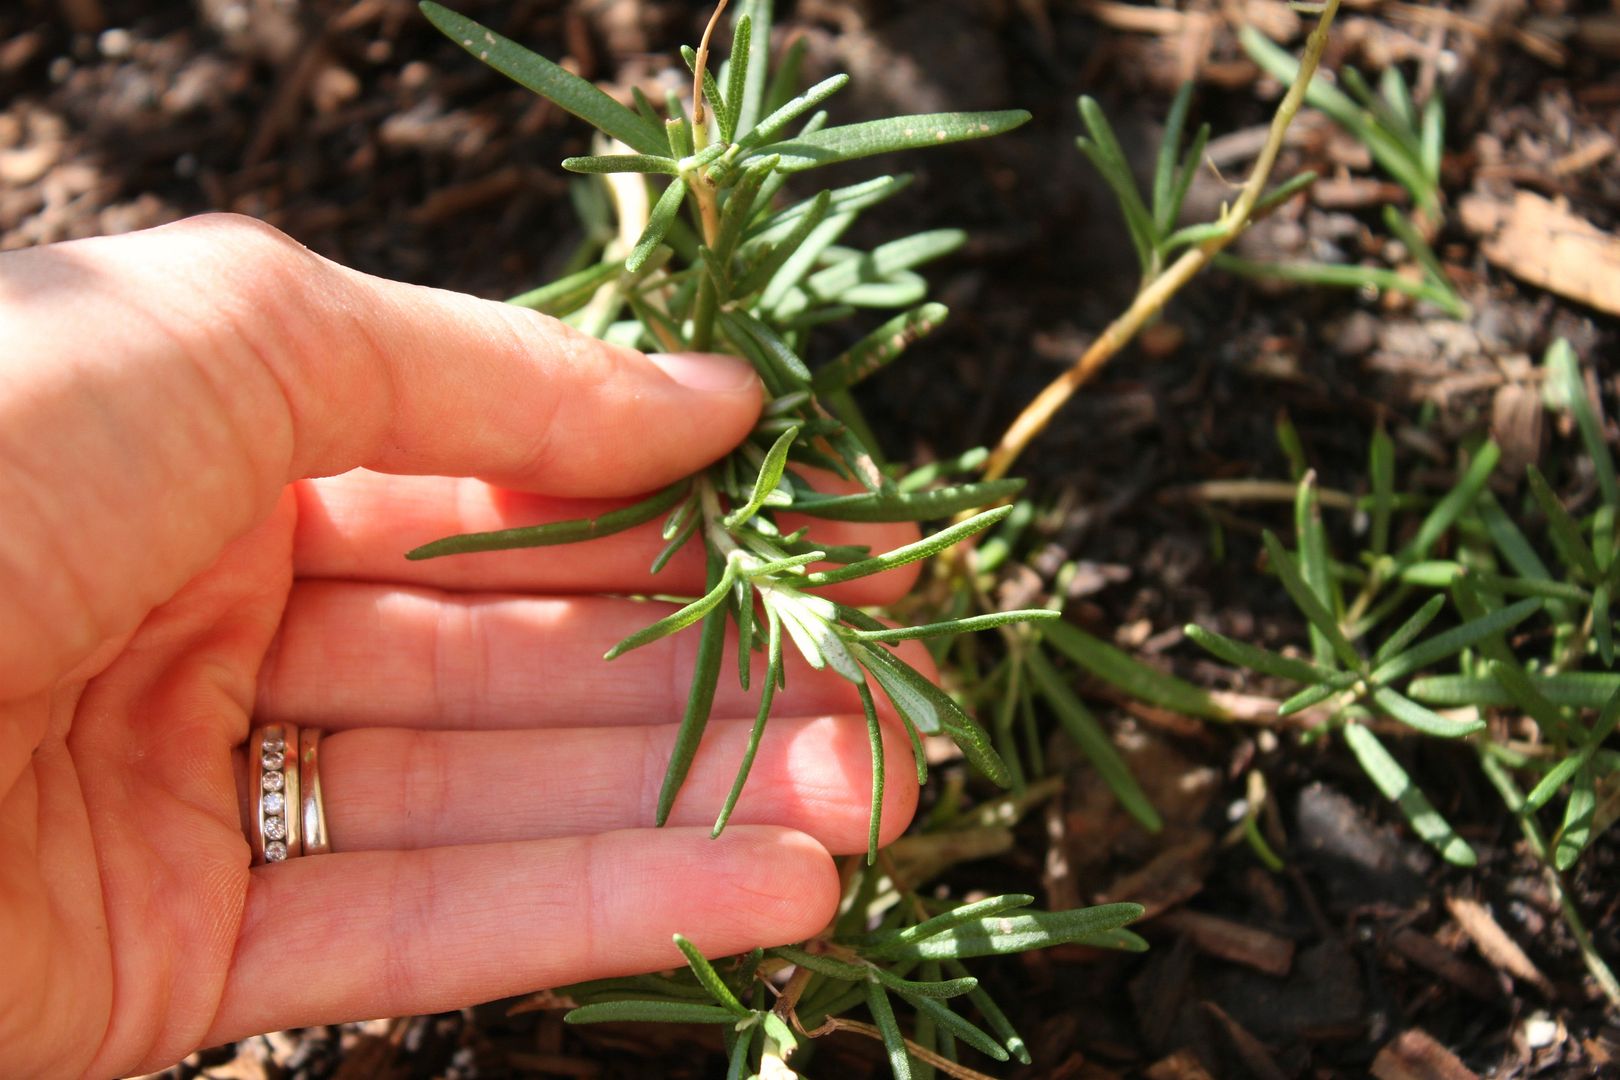
Something I have been in the mood for is cookies. We have a ton of rosemary in our garden so when I found this recipe I knew I wanted to try it...with a few modifications of course.

What you will need:
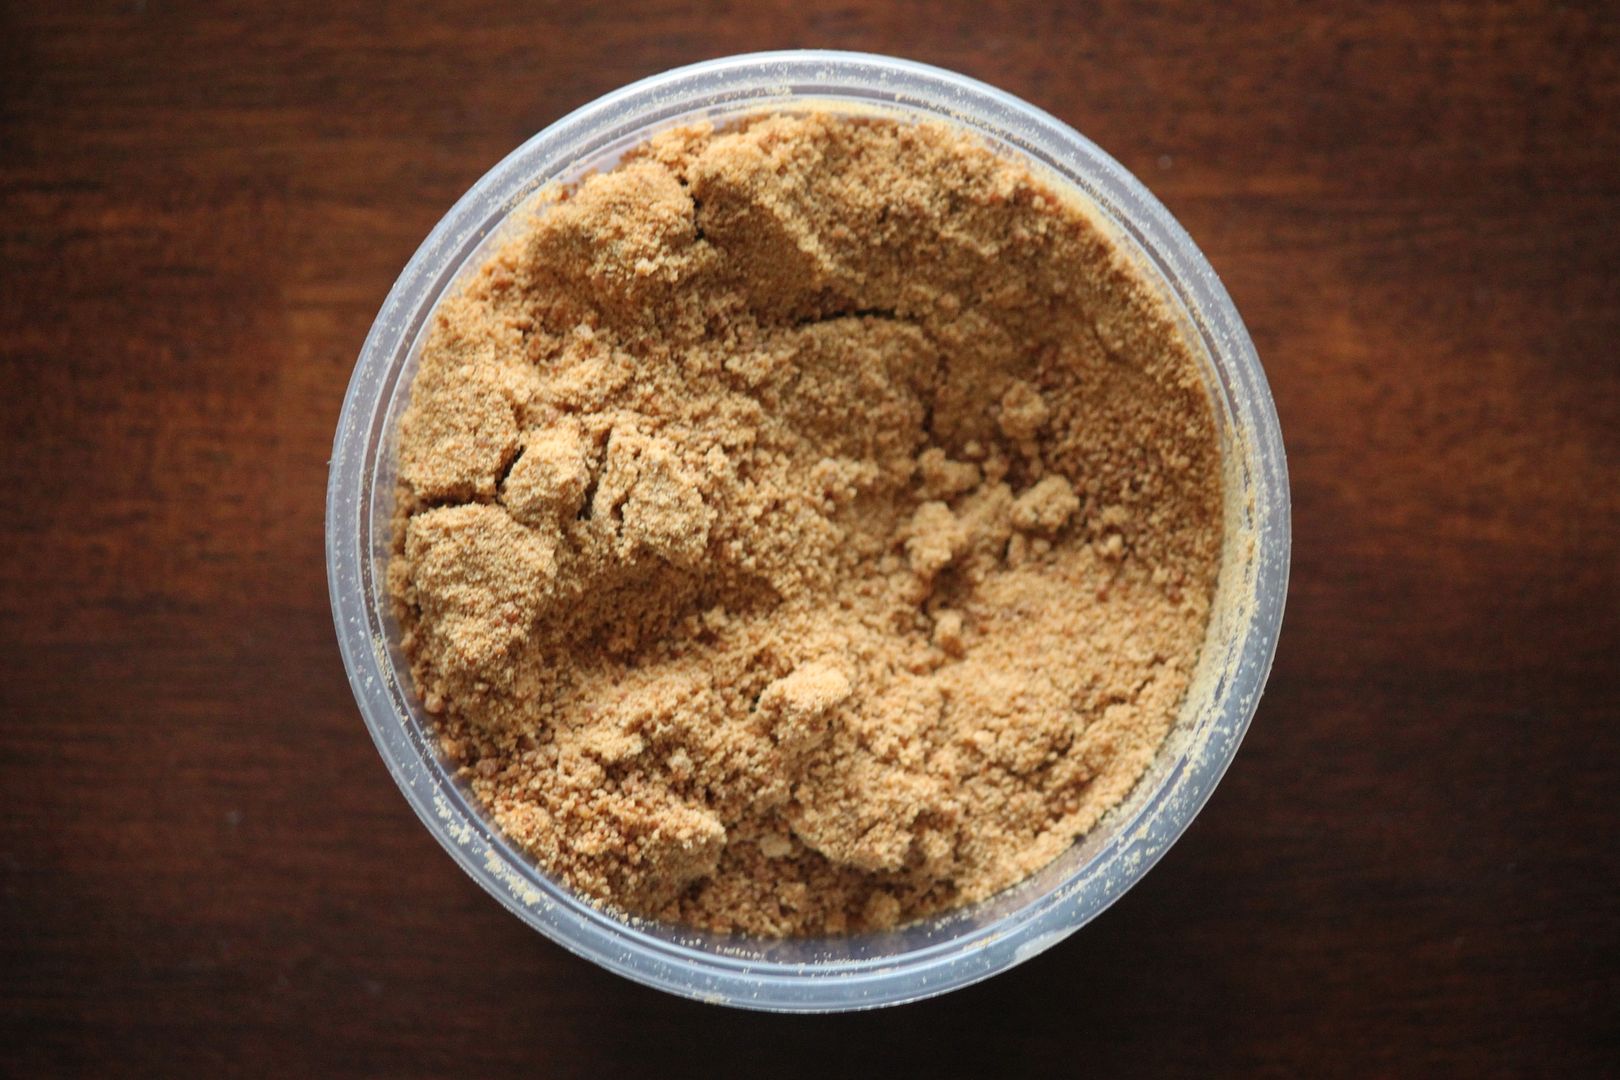
  • 1 1/2 cups of butter
  • 2/3 cups of coconut sugar
  • 2 tablespoons of chopped fresh rosemary
  • 2 3/4 cups of whole wheat flour
  • 1/2 tsp of vanilla
Directions:
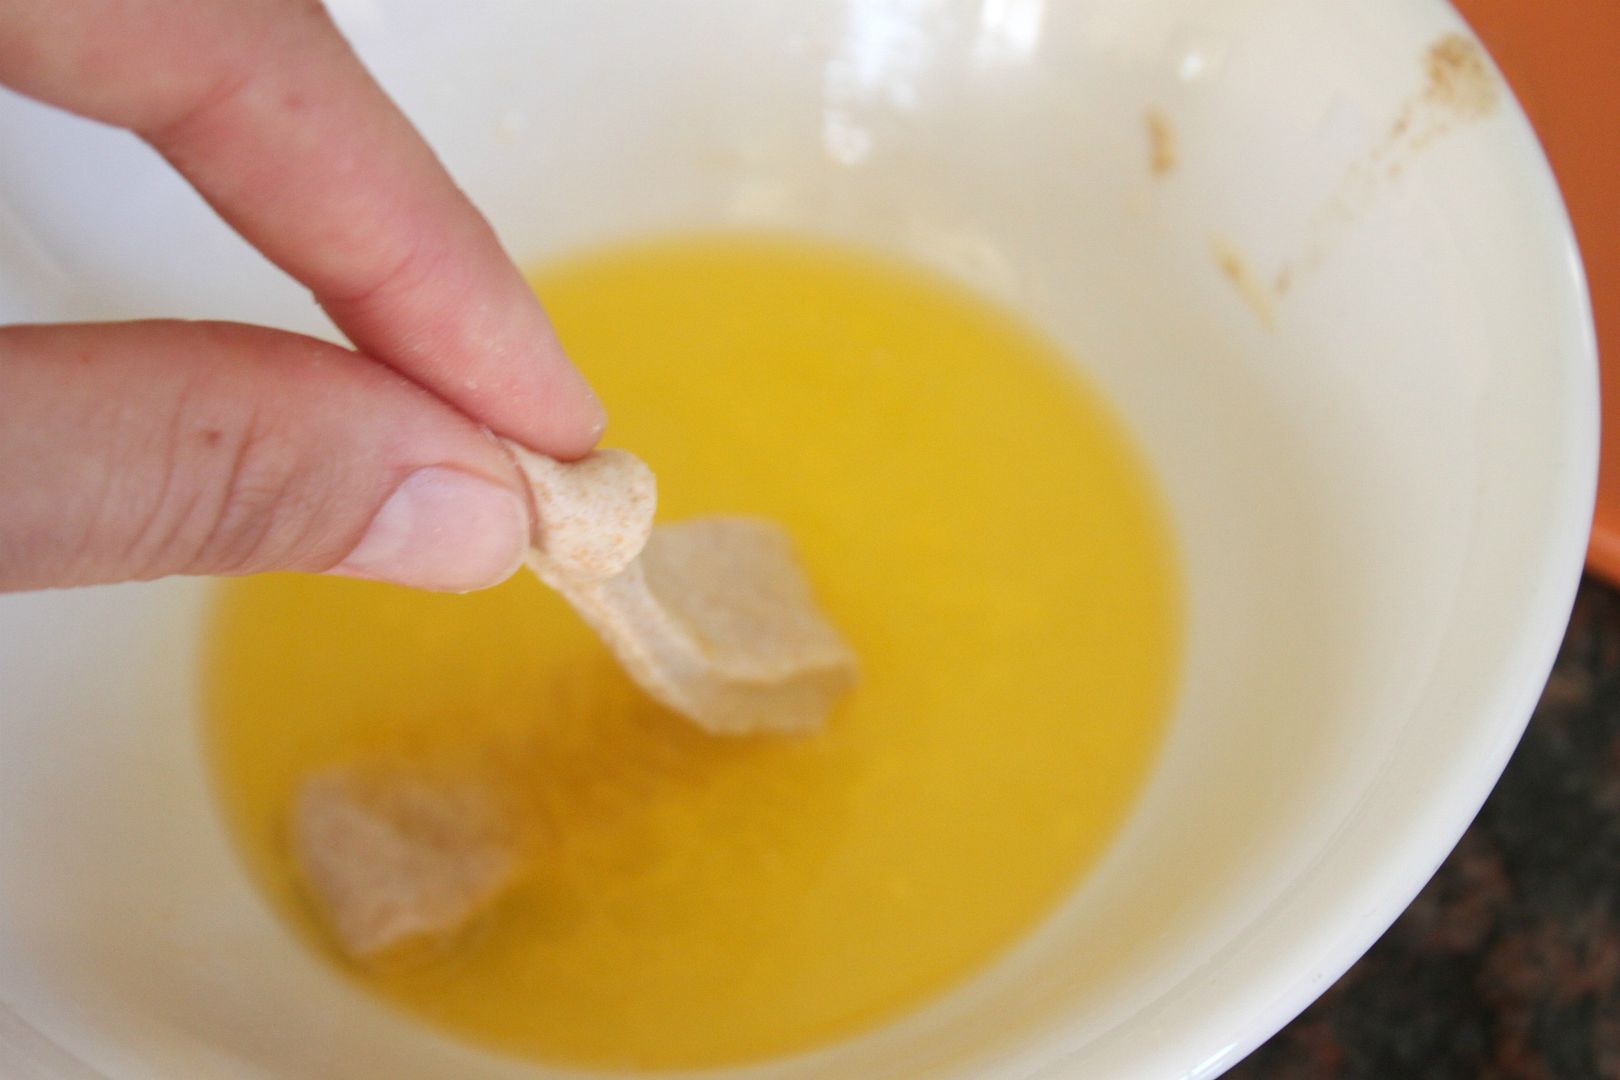
  1. In a medium bowl, mix together the butter (softened), vanilla and sugar. Add the flour and rosemary until it is all blended together. The dough will look somewhat lumpy and this is normal. Cover and place in the refrigerator for one hour.
  2. Preheat the oven to 375 degrees. Line a cookie sheet with parchment paper.
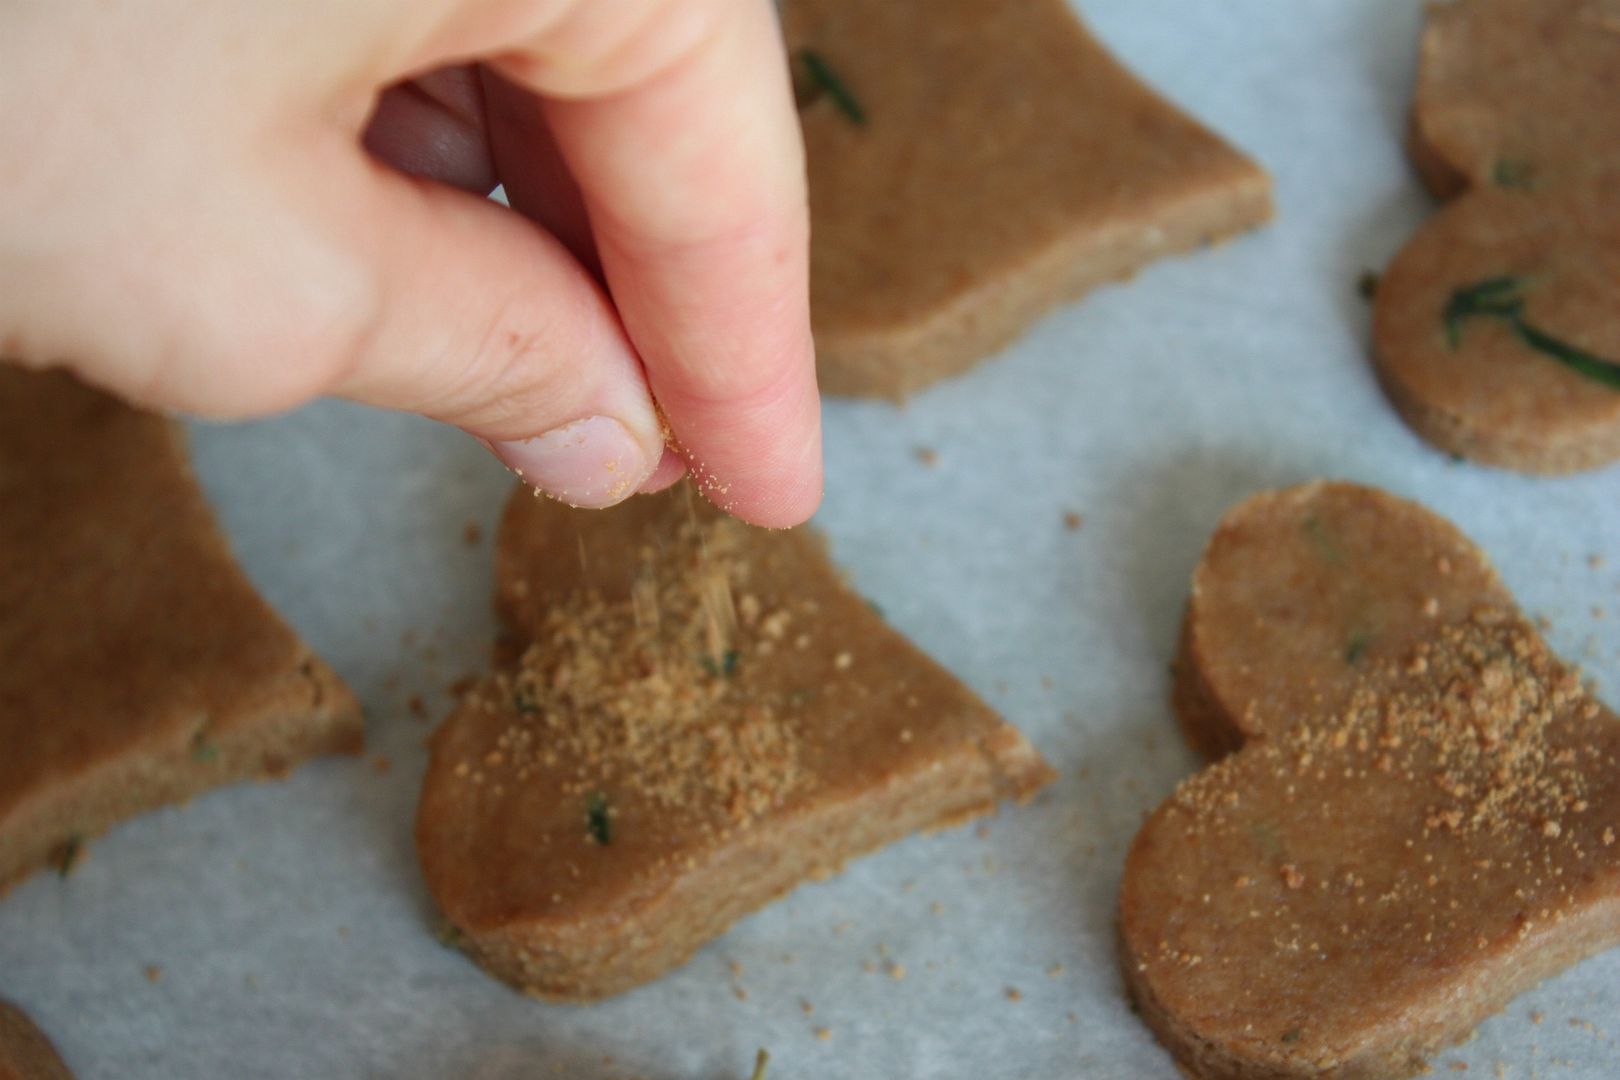
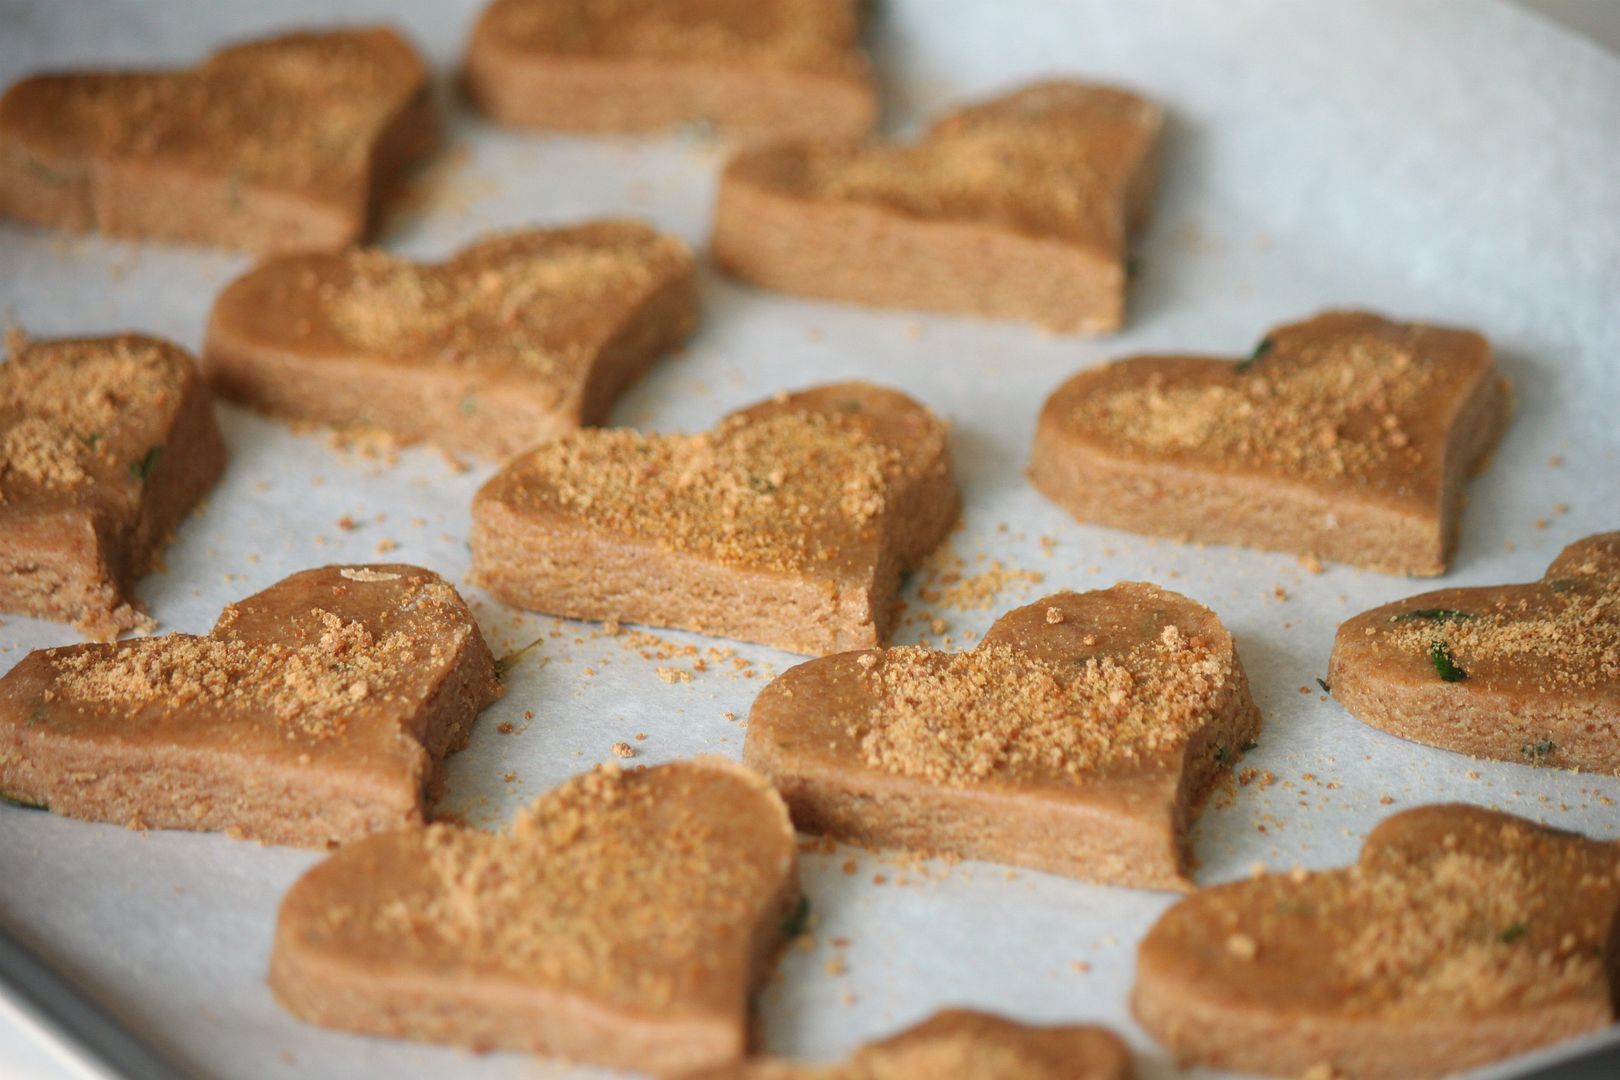
  3. Lightly flour your work surface and form the cookies however you want. I used a little heart cookie cutter.
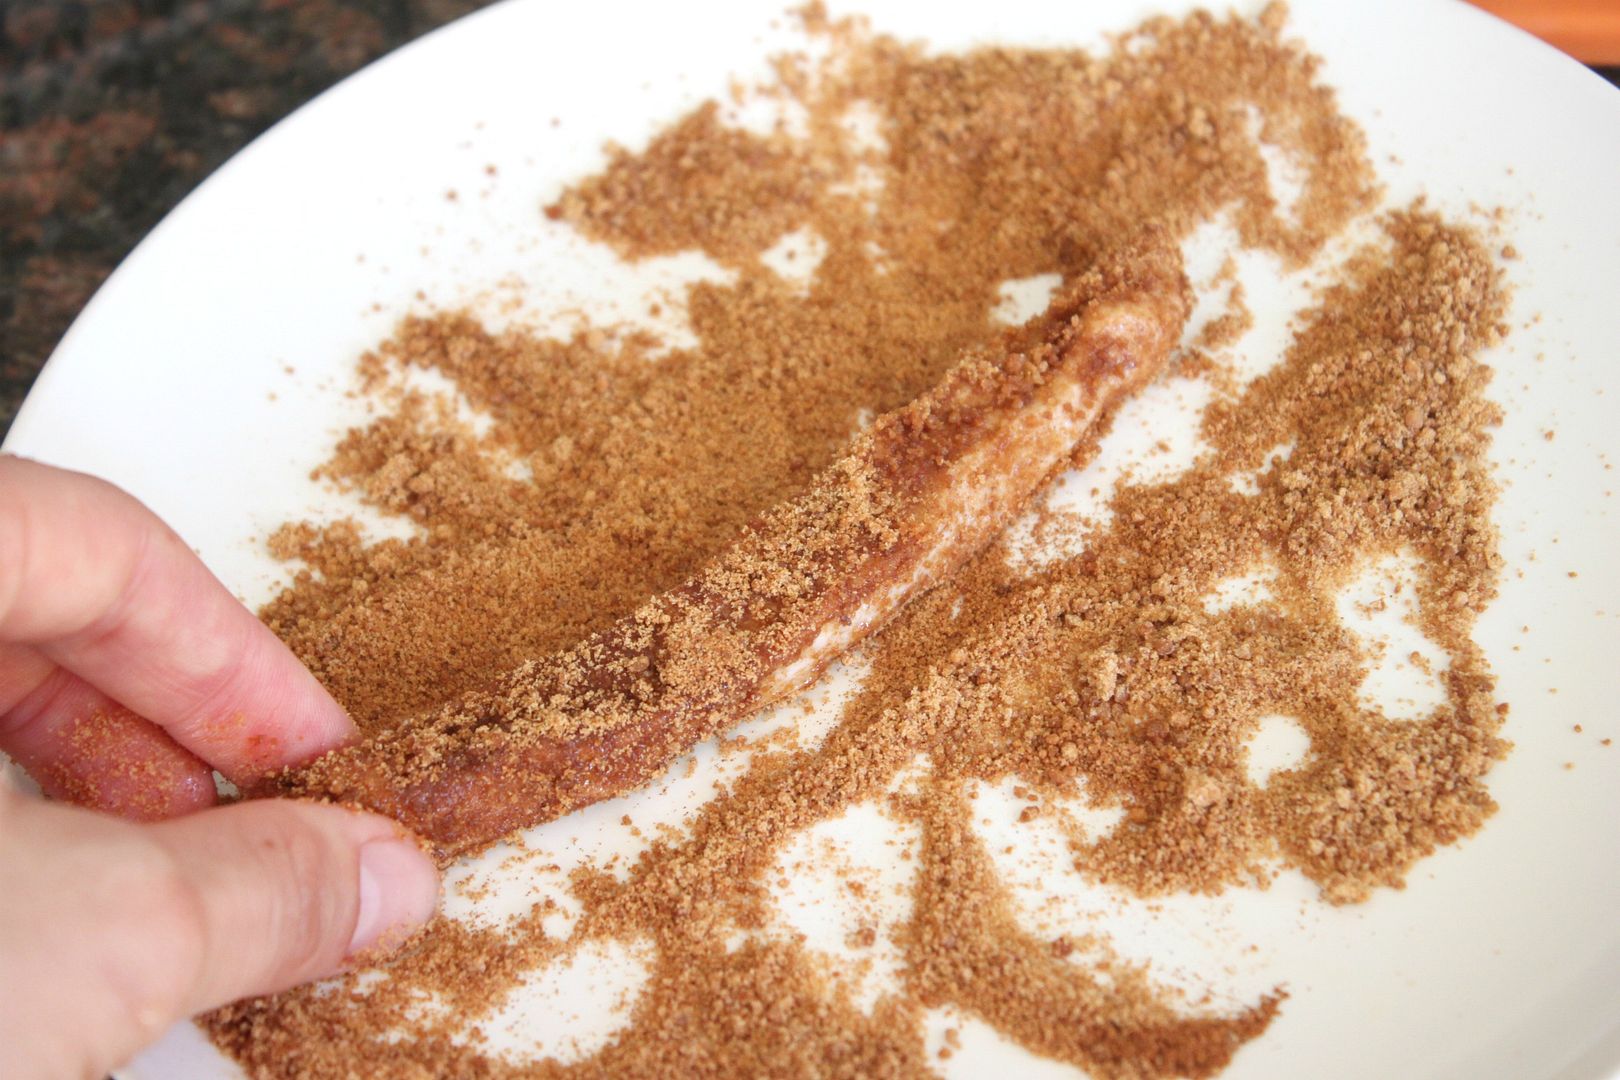
  4. Place cookies on lined cookie sheet and sprinkle a little coconut sugar over the tops.
  5. Bake for 10-12 minutes or until the edges are golden.

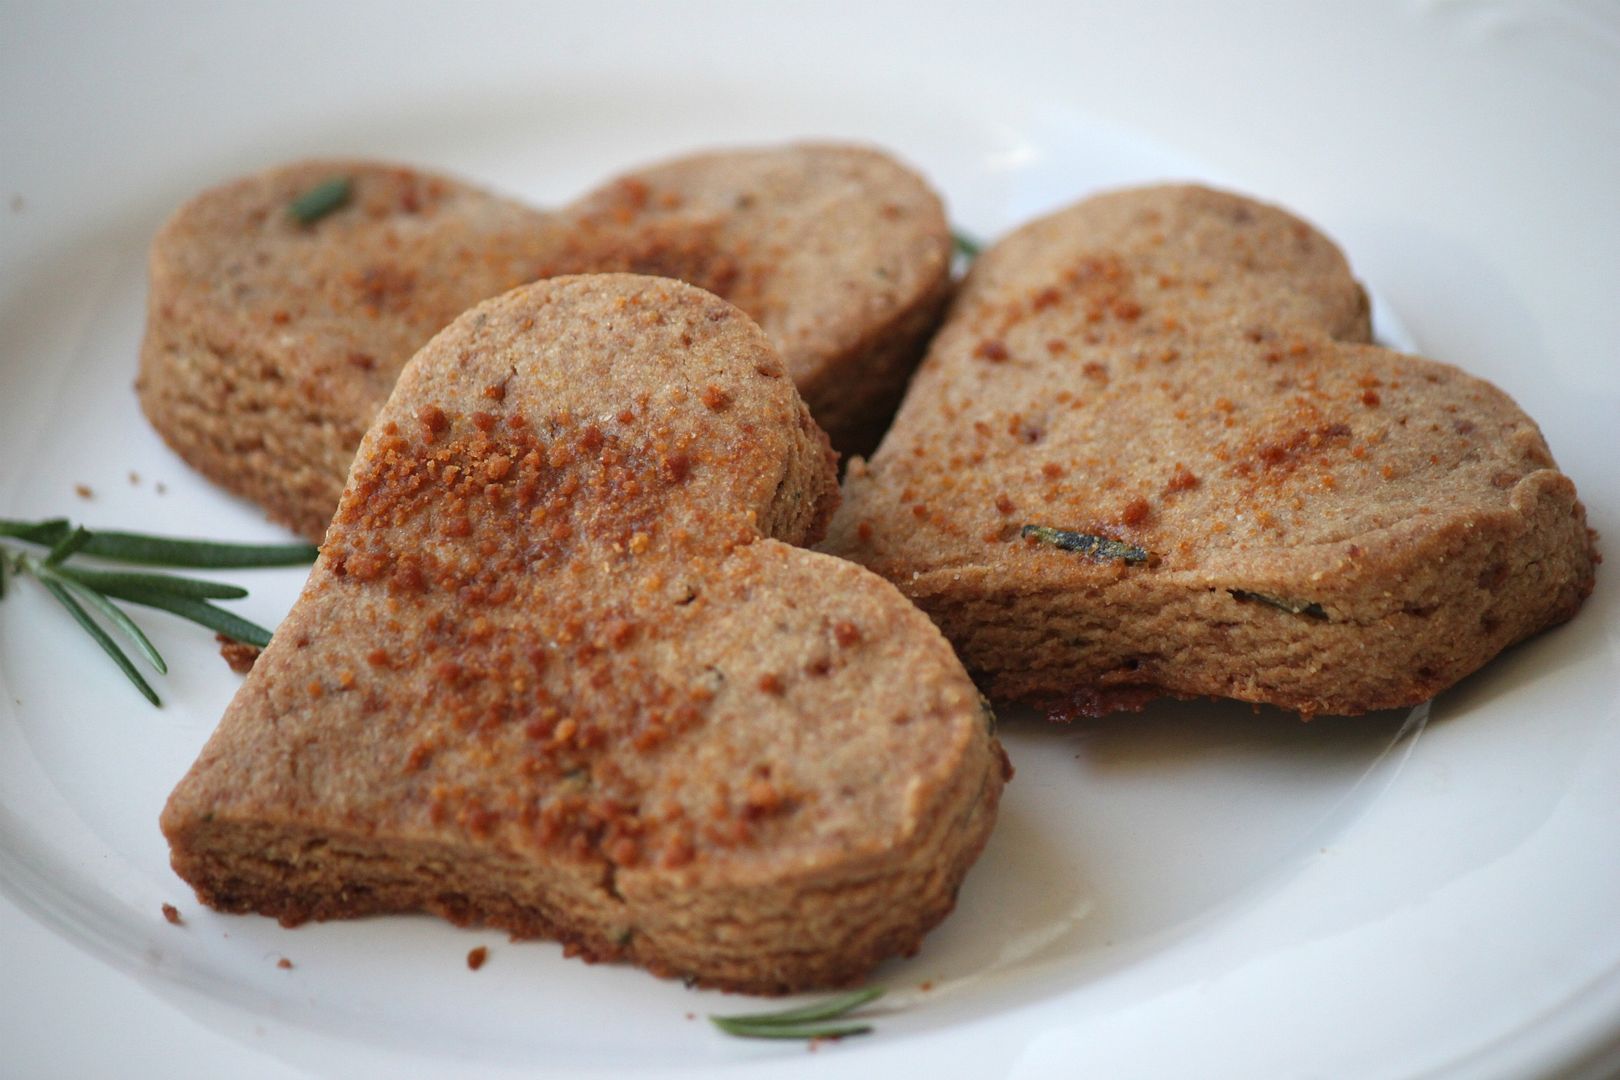
I seriosuly loved these! My husband, who was just happy I actually baked something said they reminded him of gingerbread cookies. That's positive right? He also said "next time" I should slice them really thin and place a little bit of icing in between two cookies like a cookie sandwich...hmm not a bad idea!


Hope you all have a fun and safe Halloween weekend!


On a side note: I had a few people ask where I got my outfit in yesterdays post. I am by no means a fashion blogger but here are the deets:

Tank Top
: Old Navy
Skirt
: Kohls - It was from Lauren Conrad's line
Long gold necklace: Kohls- Lauren Conrad's line as well

Recent Family Pictures + A Little Secret Shared

Thursday, October 27, 2011

A few weekends ago (the same weekend my stroller went flying into the duck pond) we met up the beautiful Brianna Anderson and had some family pictures taken.

Bri is a PHENOMENAL photographer who specializes in maternity and newborn photography...and she just happens to be my cousin! I feel so blessed to have such a wonderful and talented person in my life.

Bri put together the adorable video below...and there is a special little message at the end so make sure you watch it all the way through ;)


Thank you Bri for the beautiful family photos!

To see more of Brianna's photography you can check out her blog here!

Coconut Sugar

Wednesday, October 26, 2011


After I posted this recipe last week, I had quite a few people asking about the coconut sugar that I mentioned. So I thought I would do a little post on what exactly it is and how it is much better for you than regular white sugar or any of that crappy artificial stuff.

What is Coconut sugar?
It is a natural sugar that comes from the coconut palm tree. Coconut sugar is nothing new. It has been used as a traditional sweetener for generations in South East Asian countries. It is considered a low-carb sugar (awesome right?!) because it has a lower glycemic (less impact on blood sugar) than regular white sugar. This is a great substitute for people with diabetes. Since I am a type 1 diabetic I was so excited when I discovered this. It also measures out exactly the same as sugar does, so if a recipe calls for one cup of sugar, you would use one cup of coconut sugar.

What does it taste like?
You don't want to bake a delicious batch of cookies only to be disappointed right? Coconut sugar resembles a subtle version of brown sugar with a hint of maple syrup. It is not overpowering like some artificial sweeteners can be. As Goldilocks would say," It is not too sweet, it's not too plain..it is just right." :)

Where can you buy it?
You can find it at your local health food stores as well as Asian grocery stores. You can also buy it online here.

If you are looking for a healthier alternative to cane sugar I highly recommend you give coconut sugar a try!

Giveaway! *Olive Yew Jewels*

Tuesday, October 25, 2011


Today's giveaway is hosted by Olive Yew Jewels

Olive Yew offers handmade gold and silver jewelry, unique rings , bracelets, necklaces and earrings. I just put this initial charm necklace on my Christmas list..so cute!

Angela of Olive Yew is offering one lucky reader a chance win the gold bow necklace shown above! I love love love it!

How you can win:
(leave a separate comment for each)
  • You must be a follower of Delighted Momma
  • Visit Olive Yew Jewels and leave a comment letting me know what you love in her shop!
Extra Entries:
(leave a separate comment for each)
  • Tweet about giveaway. Tag with @ Delighted Momma
  • Mention giveaway on Facebook.
  • Like Olive Yew on Facebook
  • Add Olive Yew to your favorites on Etsy
  • Be creative and mention anywhere else you like! Let me know where you did.


Good luck! The winner will be picked at random and announced next Tuesday.

Skin Care Tip Of The Week *10 Beauty Superfoods*

Monday, October 24, 2011


I have mentioned before that almost everything you do including what you eat, plays a role in how your skin will look and feel. I have listed some amazing skin superfoods that are all beneficial to your health and your skin will thank you for it.


1. Blueberries- loaded with vitamins, minerals and antioxidants. Blueberries prevent aging by neutralizing the free radicals (molecules responsible for aging and tissue damage) in the body. They also provide a boost in the immune system.

2. Turmeric- has been used for years in holistic medicine as as a digestive aid and a wound healer. It is also a natural liver detoxifier and potent natural anti-inflammatory (great for those with acne).

3. Parsley- it is rich in vitamins A and C. It also contains powerful antioxidants that can help slow down the aging of cells. Parsley is also the perfect digestion remedy and can help cleanse the liver of toxins. So don't pass on this often overlooked garnish. Parsley contains three times as much vitamin C as oranges, and twice as much iron as spinach..crazy right!

4. Coconut oil- has anti-microbial, anti-fungal and anti-bacterial functions. Helps with digestion. Excellent source of healthy fats. Applied topically is a great stretch mark prevention oil.

5. Avocado
- contains antioxidants that slow down aging, promotes good heart health, and prevents the growth of cancer cells. The natural oils in avocado also keep your skin looking vibrant and youthful.

6. Tomatoes-contain lycopene, a powerful rejuvenating antioxidant that gives tomatoes their deep red color is known to reduce the risk of prostate, breast, lung and other cancers. Tomatoes also contain a ton of vitamin C and can help skin texture and color. They are also super low in calories..so eat up!

7. Pumpkin Seeds- loaded with essential skin beautifying minerals and antioxidants. Pumpkin seeds are also a great anti-inflammatory. According to WHS pumpkin seeds are also known to boost the immune system and lower cancer risks. The best way to get all the health benefits is to eat them raw.

8. Kale- has tons of vitamin K, A and C. It is also a rich source of minerals including cooper, calcium, iron and magnesium which all play a role in healthy beautiful skin. For more information on kale you can read read this post.

9. Lemon- contains over 200 enzymes which help to detoxify the liver. Lemons are high in vitamin C, which has many healthy skin benefits including maintaining collagen levels and repairing tissue damage.

10. Sardines- you may not be a fan of these...but the health benefits are unbelievable. They are loaded with calcium, vitamin D and B12. A three ounce serving of sardines has as much calcium as a cup of milk. Sardines are also high in omega-3 fatty acids. A diet high in Omega-3 has been shown to inhibit breast, colon and kidney cancer. So you may want to reconsider incorporating these slimy little fishies into your diet. * I like mine with lemon and rosemary :)


If you would like some more info on Superfoods here are a few great resources:

Dr. Mercolas Top 7 Anti-Aging Foods


Worlds Healthiest Foods

Benefits of Parsley

Things That Make Me Say Yeay

Friday, October 21, 2011

Baked pumpkin seeds. Mmm!

I have this amazing Williams Sonoma cookbook in my kitchen that is used for "decoration" purposes. I have never actually looked through it...until the other day. The soup section was impressive and I am so in the mood for this Tuscan Tomato Soup recipe that I found. By the way, am I the only person who thought Williams Sonoma was a famous Chef who opened up the William Sonoma stores? Haha most likely I am alone on this one.

Josie Maran 100% Pure Argan Oil. This stuff is absolutely amazing.

Loose leaf tea is my favorite. There is this adorable little shop by my house that has the best teas I have ever tasted. I always order coconut banana and it is delicious! Their motto is, "Sniff, Select, Sample."

Enjoying some pumpkin pie frozen yogurt.


Happy Friday! Any fun plans?

A Funny Picture + iPhone Case Winners

Thursday, October 20, 2011


Sometimes I have these ideas in my head that don't always pan out as planned. Take our latest pumpkin patch adventure for example...

In my head it was going to be chilly and I would sip on my (extra) hot mocha while we happily browsed around looking for the perfect pumpkin. OH and in my head we would take a bunch of cute family pictures, including ones of Max taking his first pony ride. You would have thought after these pictures I learned my lesson and just hired a a professional photographer to follow us around snapping the perfect candid shots. Hey I can dream.

Well it was grossly hot and the boots and scarf that I wore made me feel like I was sitting in a sauna with snow gear on.

Max was cranky and tired.

My extra hot mocha made me wig out and I felt like I was having a mini panic attack. For reals! I was seeing little white spots and thought I was losing my vision for a brief moment.

The line for the pony ride was pretty much wrapped around the pumpkin patch. NO thank you.

We did not get ONE family picture ha!

How was your pumpkin patch experience? Was it full of smiles, fresh popcorn and perfect family photos? Well good for you if was. I want a re-do!


The three winners of the Society6 iPhone cases are:

  1. Ami @ The Smallest Happiest Things
  2. Anna Elder
  3. Jenny Taylor

Congrats ladies! Please e-mail me at lindsay.kujawa@yahoo.com with your shipping address and the iPhone case that you would like.

Thank you to all who participated!

Baked Cinnamon Twists

Wednesday, October 19, 2011

If I could eat pastries coated with cinnamon and sugar on a daily basis (and my butt remained unaffected by the overload of carbs) I would. BUT I am too vain and type 1 diabetic so this is not possible.

This was one of those weeks where I NEEDED a little sweet treat in my life. I was at the mall on Monday and I almost stopped at that amazing Wetzel Pretzel stand. They had these gooey melted cinnamon sticks that were calling my name. I resisted. I could not stop thinking about them and was determined to make my own version. I found a recipe here and put my own butt friendly twist on it.

What you will need:

  • 1 package of ready made whole wheat dough. I got mine at Trader Joes.
  • 1/2 cup of organic coconut sugar. Coconut sugar is a delicious alternative to regular sugar because it is low-glycemic and it wont cause that energy crash that you get from ordinary sugar.
  • 1/4 cup of melted butter
  • 2 teaspoons of cinnamon.
Directions:
  1. Preheat oven to 350 degrees.
  2. Roll out the dough into a long rectangle.
  3. Slice the dough into long strips
  4. Place each strip into the butter.
  5. Place each butter coated strip onto the plate with the cinnamon and sugar. Roll it around until in is evenly coated.
  6. Twist each end of the stripes in opposite directions.
  7. Place on a greased baking sheet and bake for 15-18 minutes.
So whats the status of these baked cinnamon twists as of now? They are gone. Every last one.

Skin Care Tip Of The Week *DIY Pumpkin Enzyme Mask*

Monday, October 17, 2011

Once fall hits the Pumpkin Facial (with a pumpkin mask) is one of my most popular treatments. Not only does it smell delicious but you leave with an instant radiant glow.

Not everyone has the time or budget to fit in a professional pumpkin mask treatment so I am going to show you how you can make your own right at home.

The benefits of a pumpkin mask:

  • High in Vitamin A (great for acne and skin healing)
  • High in Vitamin C (great for skin brightening)
  • Helps naturally remove dead skin cells
  • Hydrating
What you will need:
  • 1/4 cup of organic pumpkin puree. I used a small pumpkin that I cut into slices, removed the seeds and microwaved it for 10 minutes.
  • 1/2 tablespoon of raw organic honey (a natural bacteria fighter)
  • 1/2 tablespoon of organic non GMO soy milk (helps increase elasticity of your skin)
Directions:
  1. Mix all the ingredients together
  2. Apply the mask evenly all over your face, avoiding your eye area.
  3. Leave on for 15 minutes and then remove with a warm washcloth.
  4. Follow up with a moisturizer.
*If you have acne or are acne prone you can add a tiny bit of raw apple cider vinegar into the mask.


Your skin will feel softer and smoother as natural pumpkin enzymes treat and nourish your skin.


Things That Make Me Say Yeay

Friday, October 14, 2011


Have you entered the iPhone case giveaway yet? Enter here!


A single dandelion in the middle of our grass. Even though dandelions are considered weeds..they are still my favorite.

Michaels was having a huge sale on polymer clay so I stocked up. There will be lots of homemade gifts this year for Christmas!

Roasted seaweed crisps! Wait wait before you shout, "EW!" I am telling you they are soo good! I have been having a major salt craving and these do they trick.

We (Ian) finally got around to painting our room. We chose a super light gray and I'm lovin it! I am a great supervisor by the way.

Nothing makes him happier than the park. We cant even say the word "park" unless we are actually going...if not, total meltdown.


Hope you all have a great weekend! Any fun plans?

We are headed to an awesome little pumpkin patch in search of a perfectly fat pumpkin.

**Giveaway** iPhone Cases -CLOSED-

Thursday, October 13, 2011


Today's AWESOME giveaway is hosted by Society6. Society6 is created by thousands of artists from around the world. When you purchase a product from Society6 they produce it using only the highest quality materials, and ship it to you on behalf of the artist . It really is an amazing concept.

I spent a good hour browsing their site the first time I discovered it. Not only do they sell unique one of a kind iPhone cases but they also carry fine art prints, T-shirts, hoodies,
laptop and iPad skins!

Society6 is so generous and they are giving away 3 iPhone cases! Soo that means there will be three lucky winners!


How you can win a new iPhone case:
(leave a separate comment for each)
  • You must be a follower of Delighted Momma
  • Visit Society6 and leave a comment telling me which iPhone case you would like to win!
Additional Entries
(leave a separate comment for each)
  • Tweet about giveaway. Tag with @Delightedmomma
  • Mention giveaway on Facebook


Good luck! Three winners will be chosen at random and announced next week.

DIY Glitter Bow Ring

Tuesday, October 11, 2011

As of lately I have had a mini obsession with bows. I think they are so feminine and fun to wear. I wanted to create a bow ring made purely of polymer clay. Plus... I think it was time to switch it up from the bangle craze that I have been on.

This does take a little bit of patience (which I don't have) so don't get frustrated if you have to mash up your creation a few times before you get it the way you like.

What you will need:
  • Razor Blade
  • A roller of some kind. I purchased mine at Michaels in the clay aisle.
  • Polymer clay
  • Glitter.
Condition the clay with your hands to soften it up. Use the roller to flatten out the piece of clay.

Using the razor blade, slice a piece that is about 1 1/2 inches long. Take the two ends and fold them into the center.

For the middle part of the bow, slice another small piece that wraps around the bow and gently cinch it together in the middle to make your bow flare out a bit.

For the actual ring you need to measure your finger first to determine the size you would like to make it. Take a small piece of clay and roll it into a skinny tube. Slice off where you want to connect the two ends. Connect the two ends by gently mashing (maybe fusing is a better word) them together. Use your finger to roll out any unevenness.

Place the bow on top of the ring where you connected the two ends. Don't worry about fingerprints or minor imperfections. This will all be covered up by the glitter.

Sprinkle glitter all over your ring. The fun part :)

Place your ring on a baking sheet and bake at 275 degrees for 22 minutes.

And there you have it!

On a side note: I always thought it was so weird whenever I heard someone reference a hand model..but I actually wish I had a hand model on hand (no pun intended). Hand modeling is no joke and I literally had to take about 40 pictures until I was semi-satisfied that my hand did not look gigantic, manly and hairy.

Skin Care Tip Of The Week *give products time*

Monday, October 10, 2011

Are you constantly switching up your skincare routine because you feel like you are not getting results? How long do you use a product before you ditch it?

So many times I have heard clients say, "I have tried everything and nothing works!" I always ask how long they tried the products for and the answer is usually..." A couple of weeks".

The reality is you need to give products (especially those for skin lightening and acne) time.

Changing your skincare routine too frequently can not only make your skin irritated but it can also cause new problems because your skin is getting introduced to too many different ingredients.

Give new products at least 4-6 weeks before switching to something else. I know this seems like a long time when you want immediate results but it takes 4-6 weeks for your skin cells to turnover (exfoliate). At the end of this time period you will be able to get a much better idea if a product is working or not.


On a side unrelated note:
I am total dork and yesterday morning my stroller (baby was not inside) iPhone and car keys went flying into the duck pond. Long story...but I have learned through this big ole mess to back up your phone and DON'T keep every last important piece of information all in one place. Oh and USE those little brake stoppers on the stroller that is what they are there for DUH. Bummer. I am off to Verizon to see if I have phone insurance.

Things That Make Me Say Yeay

Friday, October 7, 2011

Adding rosemary to our little herb garden. Something (I have no clue what) has eaten all of my basil...how RUDE!

Skeleton socks.

It rained! The cooler weather is finally making it feel like fall. Time for jeggings, sweaters, boots, scarves, fuzzy socks ahhh I am getting so excited just thinking about it all!

Rosebud Salve. I think this stuff has been around forever and its the best treatment for dry cuticles..and a great lip moisturizer. LOVE it.

A new pair of brown slouchy boots.

On a side note: This weekend we are getting some family pictures taken by this amazing photographer, who is also my favorite cousin ;)

Hope you all have a wonderful weekend!


Finding Balance

Thursday, October 6, 2011


{source}

Sometimes I feel like an elephant trying to balance on a beach ball. Finding balance in life is not always easy. I tend to get super overwhelmed if I don't get a million things done that I should have.

I have said before how I hate lists...but maybe I should give in and get more organized. Its a tricky business doing the things that you need to do rather than doing the things you want to do. Need= call clients and schedule treatments. Want= dilly dally around on Pinterest and waste time ha!

How do you balance quality husband or boyfriend (hopefully you don't have both) time, family, kids, friends (important too) work, personal time for yourself...and all the other little slices of life?

On a side note: Thank God for wine..I will be having a glass or two tonight. I just picked up a bottle of Cabernet called "Twisted." The label is what got me...ahh I am such a sucker for a cool wine bottle label.

Guest Post *Creative Index*

When I first discovered Jessica's blog I knew I would be hooked. Jessica features some of the most amazing artists, jewelry designers, recipes and more! If you are feeling a little uninspired or need a little boost of creativity I highly recommend you pop on over!


Photobucket
Hello there! I'm Jessica and I blog over at Creative Index, where I keep track of the lovely & inspiring things I find here and there, and I throw in some personal thoughts from time to time too. I have a love for design, iced coffee, magazines, anything vintage, yummy food, a great DIY and all things shiny & lovely.

I am so honored that Lindsay asked me to hang out here today.... and I hope you enjoy my little DIY... It's super easy! Promise!

Photobucket
images via here & here

I really love the idea of having a menu in the kitchen. And as much as I love the chalkboard ones, I've come to realize that since we rent (and the lack of wall space), my chalkboard dreams will have to wait. So I put together this super easy wipe-off version which will help save time, money and stress when planning out our weekly dinners.

I whipped up these cute little menu designs, printed them out and stuck them in the frame. How easy is that?! Right now I'm using the utensils one, and its new home is next to the fridge. :)

Photobucket

Photobucket

If you would like your very own version, you can download them right here. Yep, that's right.... because I like to share! ;)

So basically all you need is an 8x10 frame and dry-erase or chalkboard markers. (I've heard the Vis-ˆ-Vis markers work good too, but I've never used them.) And if you want a little more color or a different background, use the blank one and print on patterned scrapbook paper.... Easy peasy!

PhotobucketPhotobucketPhotobucket


Now the hubs knows whats on the menu for dinner this week. :)

Thanks Lindsay for letting me stop by and share my little DIY! Feel free to stop by my blog and say hello... I'd love to meet you! xo

Butternut Squash Hummus

Wednesday, October 5, 2011

Yesterday it rained! It was not the gross sticky hot kind of rain, it was real awesome cold rain. I took Max outside and he jumped around in puddles and absolutely loved it! It finally feels like fall to me. I just realized, as I looked around my house that I don't have one single fall decoration up..not even a string of leaves or a decorative pumpkin. SAD! I need to get on that. Anywhoo...

We are a family who loves hummus, even little Max loves it. I decided I wanted to make a fallish (my computer does not think fallish is a word and insists on putting the red squiggly line underneath ) inspired little snack. I used this recipe as a guideline but made a couple tweaks and of course added butternut squash.


What you will need:
  • 2 cups of butternut squash
  • 1 can garbanzo beans
  • 1/2 cup of tahini (sesame seed paste)
  • 3 tablespoons of extra virgin olive oil. *If you don't have extra virgin olive oil you can use extra slutty olive oil. Hahaa I heard that the other day and was giggling for a good 5 or so minutes in my head. Funny.
  • 2 cloves of garlic. I used to think a clove of garlic was the whole bulb of garlic....that was A LONG time ago ;) My poor husband.
  • The juice from half of a lemon
  • A dash of cumin
  • 3 dashes (sorry I did not measure this exactly) of cinnamon
  • 3-4 dashes of pepper
Directions:
  1. Slice up the butternut squash into small pieces and boil for about 8-9 minutes or until soft.
  2. Throw all the ingredients into a food processor or blender and pulse until smooth and creamy.
  3. Enjoy!


Related Posts Plugin for WordPress, Blogger...