Our Real Life Fixer Upper: Demolition Time!

Tuesday, June 16, 2015

As of this week we have officially started demolition at the barn...yeay!  The first things to go are the horse stalls, and since we plan on repurposing all of the wood that is lining the stalls it's more of a careful demolition but nonetheless it's still so much fun to watch it slowly start to transform into our home.  This whole process takes some serious vision, but I'm pretty sure we've got plenty of that.

Here are a few pictures of what is currently happening at the barn...


The space already feels so much bigger and brighter, making it just a little bit easier to envision where everything will eventually be going.

Hula Pie Cookies (Paleo)

Monday, June 15, 2015


There's no denying that for the past couple of months I have been in a complete recipe slump.  Hence the reason for zero recipes around here lately.  So when my best friend recently sent me a little care package complete with handwritten recipes, spices, and nut flours, which are all locally made in Maui (where she lives) I was ecstatic!  She really is the best!

My boys have been begging me to make something sweet, so over the weekend I figured it was the perfect time to test out the Hula Pie cookie recipe she sent me. OHHHHHHH MYYY goooooodness.  These are freaking unbelievable and so simple to make.

What you will need:
  • 1 cup of macadamia nut flour (mine was from Tutu's Pantry
  • 1 tbs of coconut flour
  • 1 tsp salt
  • 1 egg
  • 1/4 cup of coconut oil
  • 1/4 cup of honey 
  • 1 tsp of vanilla extract 
  • 3/4 cup of shredded coconut *
  • 1/3 cup of Enjoy Life Chocolate Chips *
* Stir in these ingredients by hand. 

Directions:
  1. Preheat oven to 350 degrees. 
  2. Place all of the ingredients (except the shredded coconut and chocolate chips) into a food processor and process until smooth. 
  3. Place batter into mixing bowl and stir in shredded coconut and chocolate chips. 
  4. Line a baking sheet with parchment paper and drop rounded tbs size cookies onto the sheet. Flatten each cookie out slightly with the bottom of a spoon. 
  5. Bake for 12-15 minutes or until the tops are slightly golden. 
  6. Enjoy! 


Deeeelicious!


Come back and let me know what you think if you make these!

Swim Lessons That Can Save Your Child's Life

Thursday, June 11, 2015


This week is the final week of Ronin's swim lessons with Infant Aquatics.  Today he will jump into the pool with all of his clothes and shoes on as a final test. I have no doubt he will swim and float like a champ despite the extra weight.

His instructor, Kris Battista has just been incredible. I have completely entrusted her with Ronin, and day after day she has continued to blow me away with her patience and passion for teaching. Ronin now loves the water and we can't get him out of the pool at home!

With our lessons now coming to and end, I am fully confident that Ronin is swim safe.  If he ever fell into a pool when I was not around he would know exactly what to do in order to save himself.  This was the best investment I could have ever made.  If you are unsure what swimming program to put your child in (there are so many and I know it can be overwhelming), I highly recommend doing a quick google search for an Infant Aquatics instructor in your area.  You will not regret it!

See Also:
Week 2 Video Update of Ronin's Swim Lessons 
Ronin's Secondary Drowning Scare

5 Simple Beauty Tips For Better Skin

Monday, June 8, 2015

Maintaining healthy skin is sometimes easier said than done so today I am sharing 5 simple tips that can help keep your skin looking its best.

1.  Change your pillowcase more often.  This is always the first instruction I give my clients after a facial treatment.  When your skin has been deeply exfoliated either at a spa or using Glycolic Peel Pads (a new addition to my skincare routine!) you are more susceptible to bacteria. So my rule of thumb is to change your pillowcase at least twice a week.  During sleep, you sweat, drool, and toss around, resulting in the collection of dead skin cells on your pillowcase. If you keep placing your face on the same pillowcase night after night without changing it more often, you may be causing unnecessary breakouts.  

2. Do not over cleanse your face.  Cleansing your face more than twice a day can strip your skin of its natural oils and can actually cause your skin to produce more oil. Even if you are prone to breakouts, or have super oily skin you should still only wash your face with a cleanser morning and night. A great gentle cleaner is the Skin+Pharmacy Glycolic Cream Cleanser.  It helps reveal younger looking skin with continued use (without over drying!) and is suitable for all skin types. 

3. Clean your makeup brushes.  I recommend cleaning your makeup brushes at least once a month. Otherwise, they become a breeding ground for bacteria.

4.  Exfoliate twice a week.  Exfoliating your skin twice a week will not only give you a crucial deep cleanse but it will also help eliminate clogged pores and dry/rough patches.  If you are looking for a gentle and effective exfoliator, I recommend the Skin+Pharmacy Gentle Exfoliating Scrub, which will leave your skin feeling so clean and fresh afterwards.  A few things to keep in mind when exfoliating are: a dime size is all you need, always exfoliate at night, use gentle upward motions and follow up with a moisturizer and eye cream.  A wonderful nightly eye cream that I recommend is the Skin+Pharmacy Anti-Aging Therapy Retinol Eye Cream, which helps reduce fine lines, wrinkles, and dark circles.  I use a tiny bit and gently pat until it is fully absorbed.  

5. Clean your cell phone daily.  Contact acne from objects is very common and can easily be avoided by simply wiping your cell phone screen with a very damp, clean cloth.  If you do happen to get a breakout, an excellent product to treat the blemish with is the Skin+Pharmacy Acne Therapy Spot Treatment.  It's formulated with benzoyl peroxide to kill acne-causing bacteria. 

And there you have it! If you have any questions regarding these tips, you can leave them in the comment section and I will be happy to answer. 

Skin+Pharmacy is exclusively available at CVS, so if you're interested in testing out any of the products listed above, make sure you sign up for CVS Beauty Club. Members receive $5 extra bucks after every $50 spent on beauty products, so if you decide to try out these products, you'll be well on your way to getting rewarded!

* This post is in partnership with CVS pharmacy.  All opinions are my own. Thank you for supporting the brands that help support this blog.

Things That Make Me Say Yeay

Friday, June 5, 2015


I am pretty much obsessed with Peonies. So when Ian randomly brought them home for me recently, it made my day.  Plus, major husband points for him.


Mixing up my favorite zit busting mask, which consists of Aztec Green Clay & Apple Cider Vinegar.


Fresh baked double chocolate Paleo muffins. I have been slowly getting out of my recipe slump (it's been forever since I posted one) and am starting to get excited again about experimenting and creating fun things for my family. New recipes will be coming soon.


Max graduated from Pre-K yesterday and it was the cutest thing ever.  I have basically been a total crying mess ever since because I just can't believe that my baby is going to be starting Kindergarten this year!

Have a great weekend!

Why I Will Never Get Eyelash Extensions Again +The Best Natural Hair Growth Remedy

Tuesday, June 2, 2015


About three weeks ago I decided to get eyelash extensions again for the second time.  My hope was that this around I wouldn't pull them out like a total crackhead weirdo while I lay bed at night waiting to fall asleep.  Well, turns out I am a total weirdo and just like the first time I pulled each and every single eyelash extension out (along with my real lashes)...all at once.  I don't recommend this, ha!  The next morning I woke up and seriously scared myself when I looked in the mirror.  I had grossly swollen eyelids and these sparse (I could count all my lashes on two hands) itty bitty short, hardly noticeable blonde hairs that would have looked perfectly on my face if I was an albino.  Not a good look, people.  So as a follow-up to this beauty tester, I now give eyelash extensions an F...as in I'm never eFFing doing them again.

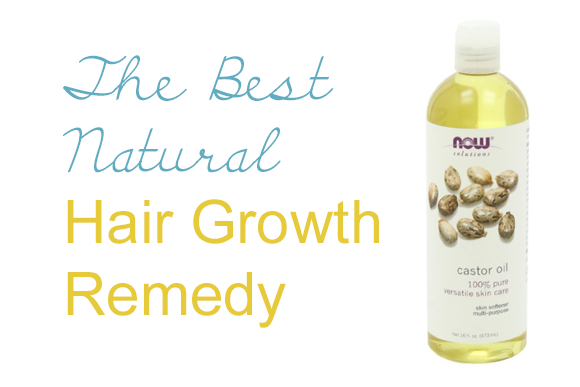
So that morning I frantically searched the web for the best natural remedy for growing back my eyelashes and everywhere I read said that castor oil will rapidly stimulate hair growth.  I read dozens of testimonials on Amazon and I just couldn't believe it.  People were raving about their results!  Some people even said that because of the castor oil, they no longer have to use prescription hair growth products. I mean, wow!

Since last week I have been applying it directly to my lash line twice a day.  It has only been a week but I am slowly but surely starting to notice a little bit of a difference on the areas where I literally did not have one single eyelash.  I can now see little tiny eyelash sprouts where just a few days prior I had nothing! SO YEAY!

Maybe it's just the natural growth process or perhaps maybe the castor oil is really working and stimulating hair growth! Either way I wanted to pass this little natural tip along, since I am sure I can't be the only weird one out there that likes to pull of their own eyelashes.

This also works on eyebrows and any other areas where you have hair loss, so I say give it a try if you need a little extra help in the hair growth department!

See also:
DIY Split End & Dry Hair Treatment 
Unusual Beauty Uses of Coconut Oil


Related Posts Plugin for WordPress, Blogger...