 Sometimes inspiration can come from the most random things. For example...the other day I was at the park with my boys and Max fell (more like skid) across the grass. It left a pretty gnarly green stain on his new shorts. This little stain sparked a memory of me being in Girl Scouts and leaf stamping. I remember having the coolest leader and all of us girls would run around her backyard picking different flowers and leaves to see which ones, "left their mark."
This is such a simple project and the best part is it is CHEAP and requires no paint. All you need is a little nature.
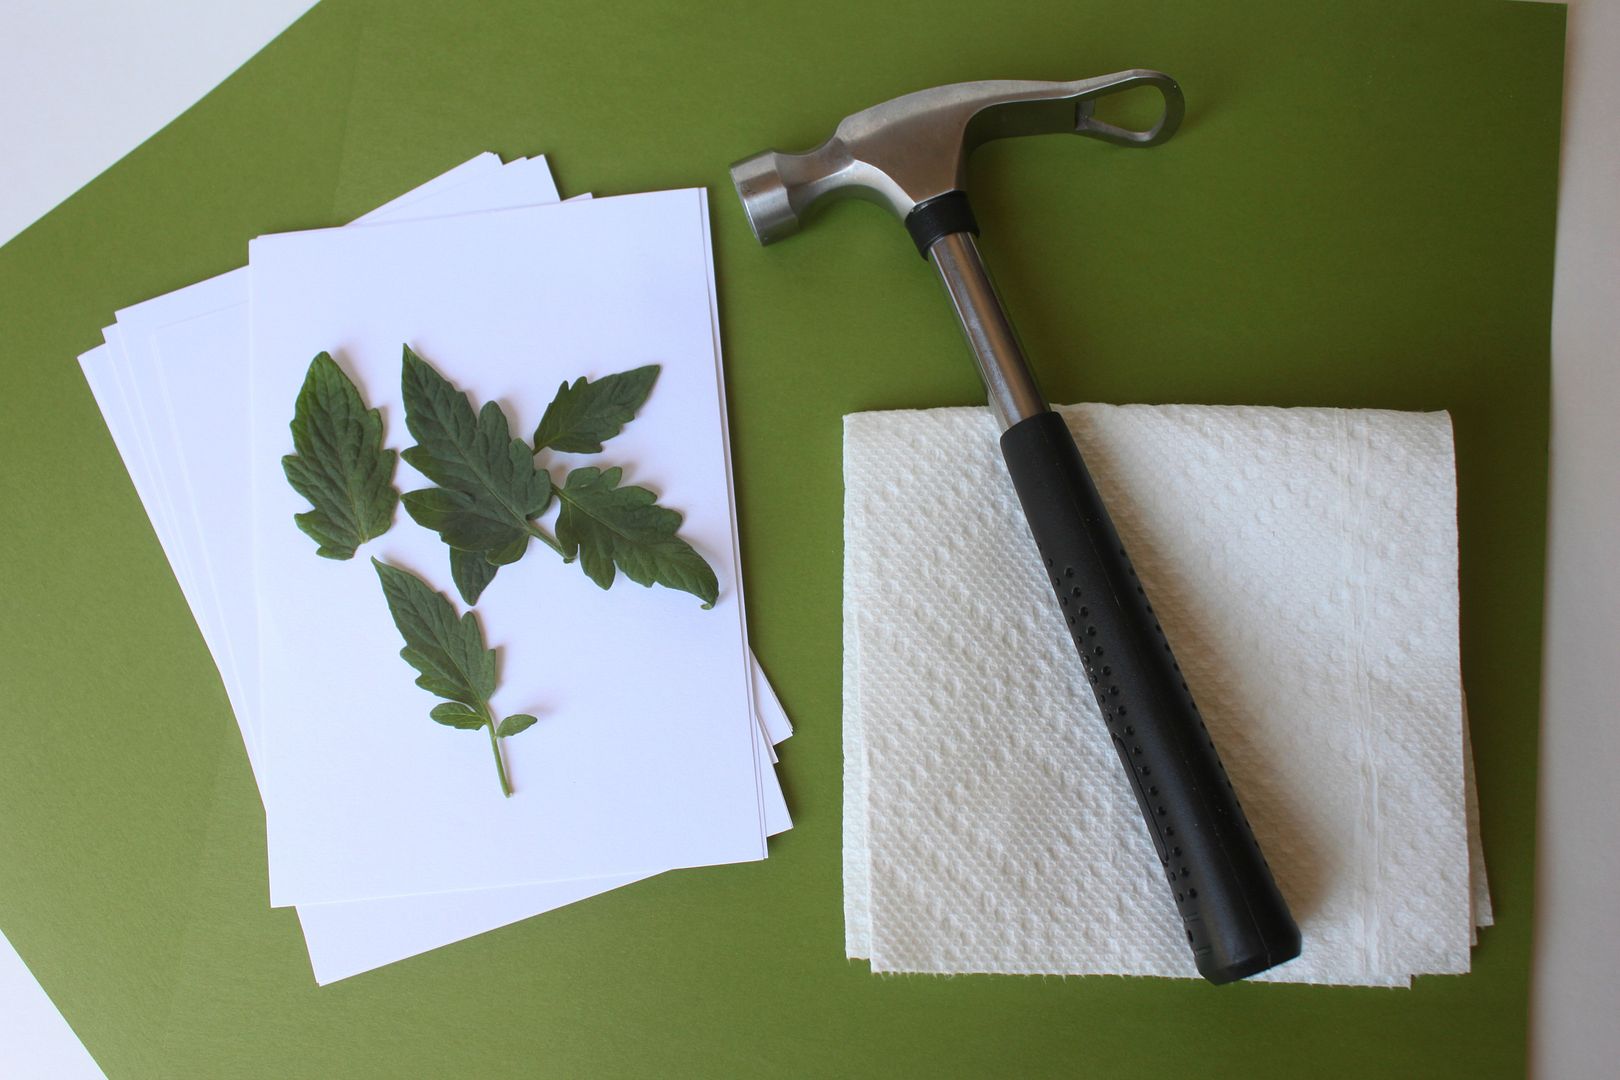
What you will need to make your own stamped leaf stationary:
- Acid free paper/stationary
- Leaves. You might have to experiment with a few before you find one that you feel gives you a vibrant green. I used our NON productive heirloom tomato plant leaves.
- Paper towel
- Hammer
Here is what you do...
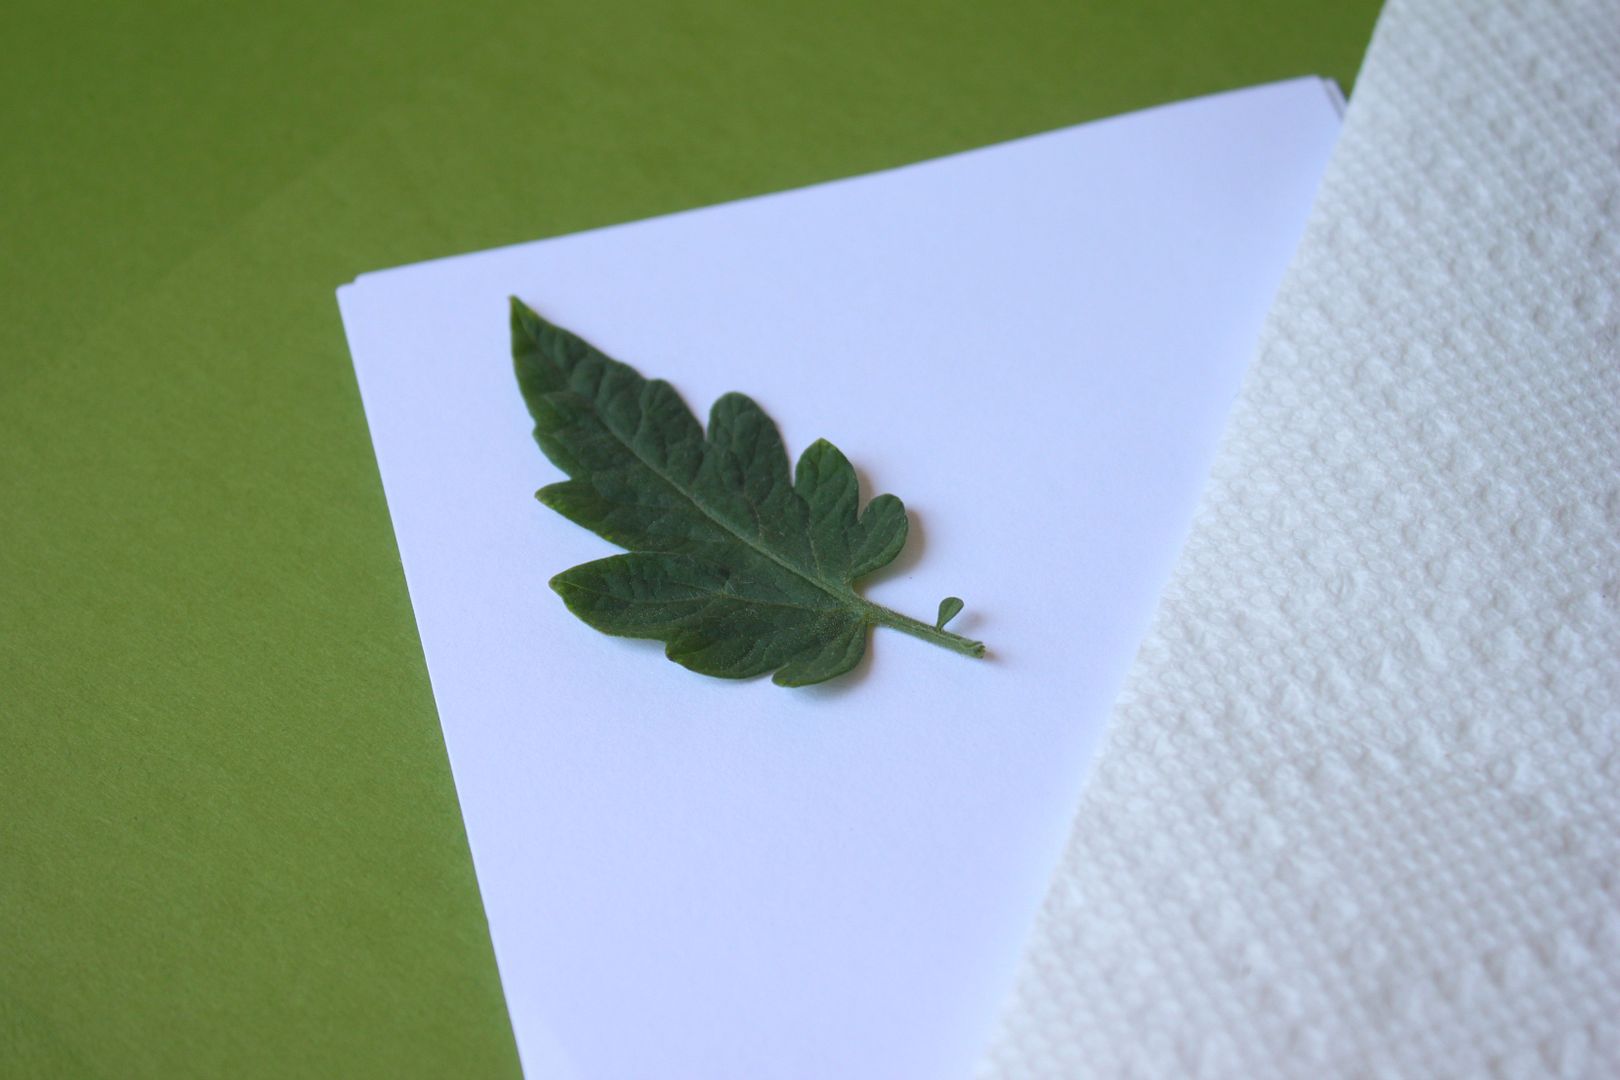 Place your leaf where you would like it to go on the paper. Place a lightweight white paper towel on top. You should be able to see the green outline of your leaf underneath.
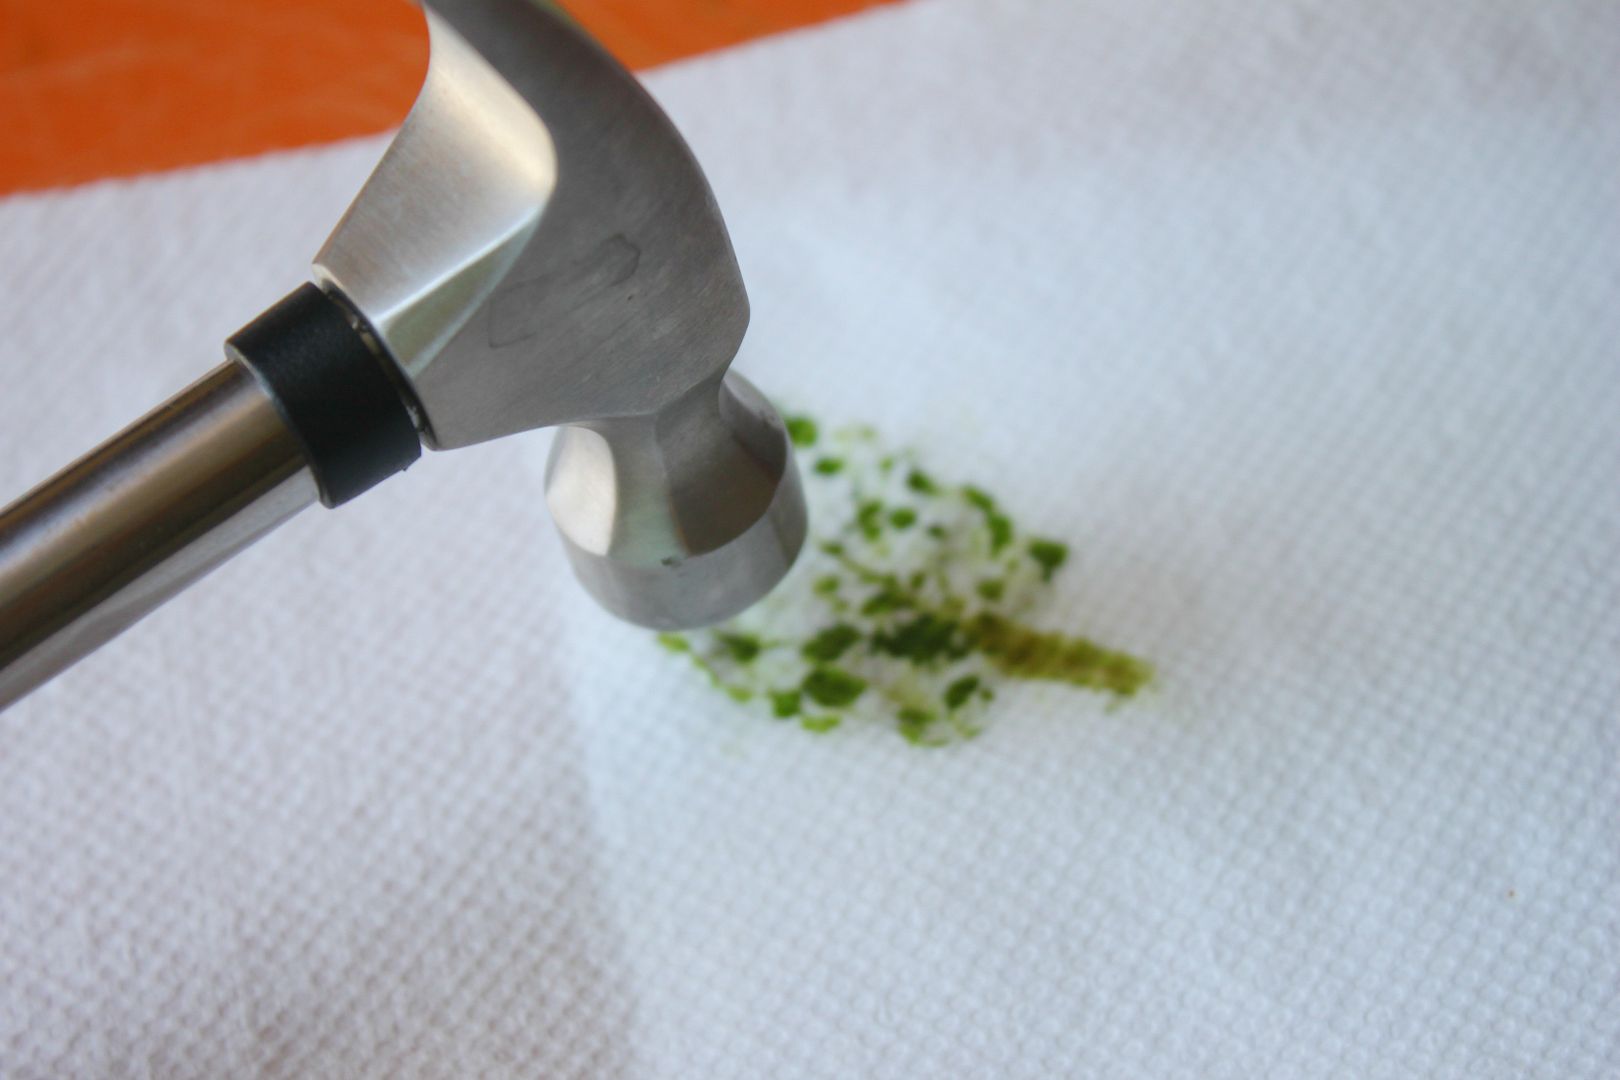 Gently hammer the spot where the leaf is until you see the full shape appear and the green color begin to soak through the paper towel.
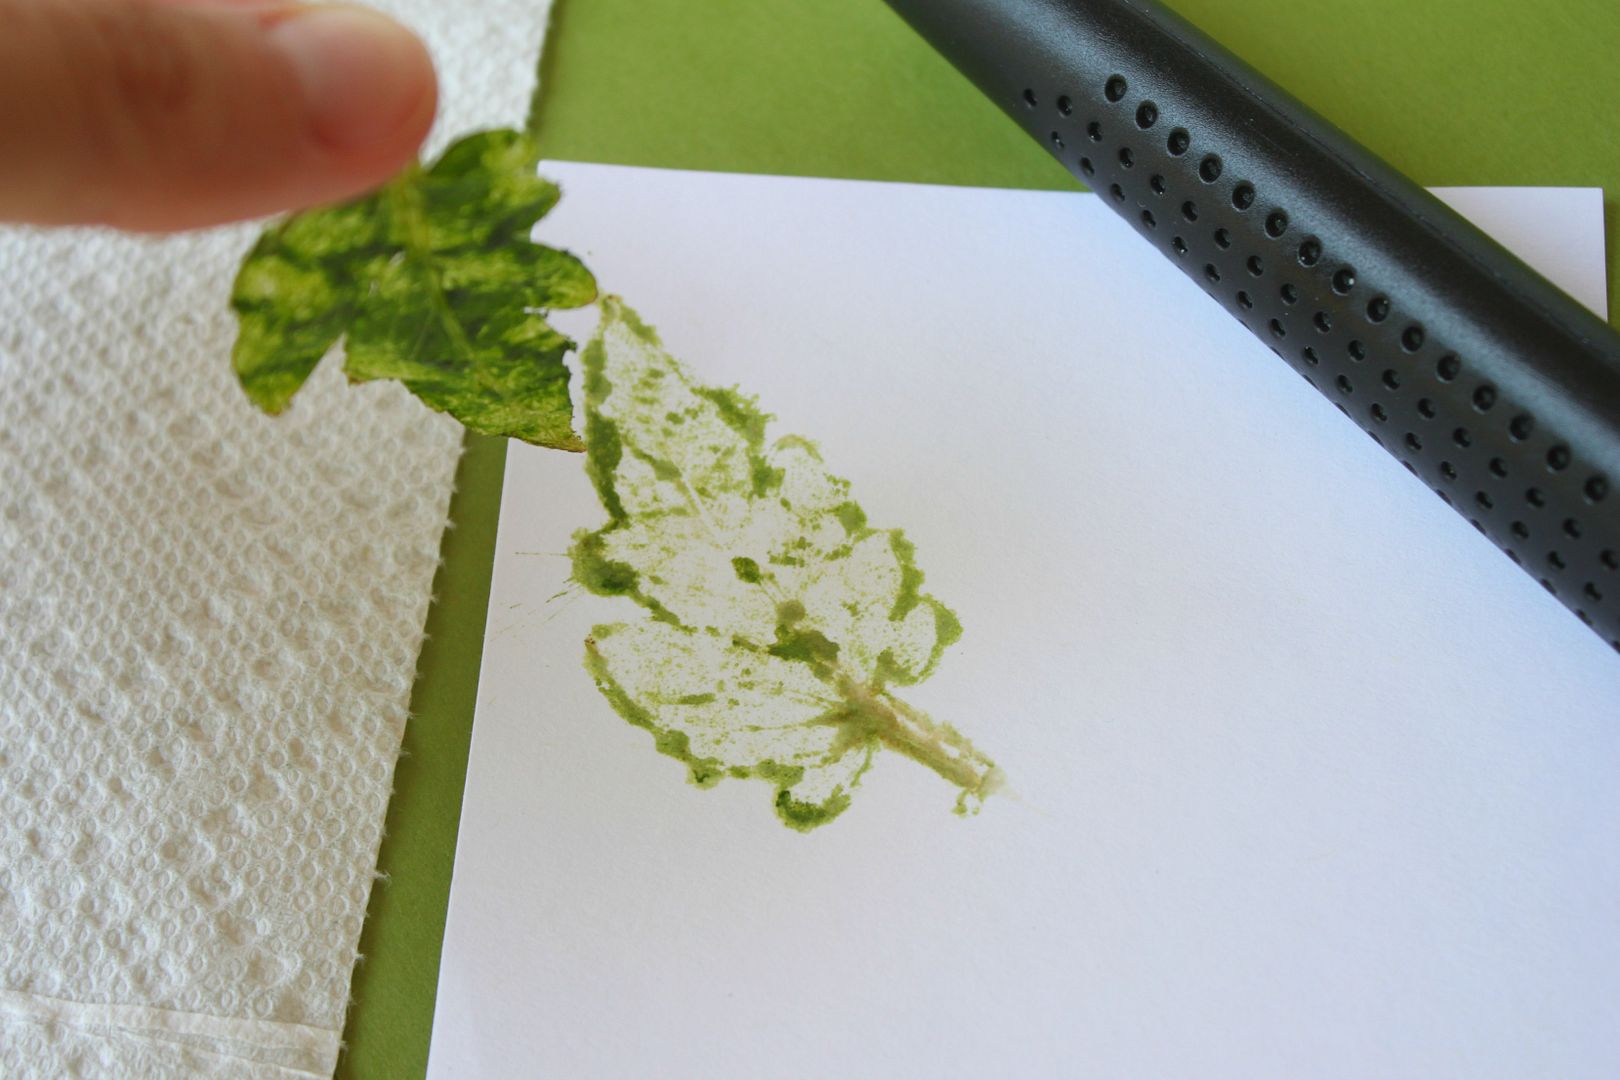 Lift off the paper towel and gently remove the leaf from the paper. Let it dry before touching.
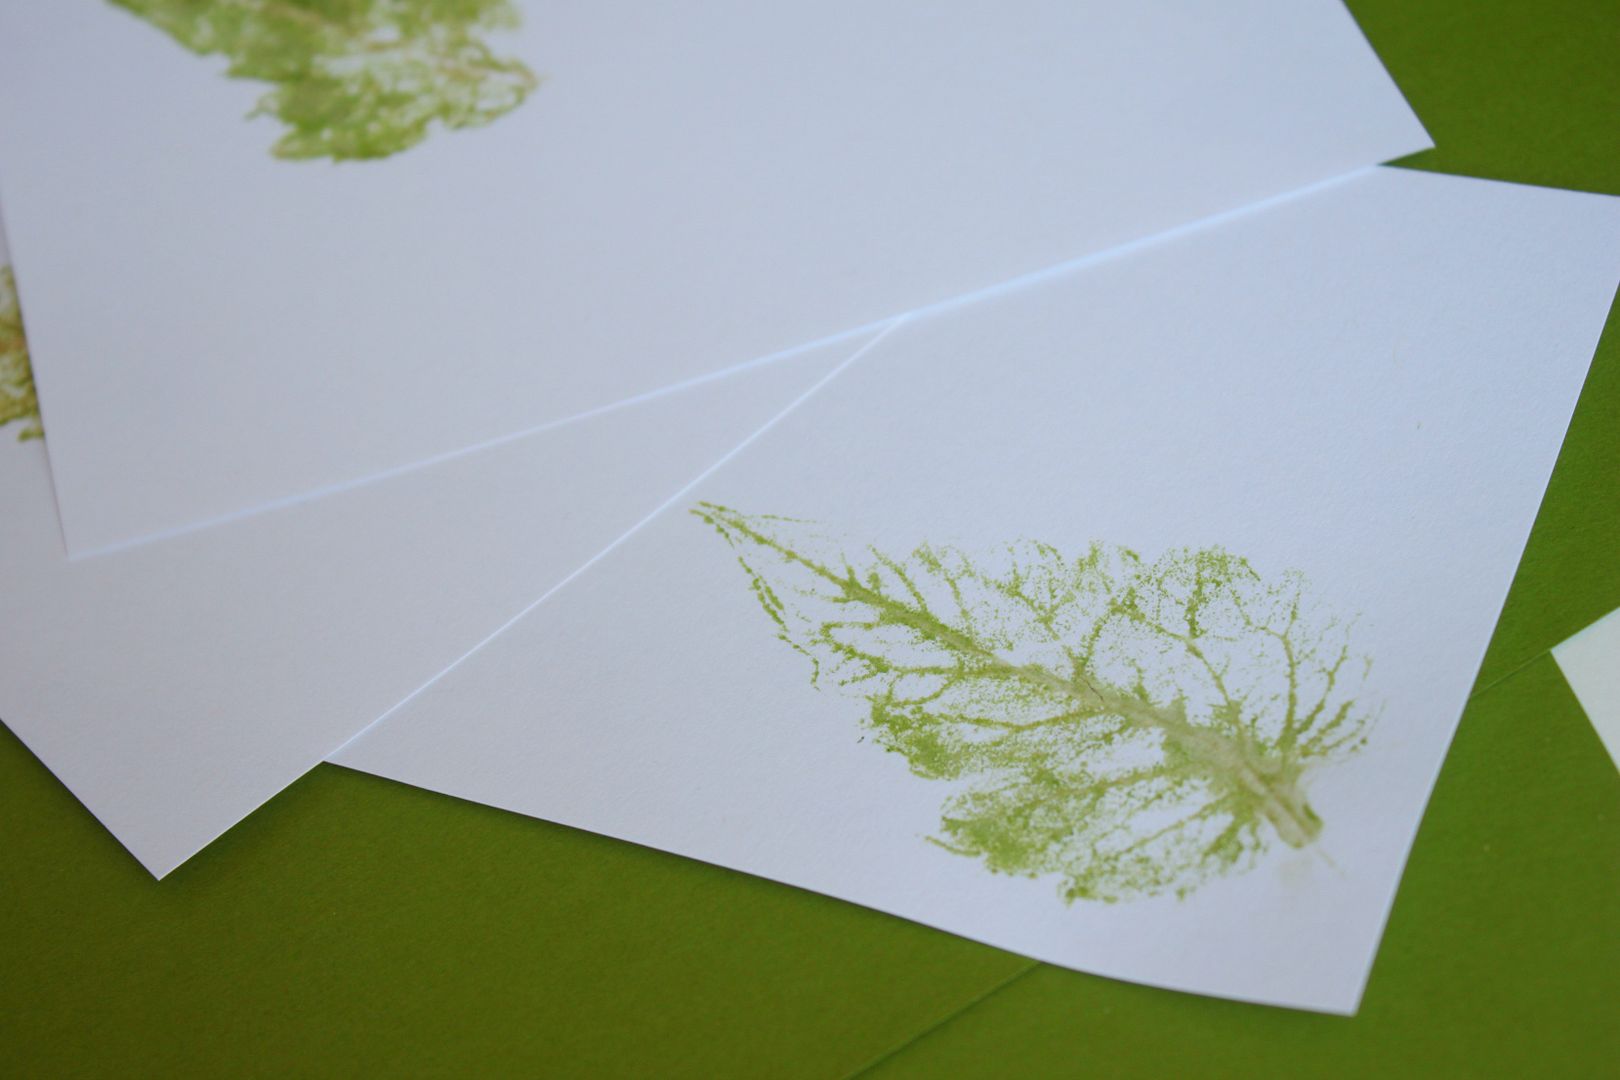 You now have your own all natural leaf stamp! I'm looking forward to doing this again with all the brightly colored fall leaves that will be here soon!
%20 "Pin It")
22 comments:
Ohhh Wheee! This looks fun and magical! I'd have never thought of that! And man, I loved some girl scouts too! Miss those days! :)
Hi! Do you allow pins from your posts? I'd love to put this on one of my Pinterest boards so I remember to try it!
SUCH a cute idea :) Always up to something girl xoxo
So lovely! I may make some thank you cards using this technique to keep on hand for various occasions.
Haley- I do! Thank you for asking! I just added it...I forgot to put it in earlier :)
Great and SIMPLE idea! Love this, thanks so much for sharing it!
Oh interesting!! I never would have thought about that.
Brilliant Lindsay. And you have the natural colors...easy!
So pretty!!
This is so cool! I have to try this with the kids.
This is so cool!Thanks for posting!
OMGsh! Just pinned it! LOVE IT!
This is so, so awesome! I never did this project as a Girl Scout - I am so happy that you shared it. Can't wait to hunt for some pretty leaves, borrow my fiance's hammer, and try it out. Thank you!
I love this. I think it's so cool that it's all natural and not as messy compared to using paint!
- Sarah
agirlintransit.blogspot.com
You already know I approve this post:) LOL Love it!
This is AMAZING! I just love you and your little blog. You introduce me to the best things. I'll definitely be doing this and linking back to you!
So cool! I'm gonna do this with the kids.
Completely love this...I totally remember doing something like this when I was little :) Such a great idea and it comes out so beautifully! XO brynn
What pretty paper you made! Just pinned this so I will remember to do this once the leaves start changing!
How cool is that? I love it!
Ooh! Love this idea!! Thanks for the tip. :)
Very cool! Will the color fade?
Post a Comment