 Making your own paper beads is SO easy and you most likely have everything you already need at home. The only thing I had to buy was the Mod Podge. My inspiration for this DIY came after seeing these beads. I knew I wanted to make my own. I did a little googling and came across a ton of how-to sites all with their own little spin on the idea. I found this one to be very helpful.
The awesome part about this project is each bead is totally unique and you can use whatever paper you want.
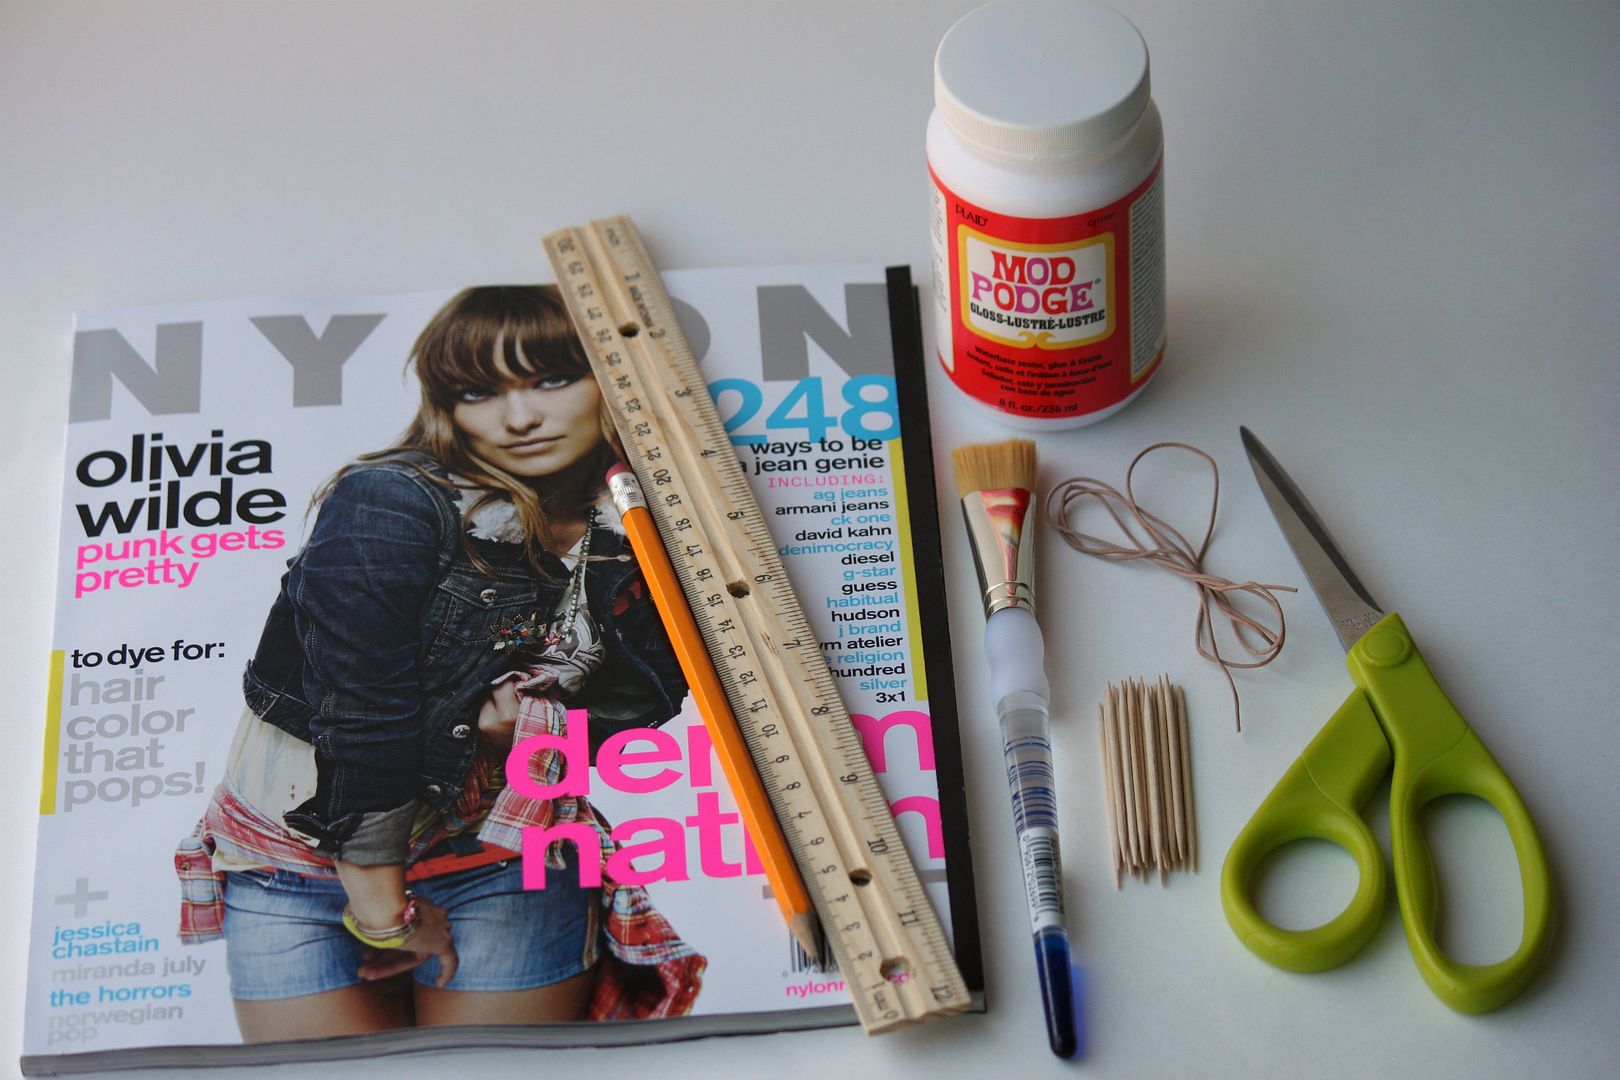
What you will need:
- Magazine or another source of paper. Nylon magazine ROCKS..its full of colorful pages, which is perfect for this project...and its a great read.
- Pencil
- Ruler
- Paint brush
- Mod Podge
- Toothpicks
- Scissors
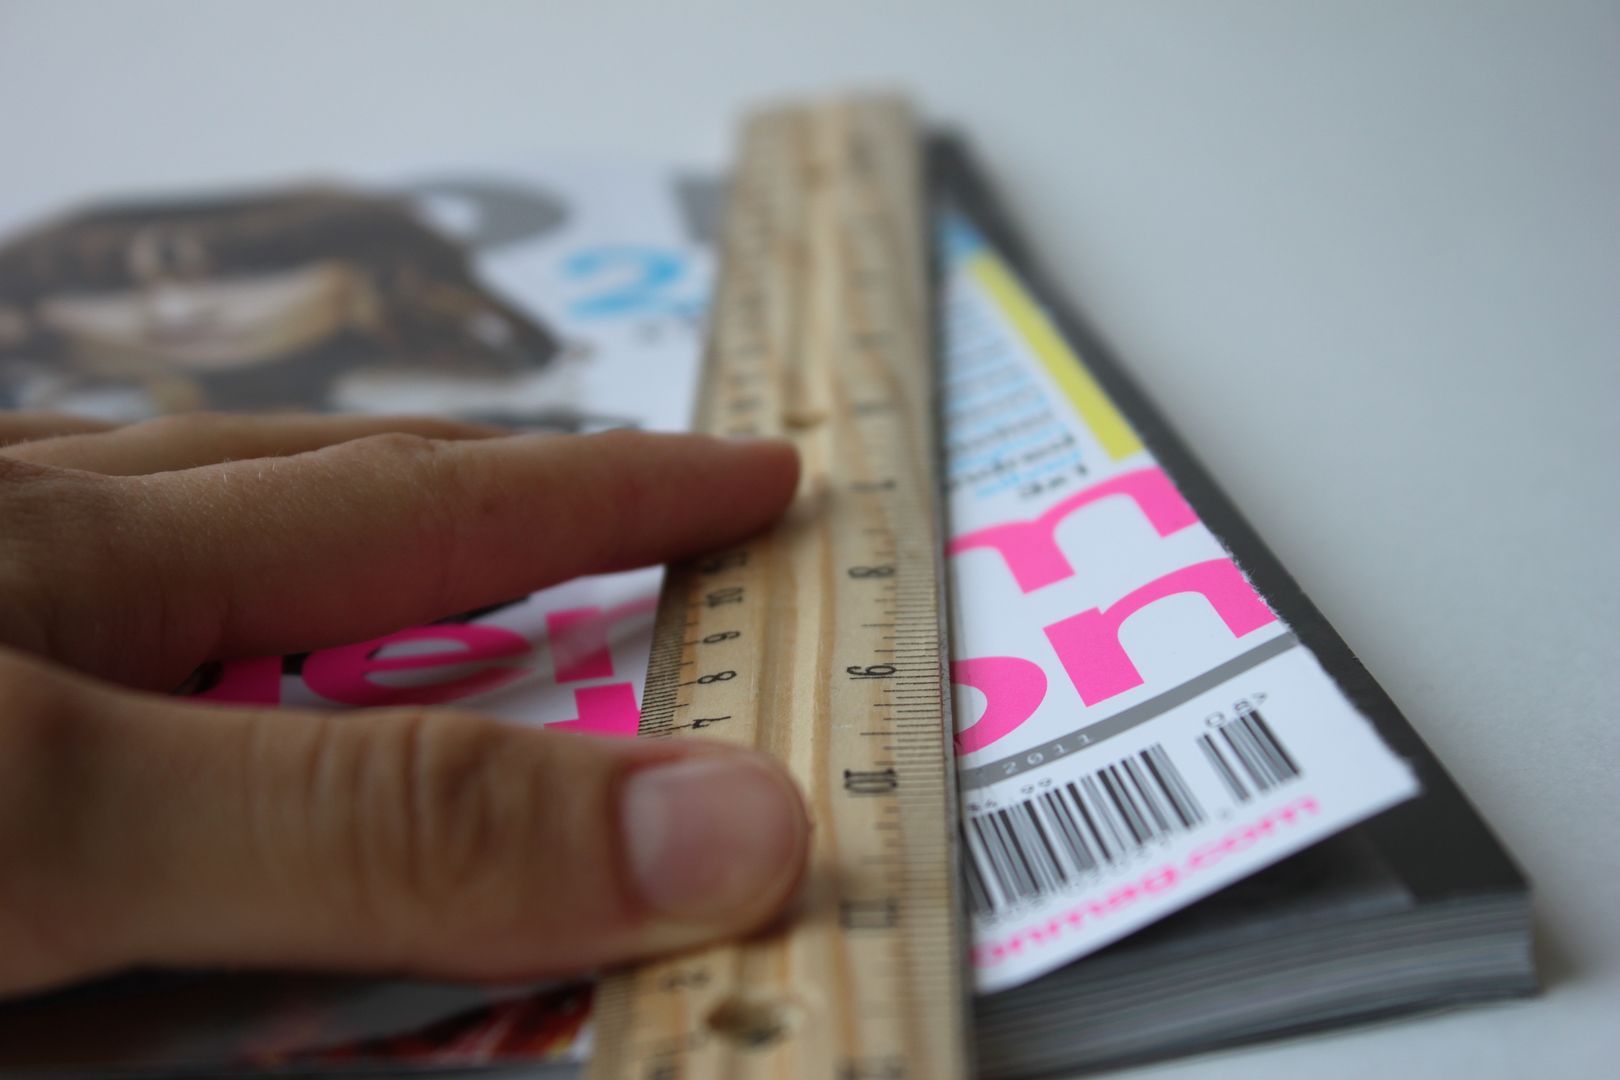 Using the ruler make long triangles. These will determine how large each bead will be. Mark them with the pencil.
 Cut out all the different sized triangles.
 Begin tightly rolling your bead onto the toothpick. Roll starting from the wide side of the triangle.
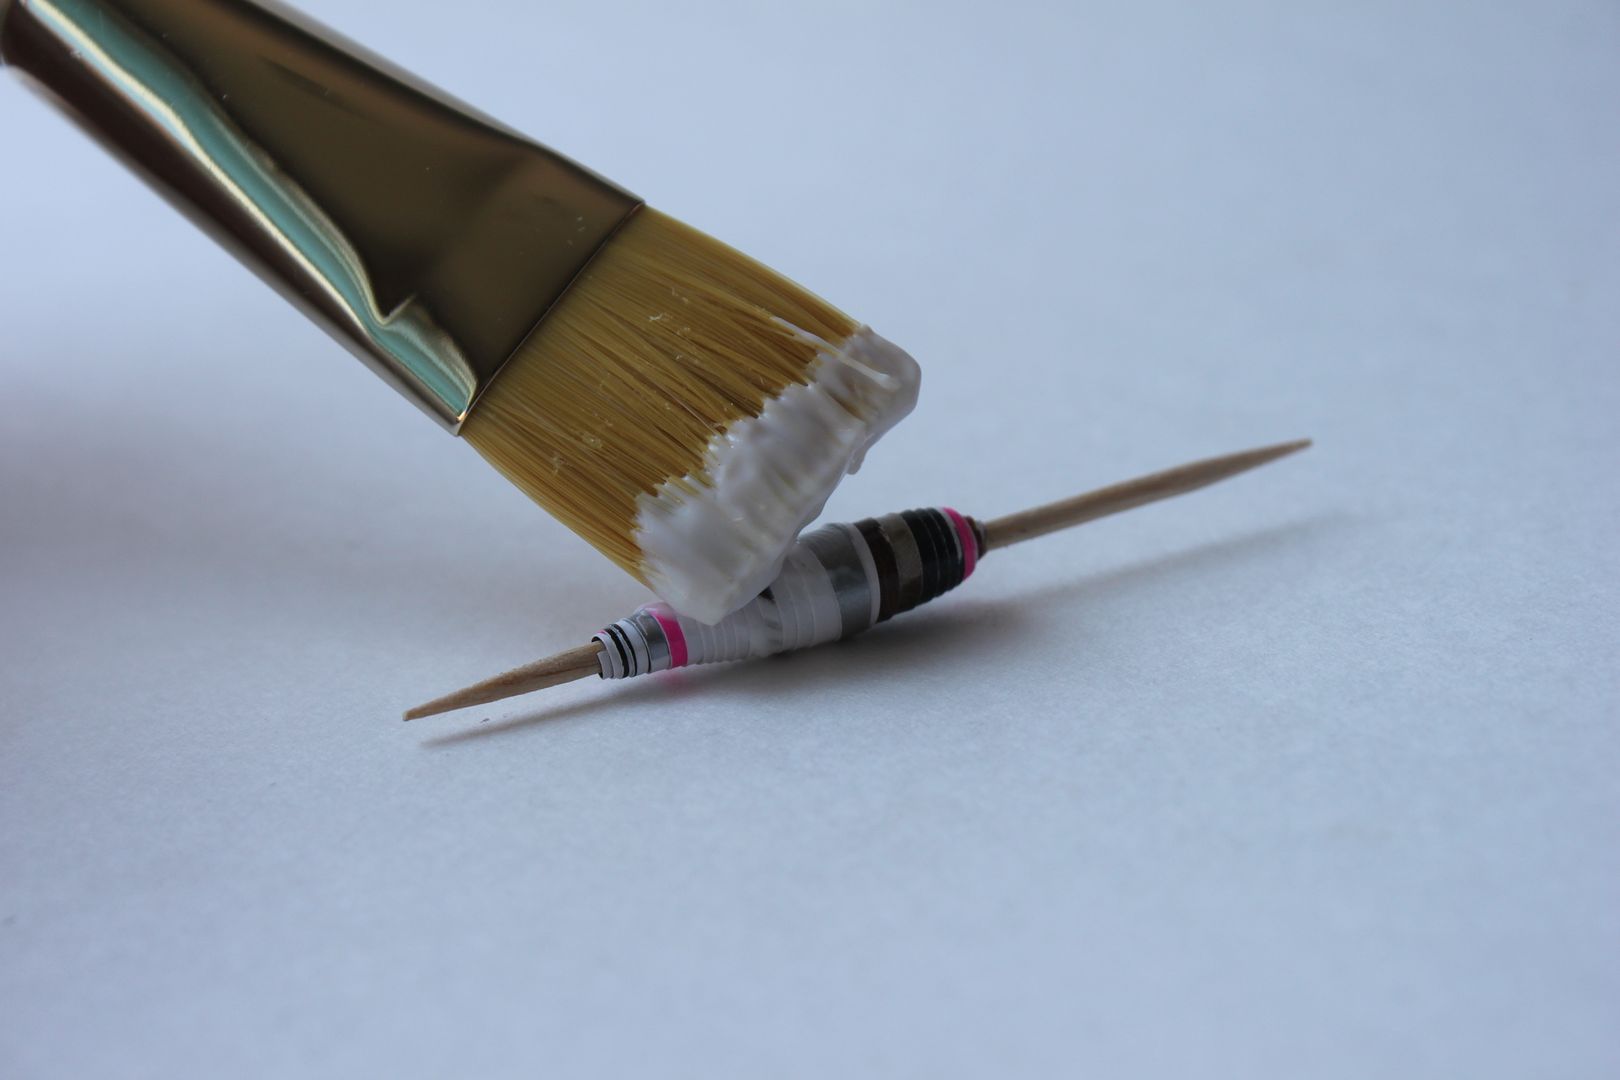 Using the Mod Podge apply a thick coat to seal the bead.
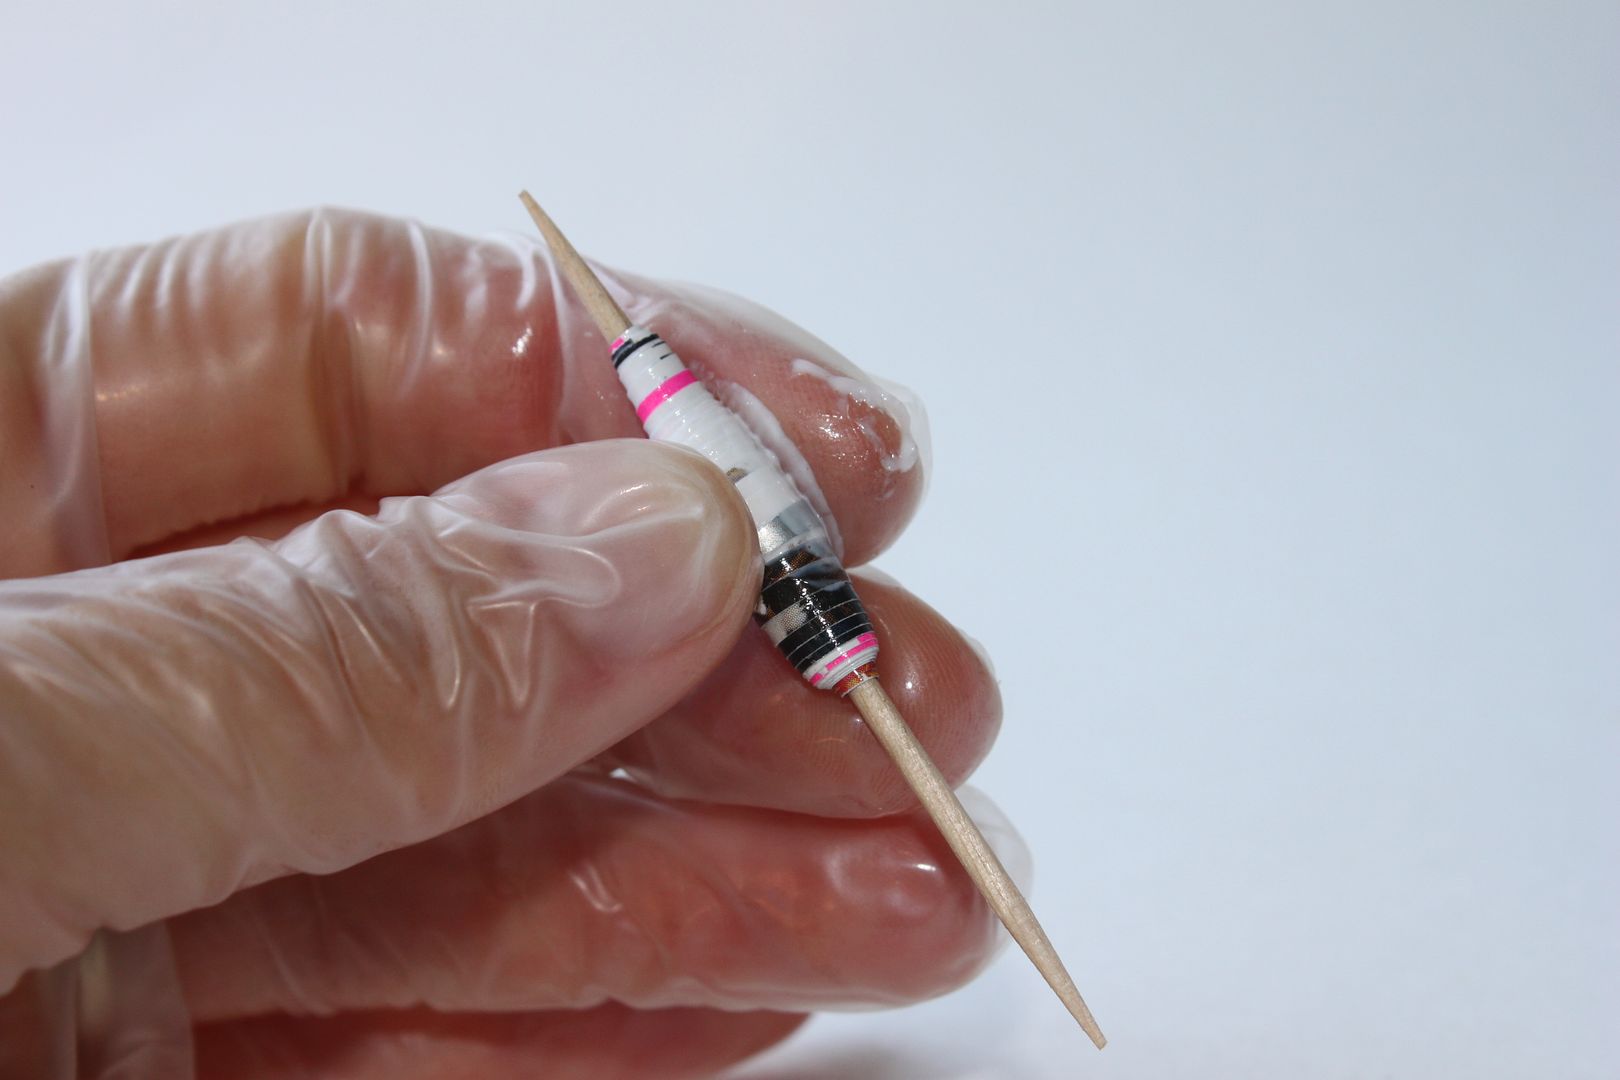 Once you apply the Mod Podge roll the glue around the bead until it is fully coated and sealed. After rolling a few beads without gloves I realized I needed gloves DUH. So add vinyl gloves to your list of things you need.
Lay them flat and let them dry.
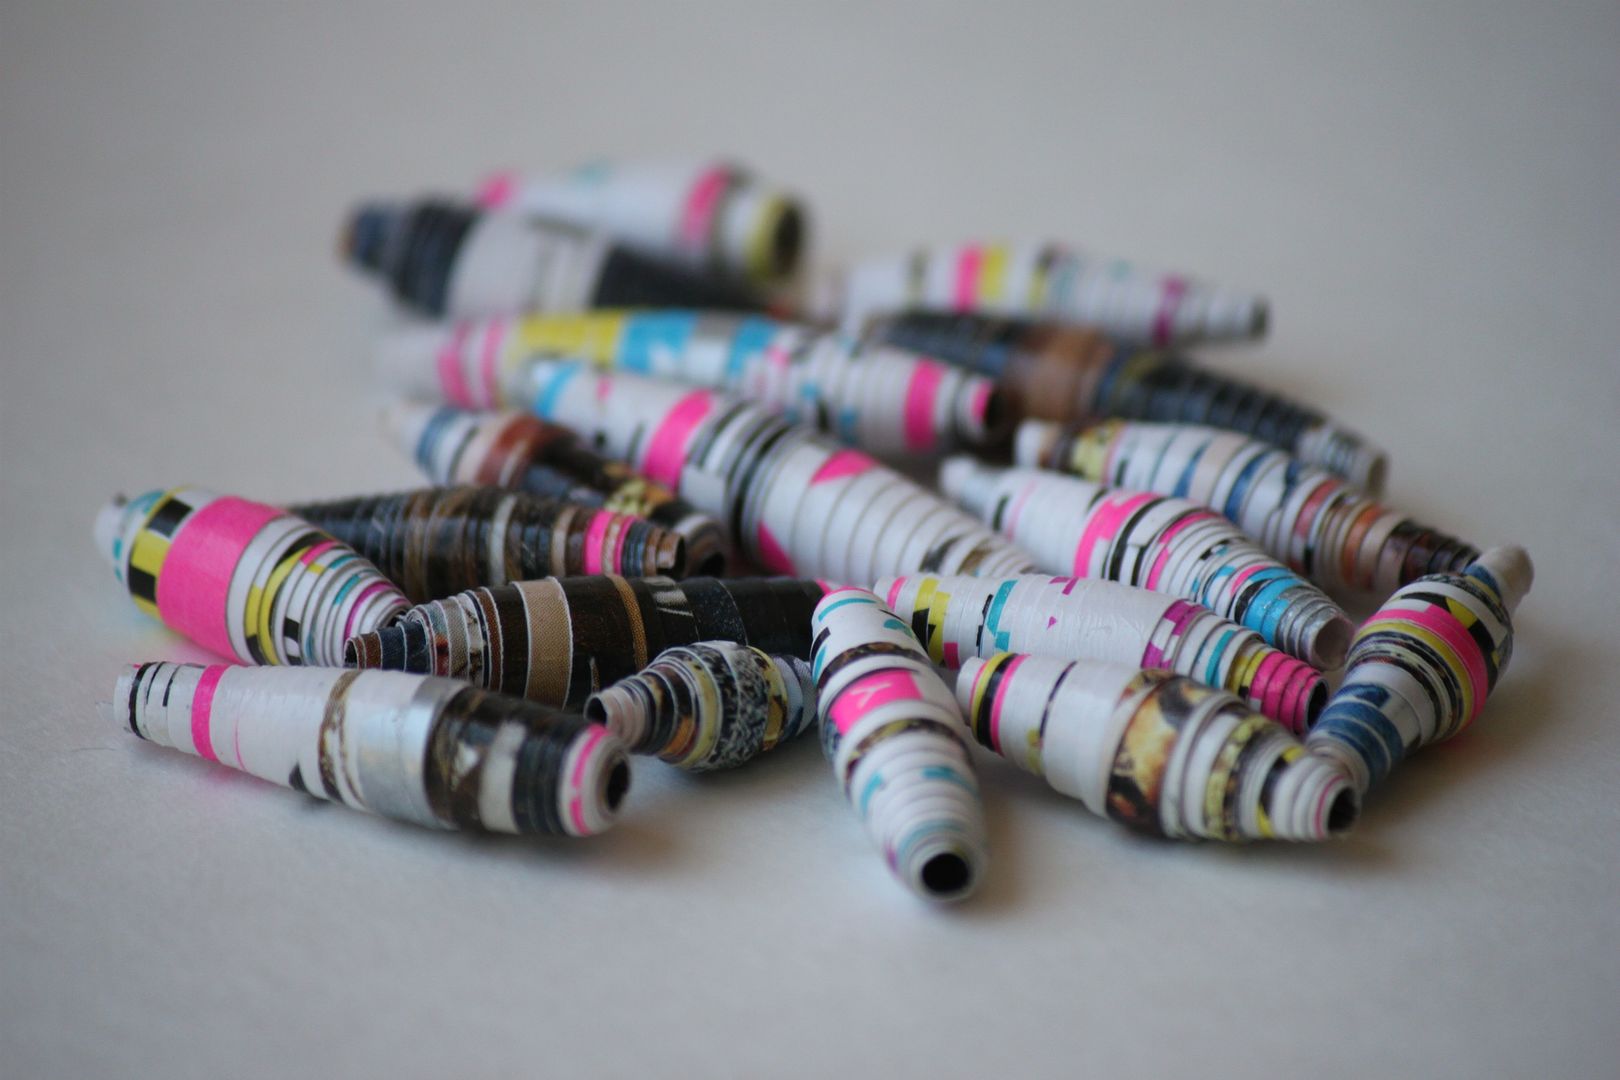 All dried and ready to go!
In a few weeks we are going on a little vacation...which entails taking our one year old on a plane. AHHH scary! BUT I have some amazing giveaways coming up while I will be away so stay tuned!
52 comments:
Cute!! This is something I can sit down and do with my daughter. I certainly have piles of magazines!
That is awesome!! I'm totally telling my friend about this - I immediatley thought of her when I saw it. Happy Friday!
megmacdesigns.blogspot.com
You know Lindsay, my little boy made me a paper bead necklace for my birthday this year. It's my most treasured possession. It's a very, very simple version of this one you posted but he did it all by himself at Kindy. It's just so cute when they get old enough and know what they want to give you for a gift. I love the colours he chose too. Blues, golds, aquas, greens. I hope he turns out to be one of these metrosexual types who loves shopping with his Mum and watching old movies. LOL He and I love going to cafes together.
Good luck on your vacation. I'm sure you won't have any problems. I was a nervous wreck the first time I flew with my little girl. She was 18 months old. By the time I got where I was going, I had calmed down and it wasn't so bad. You'll have a ball.
Anne xx
This is a really unique diy - i love it! perfect for a rainy day!
So cool, thanks for the tutorial!! I love unique pieces like this :) What are you going to do with the beads now? I can't wait to see!!
Good luck on the plane trip with the 1 y/o. Eeek! Bring plenty of distracting things, and something to suck on when ascending/descending (pacifier, bottle {if they are still on one})
xoxoxo
Lia
Those are SO COOL! Me likey a lot.
I may have shed a tear when I saw I didn't win the bracelet.
I'm going to have to go visit it on my Pinterest board to make myself feel better.
I most definitely am doing this!! Such a good idea!
xo Jackie
http://livingaftermidnite.blogspot.com
wow this is AMAZING. love it xx
very cool! I've never seen a DIY like that before! Can't wait to try.
thank you for the comment on my blog! I love these beads and have everything to make them at home.... i think I may need to get crafty this weekend!! I'll let you know how they turn out!
those are really cute (:
good luck with the plane ride!
http://hiimsaratee.blogspot.com/
Congrats to Sara and I love those beads!
How neat! (oh, no, not another project) I think I might have to attempt this one...
thanks for stopping by my blog! I now follow you :))
You are so creative! Wish we lived closer.
xo
Awesome! I've always wondered how these were made..so simple!
I am blown away. Those paper beads are so awesome!
I saw tons of jewelry with paper beads like this in Africa and Uganda. Everyone absolutely loves them over there. Thanks for sharing the how to! :)
Wow, Lindsay, these are great!!!!!!! Congrats to the winner of the giveaway!
Thanks for swinging by my blog and wishing my g'ma well. This project is awesome, I cannot wait try it myself when I get back next week. Have a wonderful weekend!
I love making paper beads!
♥Sweet Tea Serendipity
lucky sara on her win! love this project lindsay i bought some modge podge yesterday for another project, i might have to use it for this project too
Love this! Great colors! Thanks for sharing!
what a fun idea and a great project for me to do with my sister when I see her at the end of the month!
that's so cool!
How do you come up with these things?? I love this idea! Did I tell you that I bought some polymer clay & earring backs. I am totally making some soon, thanks to my inspiring friend. :)
Ahh! These turned out great! I love the pops of hot pink that they have! Can't wait to make some! :)
Oh those are SO fun! I love crafts :)
Omigosh, I did this! When I was younger! Of course, they were made with comics, not magazines and looked way less snazzy. Now I want to try my new, grown up hands at it once again....
These are awesome!!
you make them look all so perfect. when i try they look a little lumpy.
hey lovely! thanks so much for your sweet comment--you made my day, you have no idea! haha, and at the moment i am ready that EXACT copy of nylon magazine. crazy!! love this DIY, and your blog is pretty great too :)
How cool. :)
I love paper beads! we used to make these in art class all the time :)
I remember learning how to make these in girl scouts :) so cute! xx
Congrats to the winner and such a creative DIY! x
That's so cool! I always wondered how to do those paper beads. Thanks, girlie! :)
Happy weekend!
I pinned it on Pinterest :) Cool idea Linds
Those look SO good! You are so creative girl! I am always so impressed by everything you do! :)
You just keep rolling out awesome DIY's, don't ya Ms. Crafty?! This looks really cool. Thanks for sharing.
p.s. What did or are you going to use them for? A necklace, bracelet?
I had no clue making these was so easy! Thanks for sharing a fun DIY :) Hope you're having a great weekend!
p.s. Sometimes when I'm typing out DIY in my head I'm saying DUI. What is wrong with me?!?!
this looks like an awesome craft. trying it for sure!
wow i love this! follow you now, i love diy tutorials! :)
you are really pretty and thanks for your comment :)
xx
I love this *-* Nice ideas ! :D You are sooo beautyfull, have a nice day ♥
love this! Such a great way to use up all the old magazines!
Coley @
www.whatyoumakeit-coley.blogspot.com
This is so cool!! Such a great idea :)
<3
you're always so creative, love your simple crafty projects, lovely as usual!
love,mongs
mythriftycloset.blogspot.com
So original! Totally trying this soon. I went a little crazy this afternoon making bracelets. And by crazy I mean I made 8 of them. And put them all on at once. Nice. xo - Jet
Such a great DIY!!!! I remember doing this as a kid, but didn't remember how I did it!! hahahah!! Thanks for the refresher course ;)
Great DIY - thanks for sharing!
xo, chrissy
The Perfect Palette
I've jusy made these, thanks for the inspiration! Just discovered your blog btw, loves it! Also bought some clay so will be doing the bracelets soon. Just a little tip re the paper beads. I made mine out of scrapbook paper. You can find such pretty sheets, my beads are now glittery :)
So glad I could be an inspiration! A little tip: I use a size 4 aluminum knitting needle instead of toothpicks, they slide off much more easily. I can make a whole row at a time and if you get any extra mod podge on the toothpick they can stick something nasty(started by using bamboo skewers and had the same problem). Look at you, making me tell my beadmaking secrets! ;)
If anyone would rather not get their fingers messy, I will happily do custom bead orders with any type of papers you want! I love working with unique vintage papers and prefer to reuse materials as opposed to buying new!
<3
Kerri Renee/The Rehatchery
http://www.therehatchery.etsy.com
Post a Comment